New Online Banking Experience Is Here!
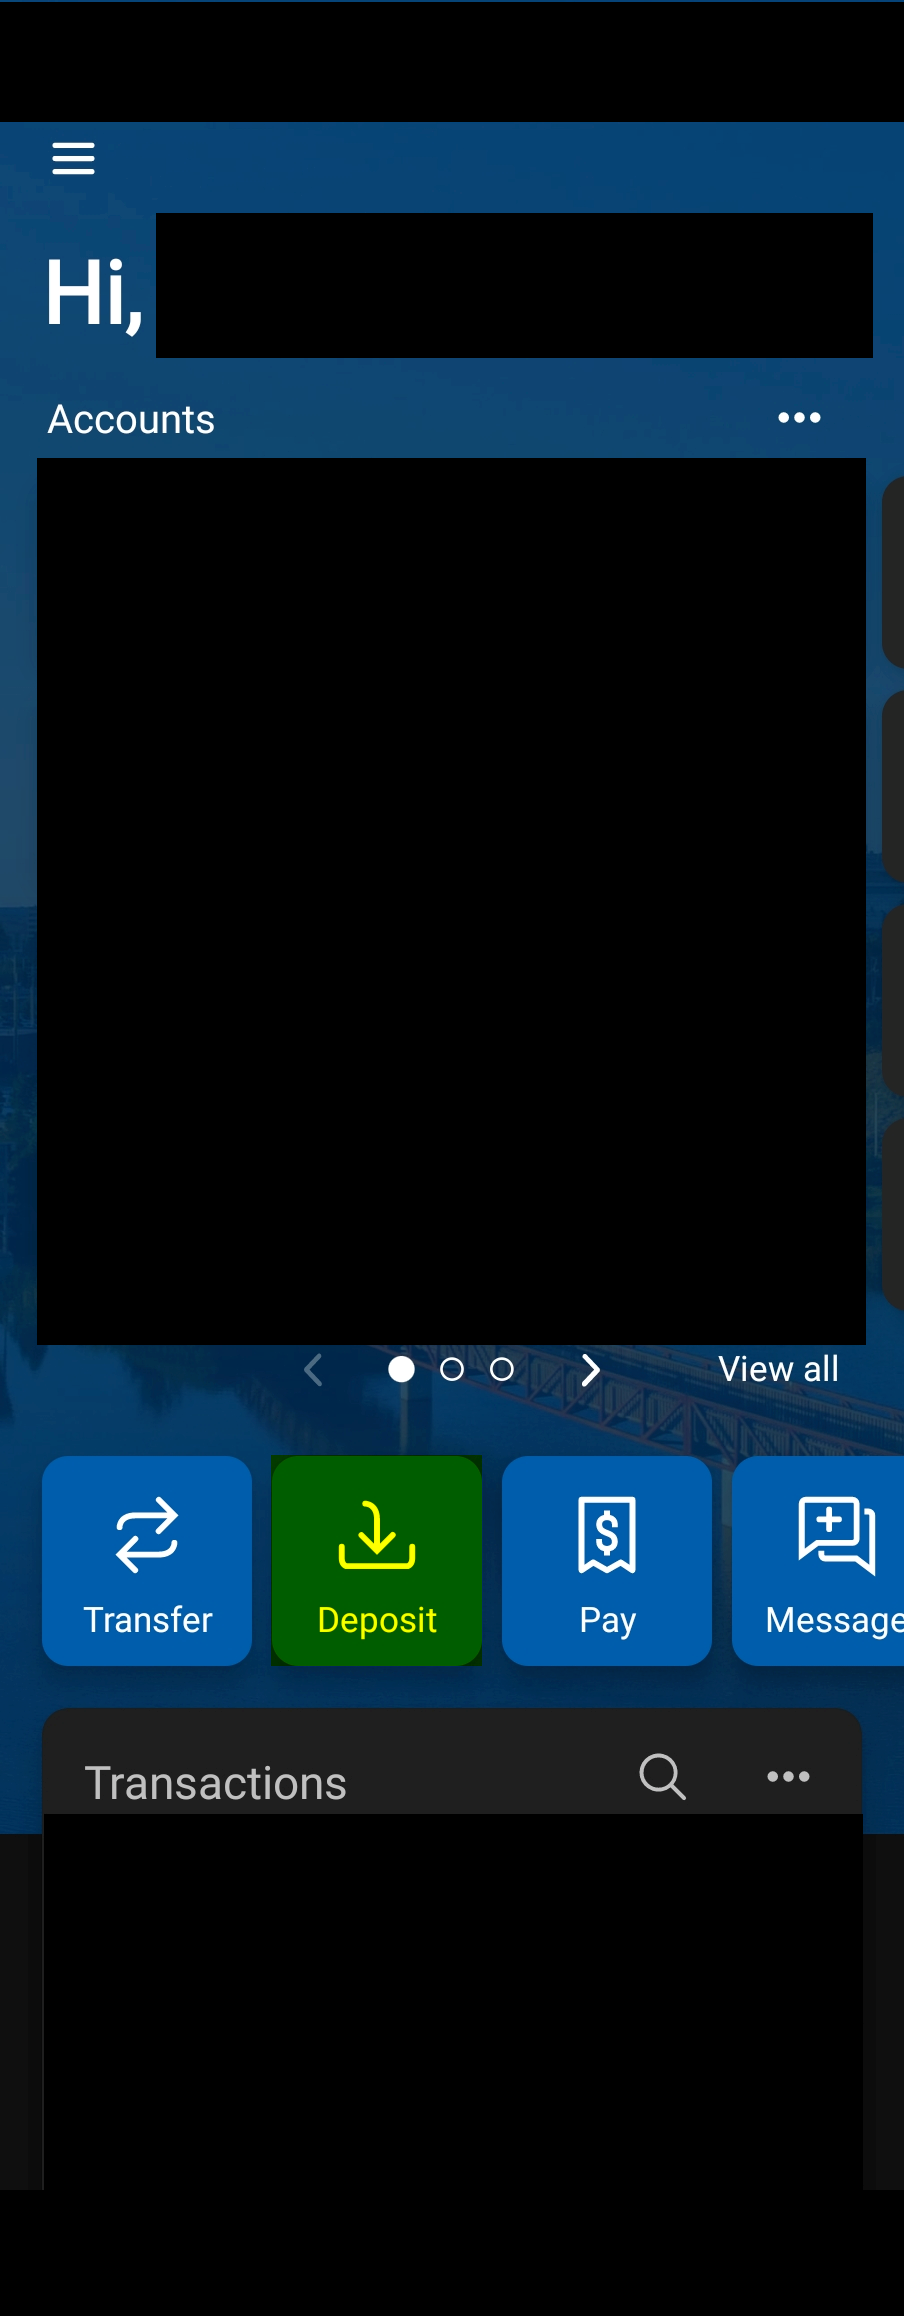
Our new upgraded digital banking platform is now live! Your online banking is simpler, safer, and more secure. If you use the mobile banking app, please visit the Apple App Store or Google Play Store to download the latest OECU Mobile App! You can also search “OECU Banking” to find the app manually. If you are experiencing any difficulty with the new system, we are here to help!
If you can’t find the answers you need here in our Frequently Asked Questions area below, please call our Support Center at: 1-(800) 324-8259, or email us at Support@oecu.com!
Setting up your BETTER Digital Banking Experience!
Three easy steps to get you started:
- Download the FREE Oklahoma Educators Credit Union Mobile App from your device’s app store
- Login into the app using online banking user ID and password.
-Already a user? You will use your existing Username and Password
-New user? Click the “Enroll Now” option on our login screen
You will need your:
- Social Security Number/EIN/TIN
- Account Number
- Phone Number
- A 2-step verification is required for all users.
The following are the options you can choose from:
- Voice or text message (to your phone number)
- Authy (FREE Downloadable Authentication App)
- Authentication App (If you already have one downloaded)
LINKS TO DOWNLOAD OUR MOBILE BANKING APPS:
Download from the Apple app store: OECU Digital Banking on the App Store
Download from the Google Play Store: OECU Digital Banking on Google Play Store
FEATURES OF YOUR DIGITAL BANKING:
Below are some easy tips to help get you started with the new and improved features of your new online banking experience!
ACCOUNT
Ability to create account specific alerts for balances, transactions, and deposits
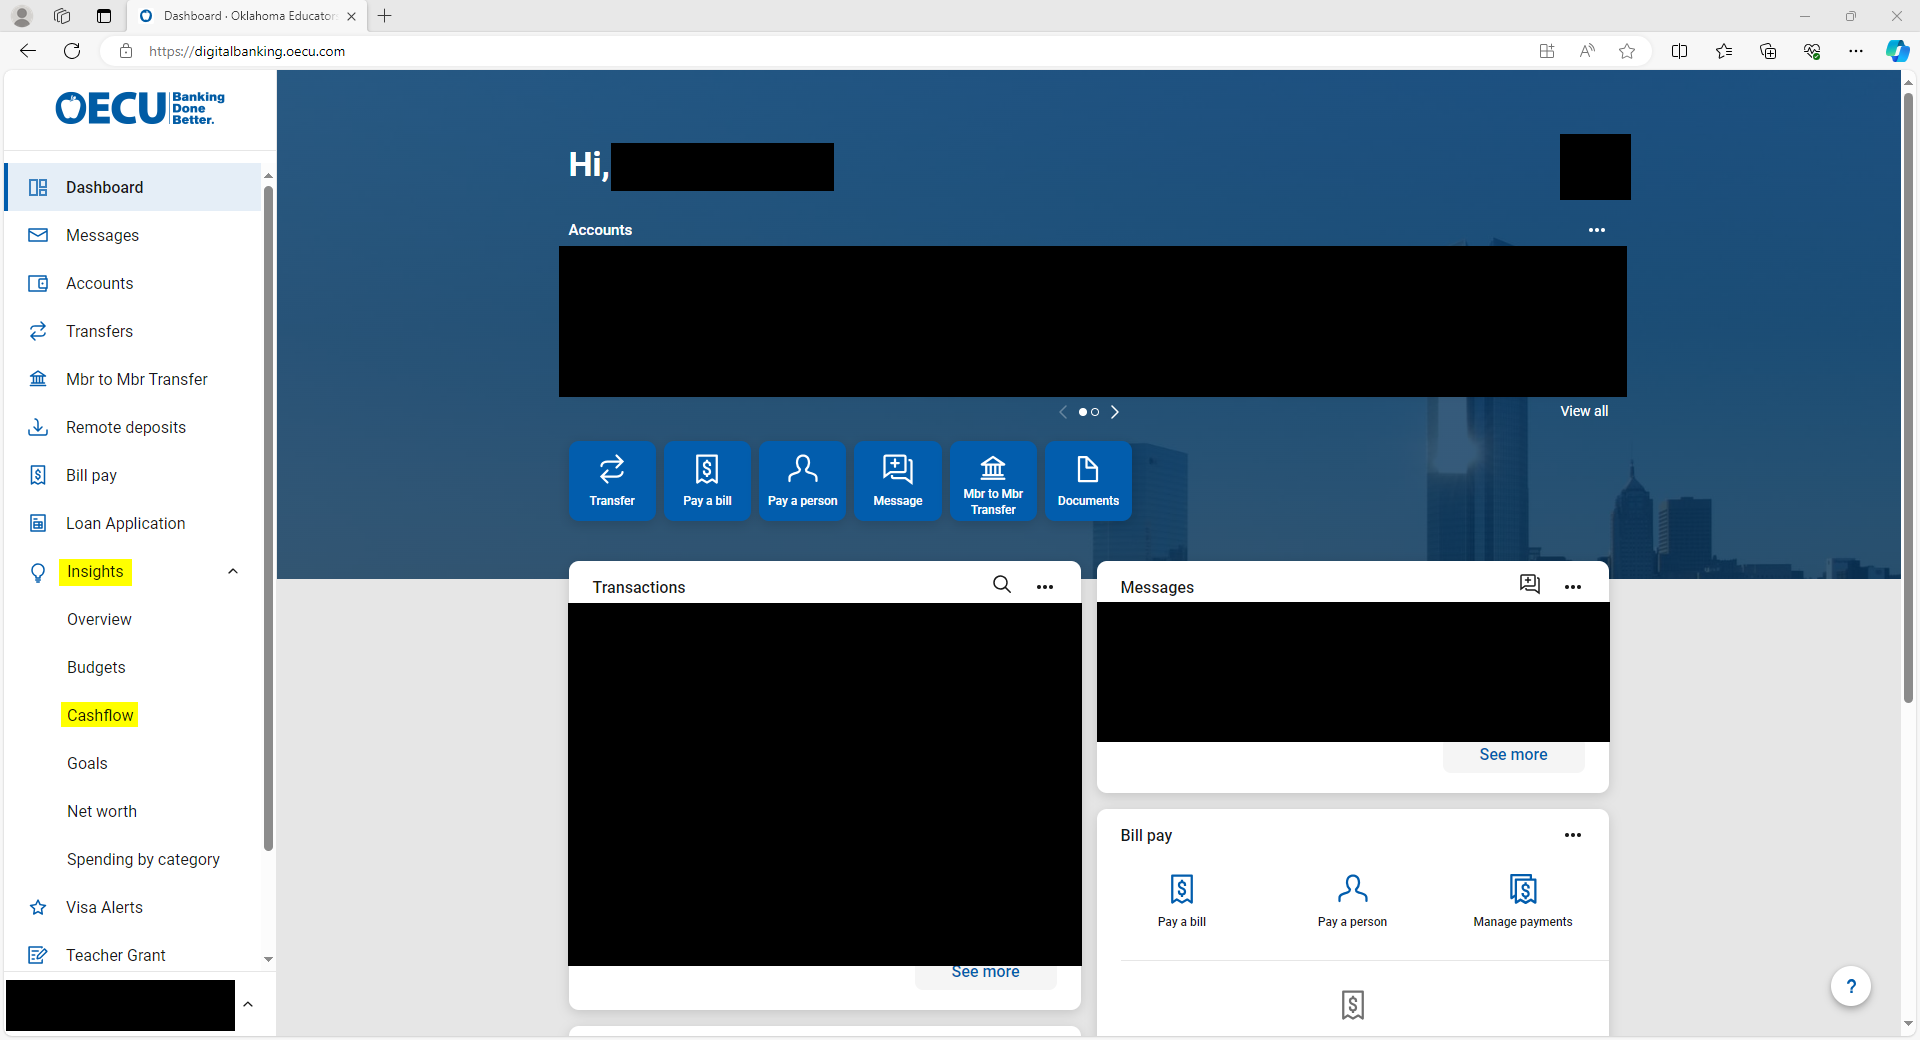
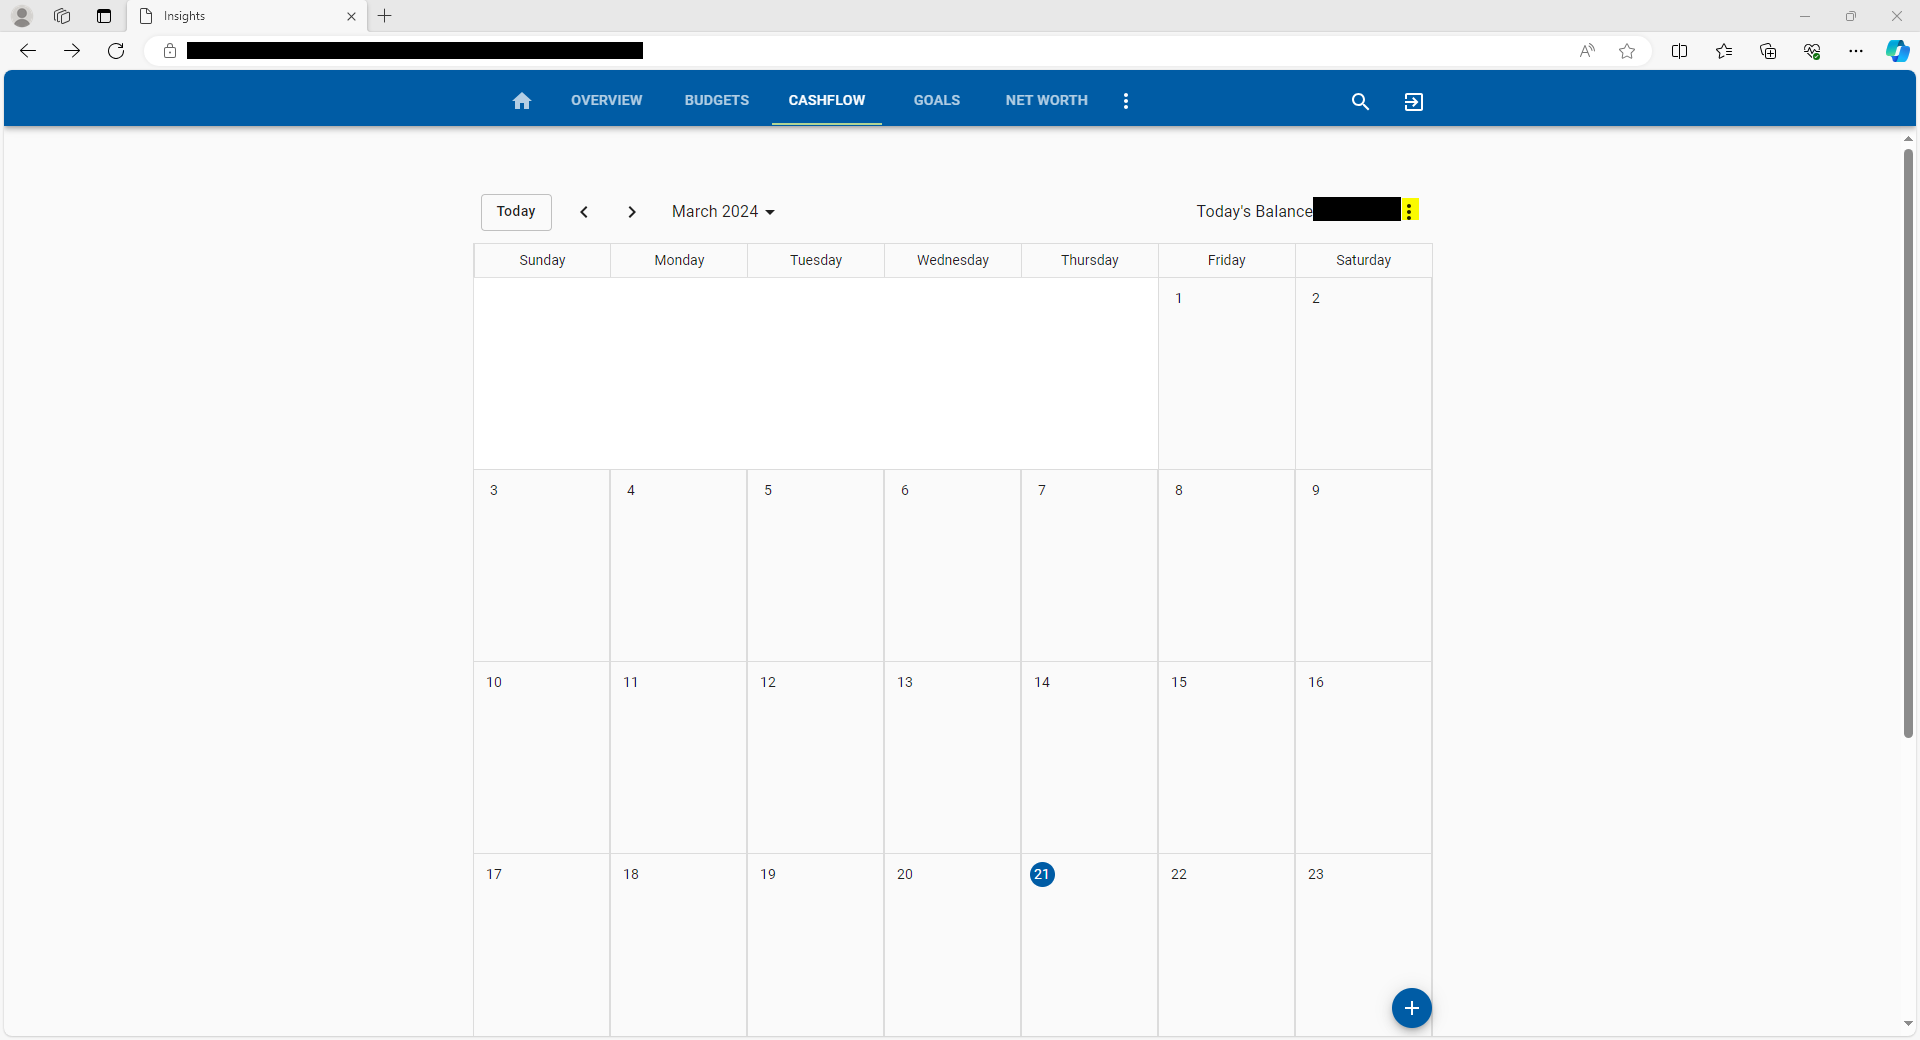
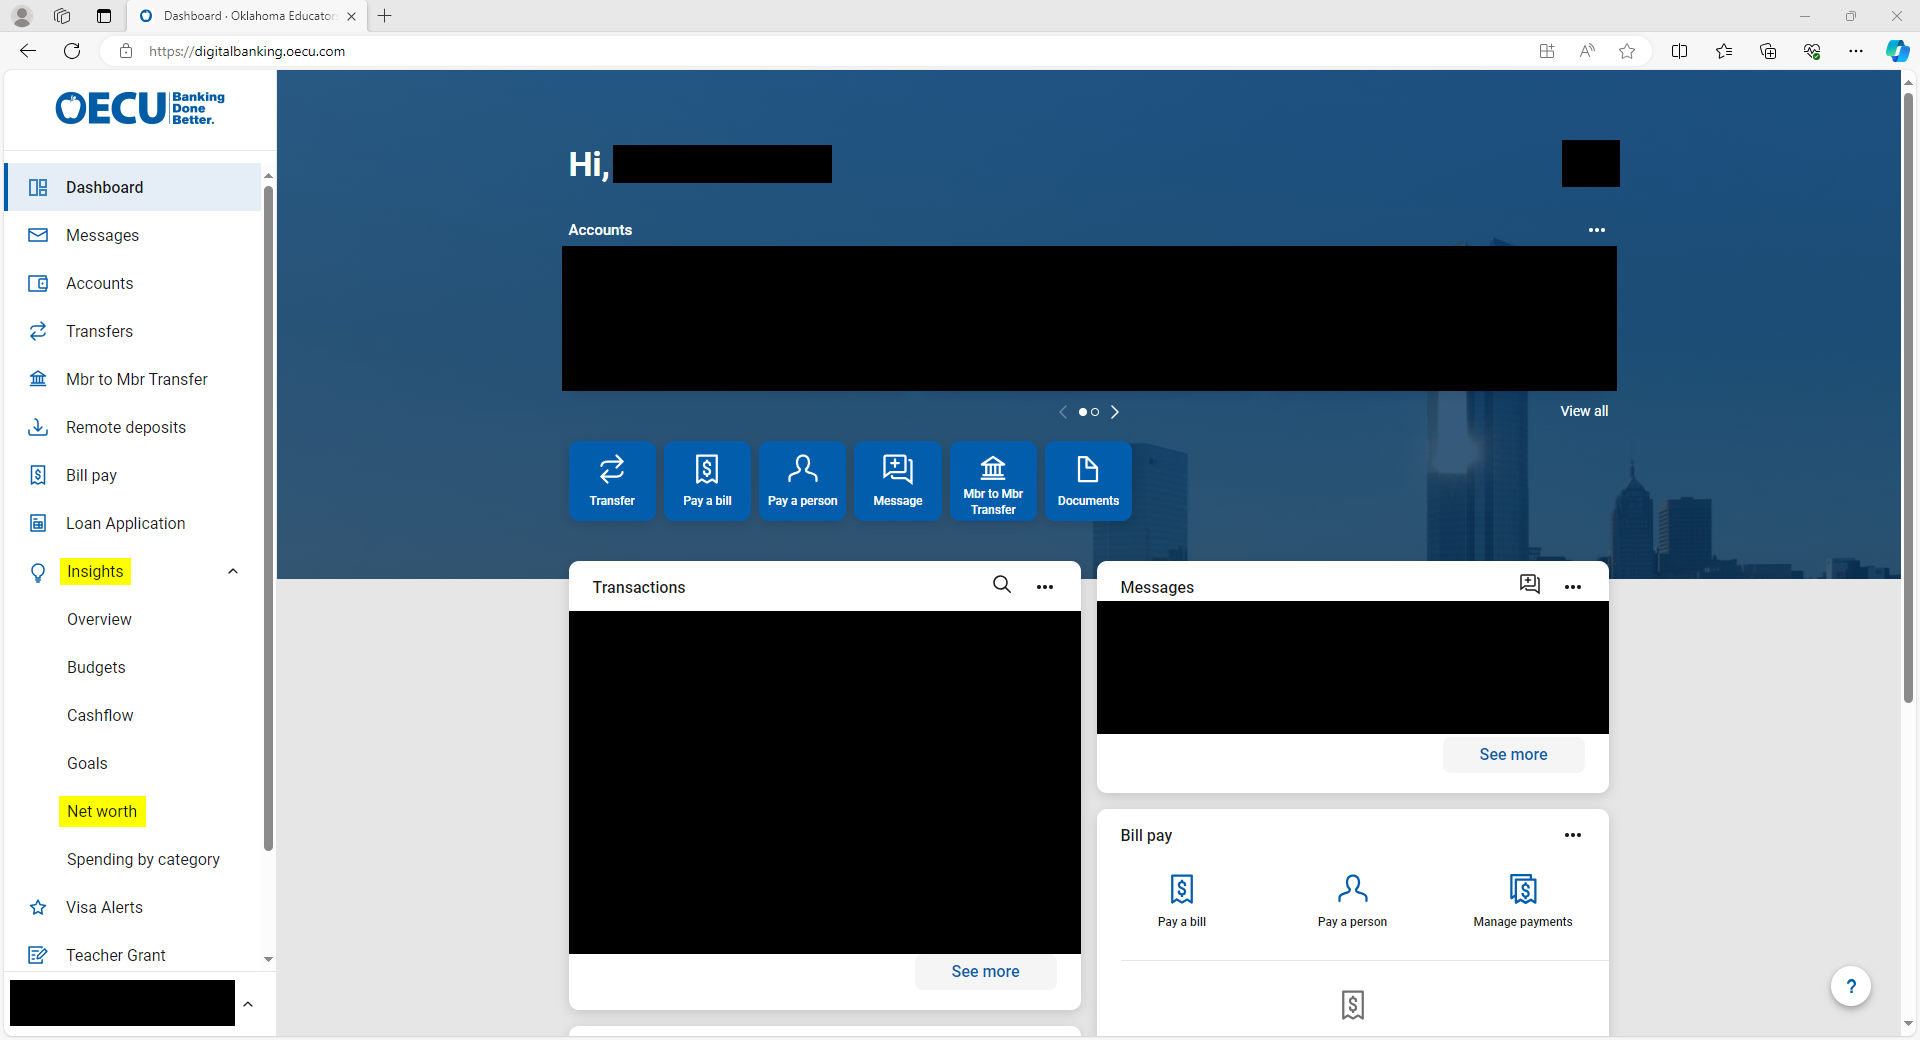
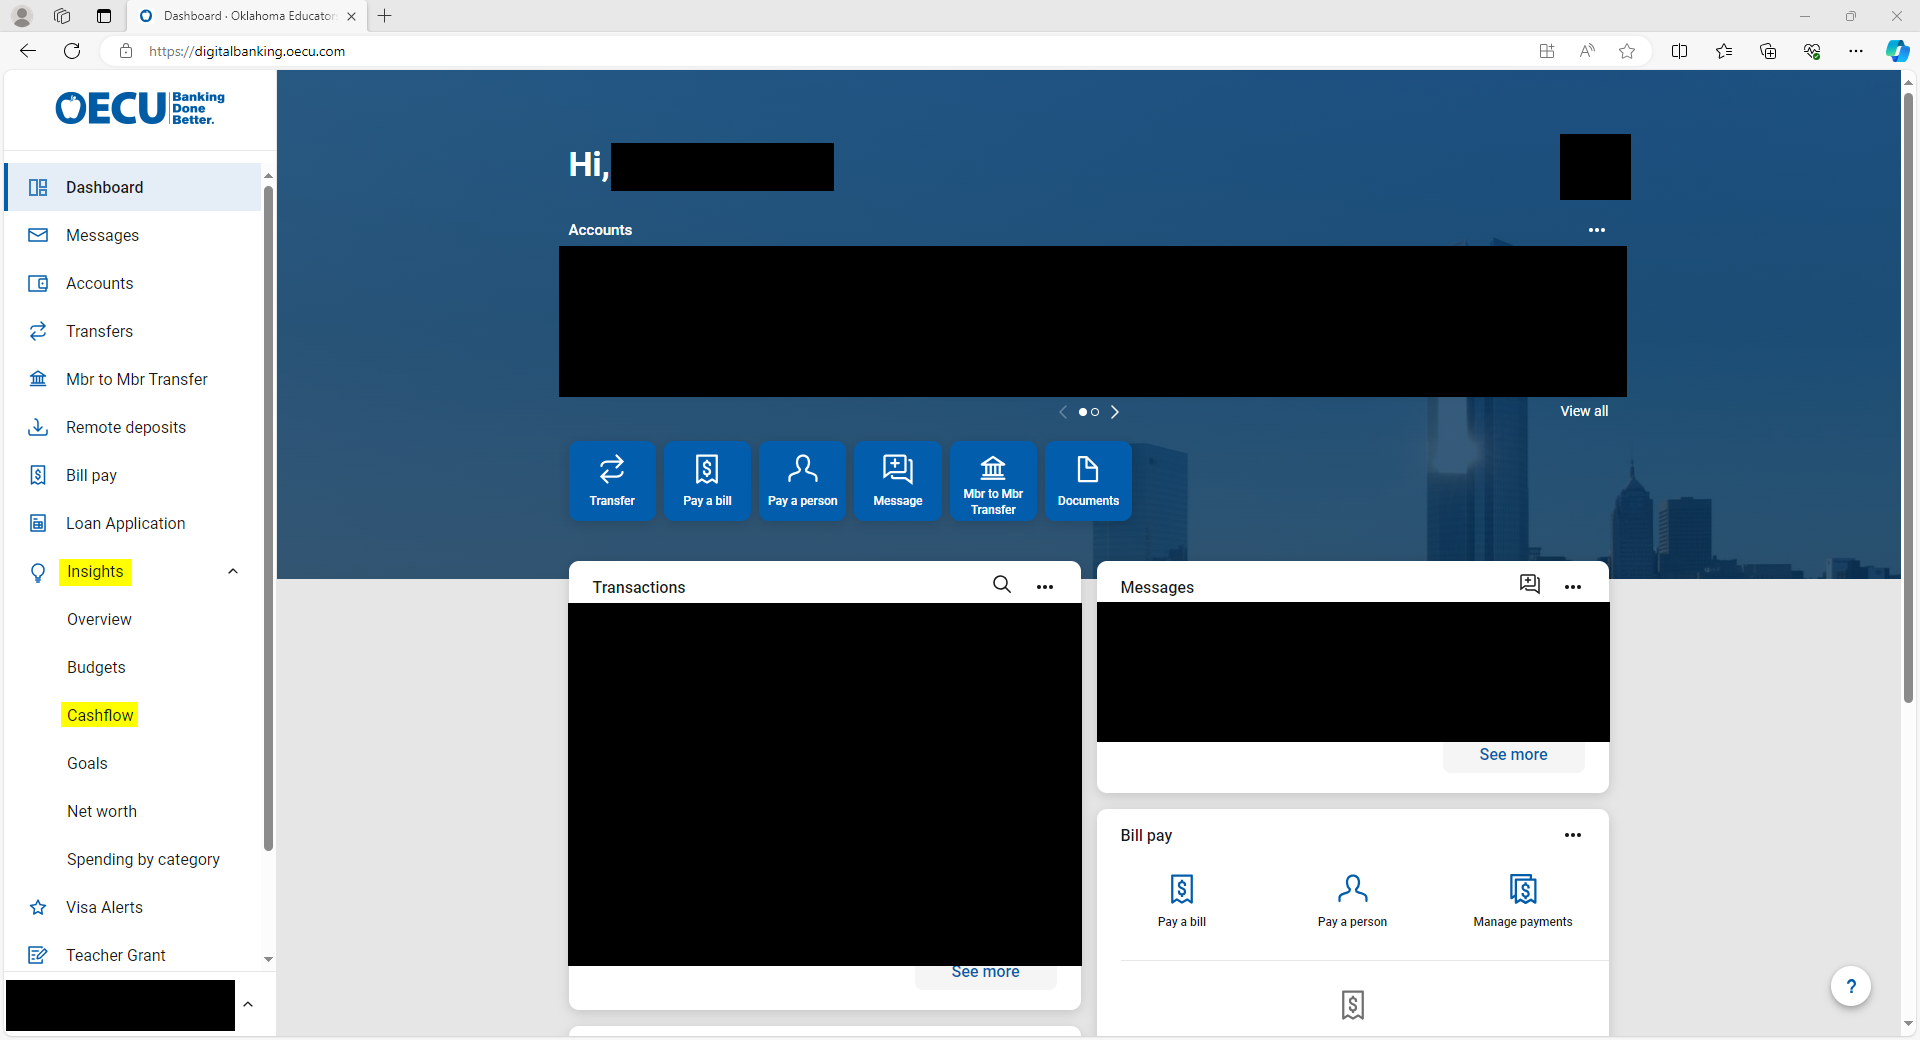
1. From the dashboard, open the “Insights” drop down menu on the right-hand toolbar and select “Cashflow”.
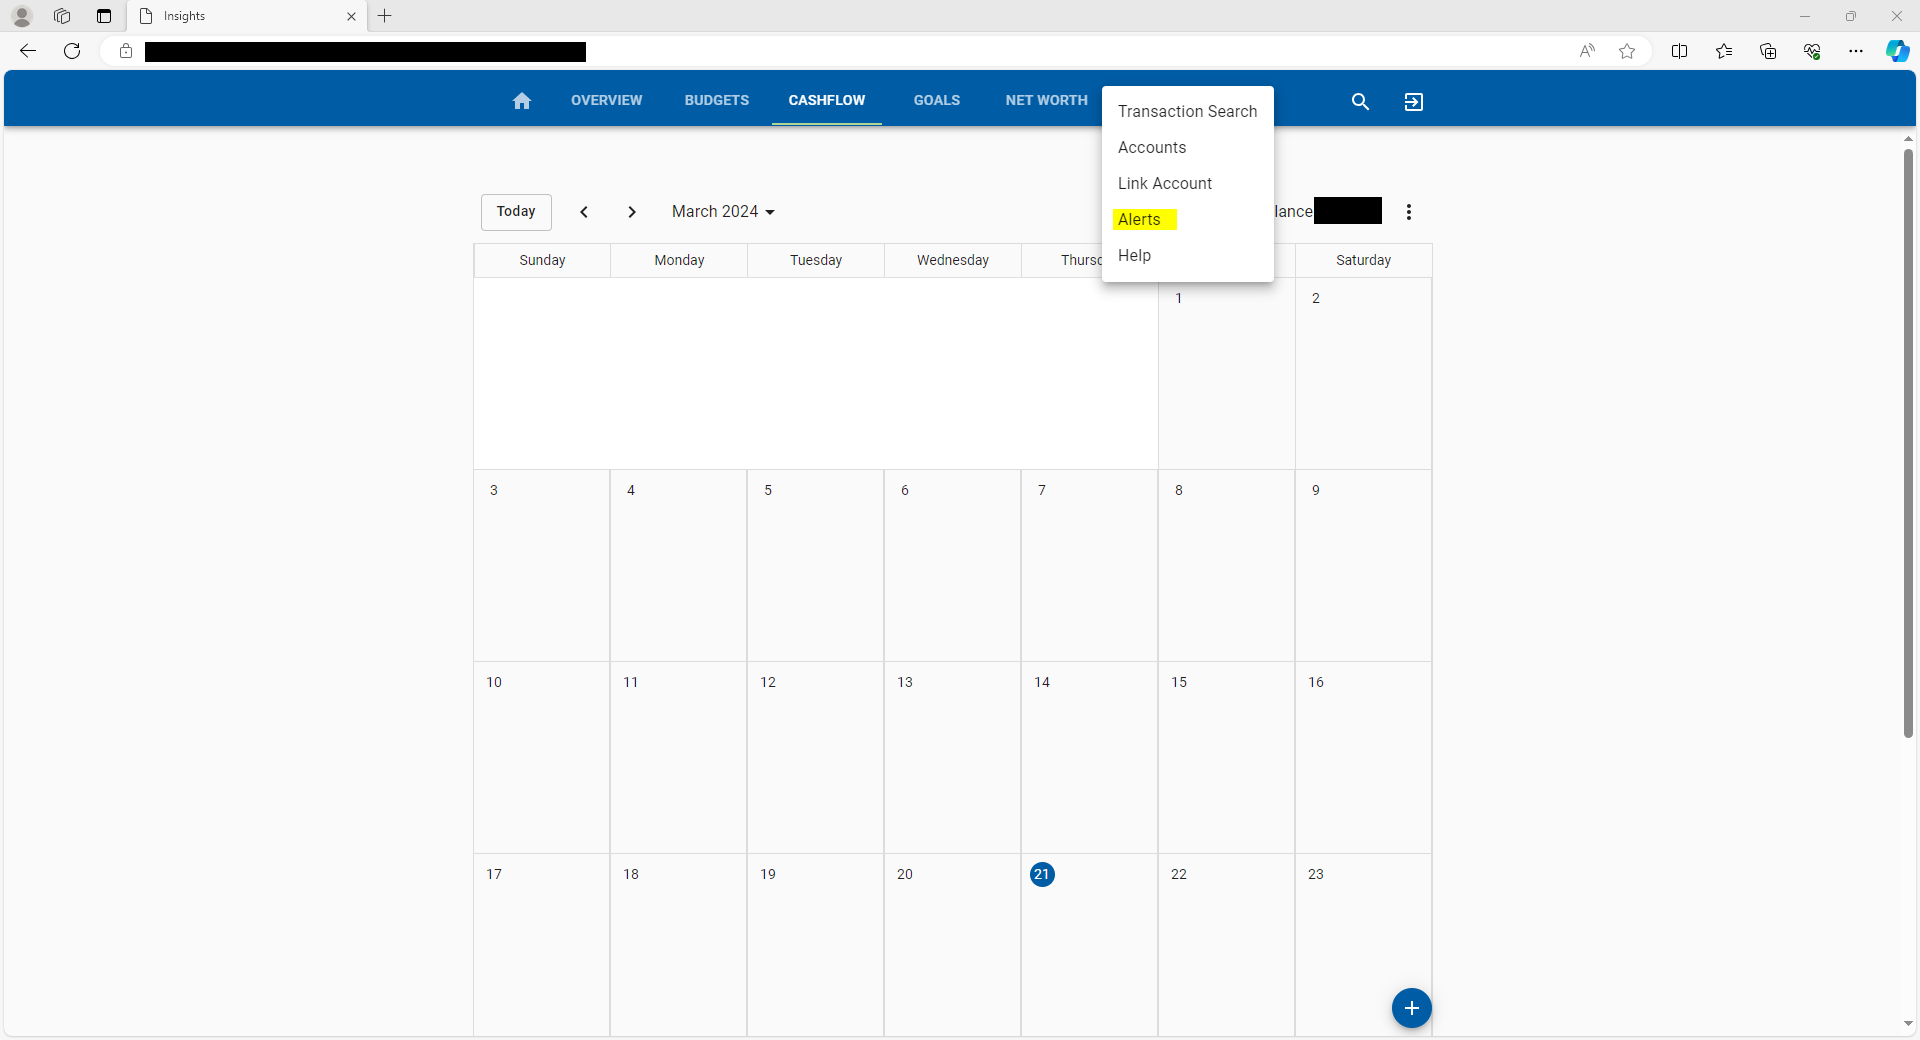
2. On the “Cashflow” screen, click the three vertical dots and select “Alerts”.
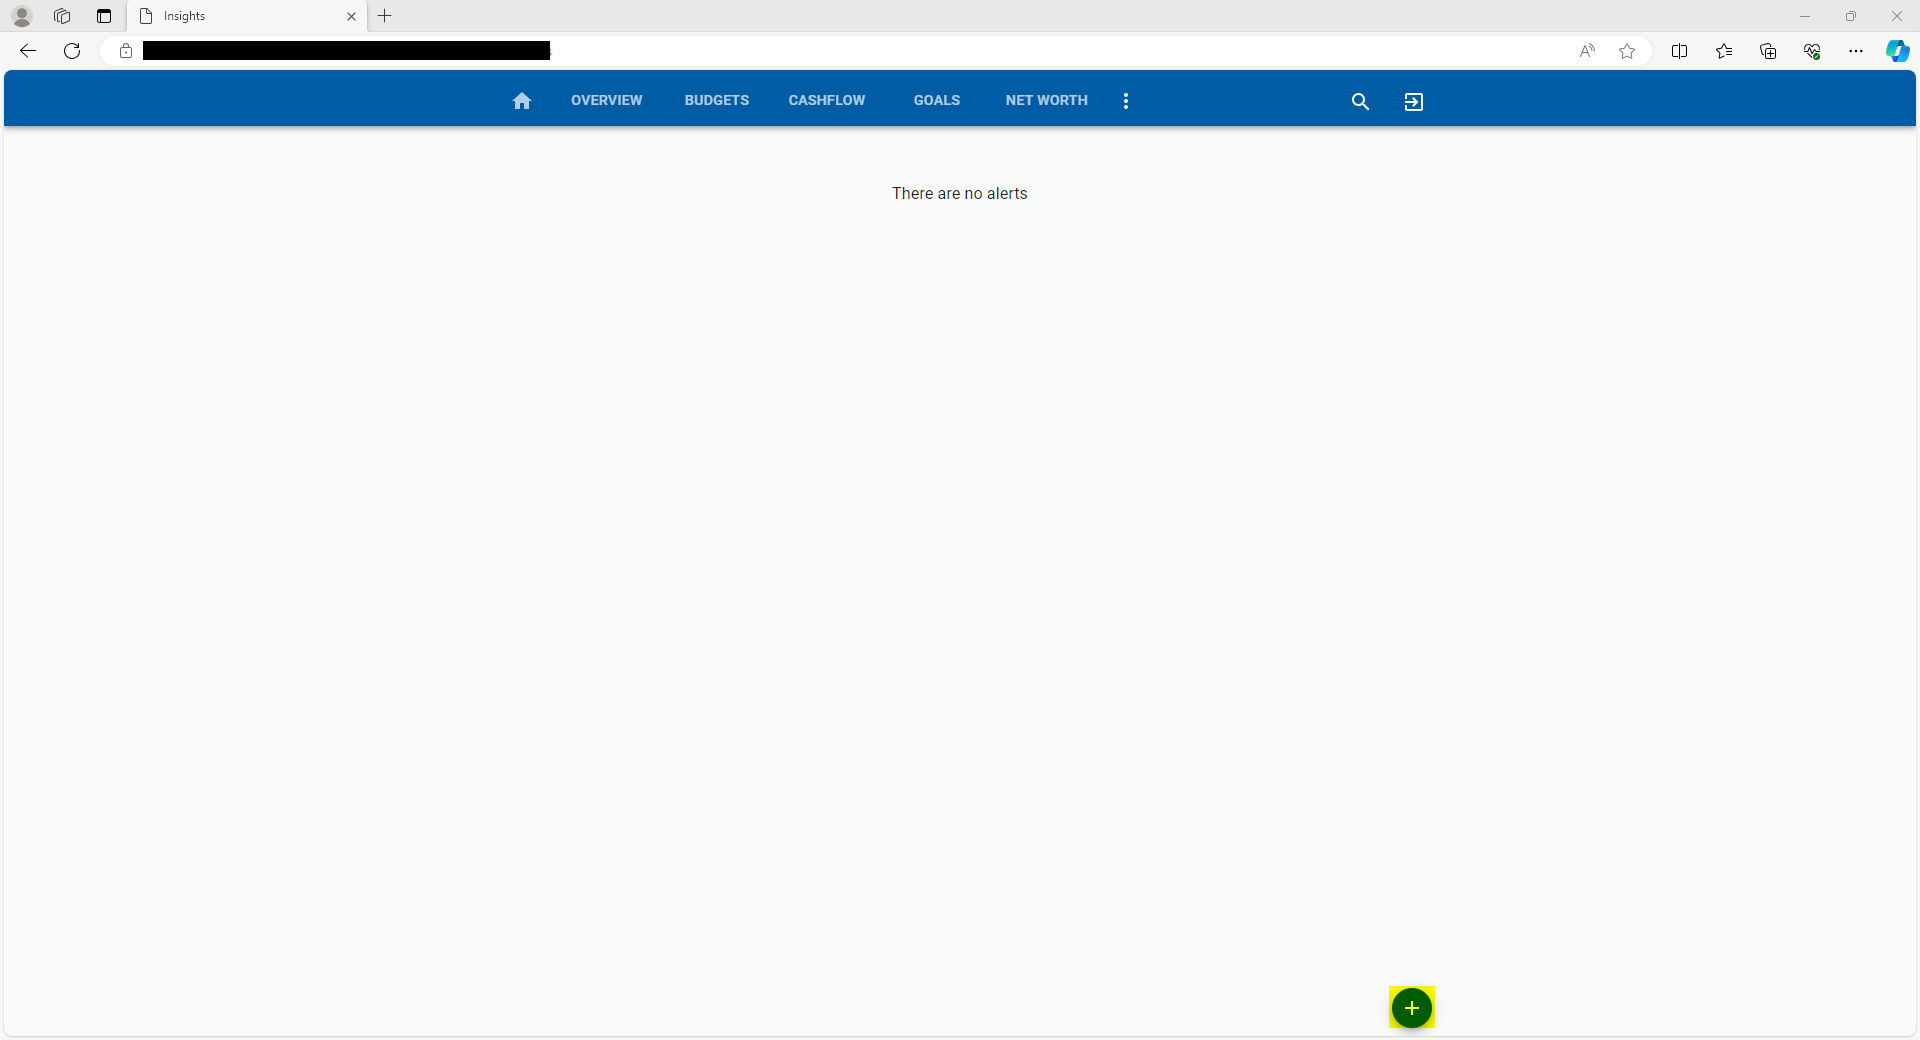
3. On this screen, you can view, modify, and delete any of your previously created alerts, as well as create a new alert by using the “+” icon at the bottom of the screen.
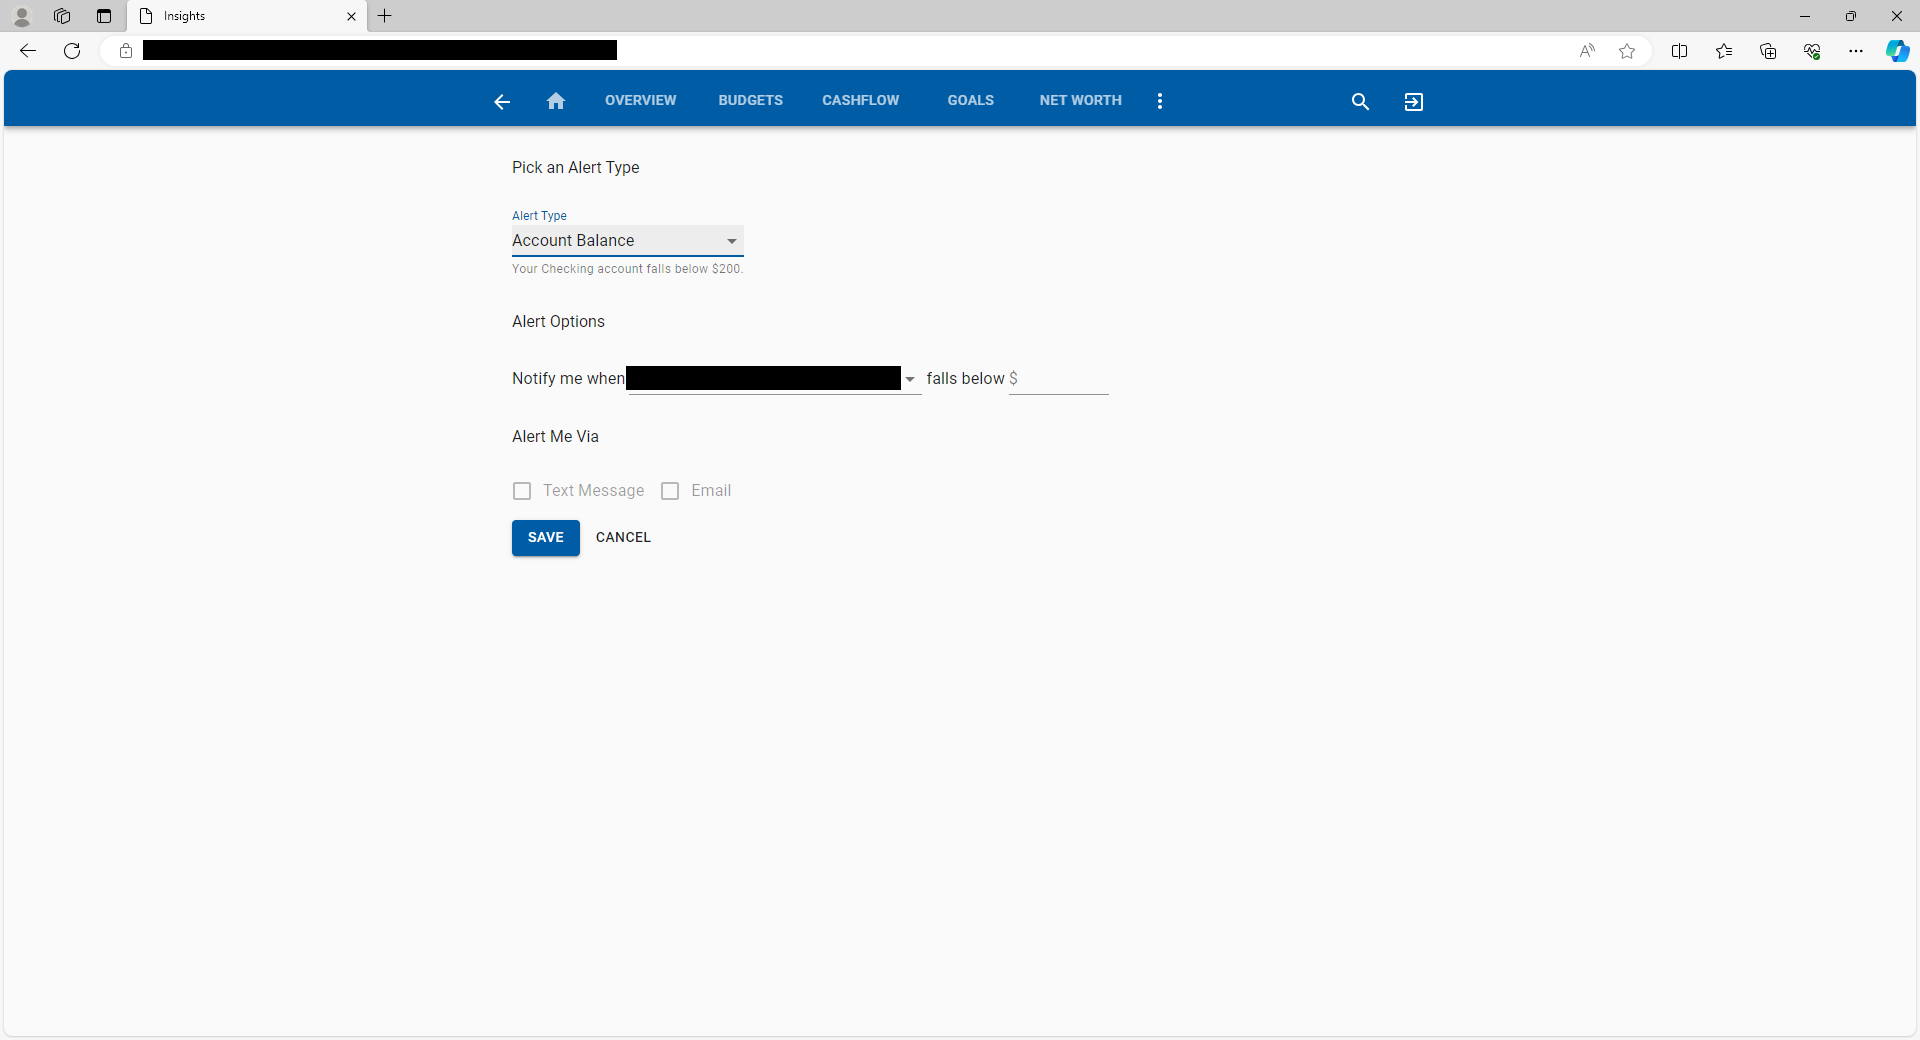
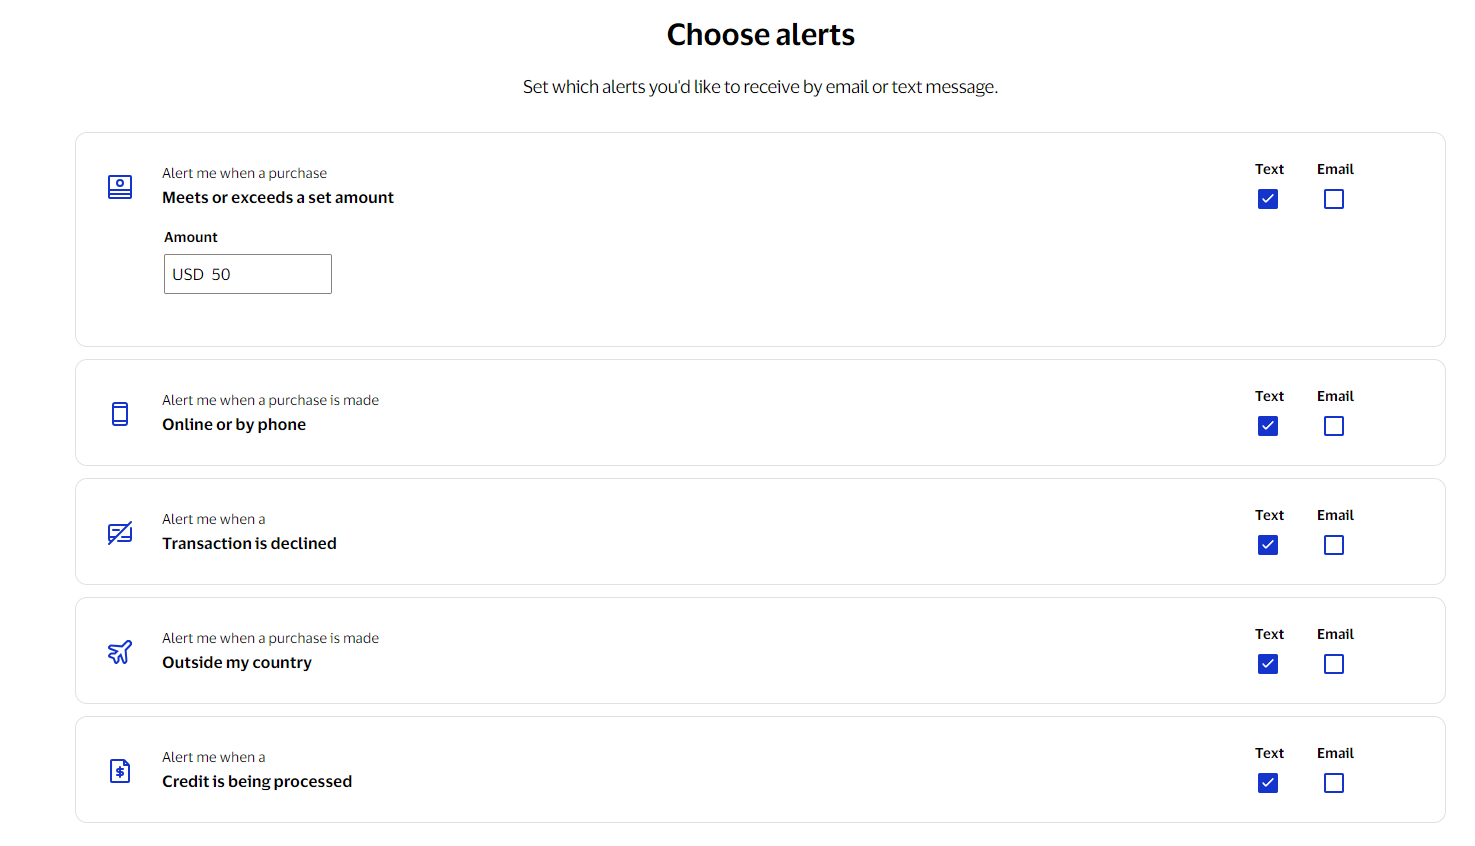
4. From this screen, you can create an alert that can either send a text message or an email for different things, such as account balance falls below a set amount, a purchase being made at a specific store, or a transaction that is over a set amount.
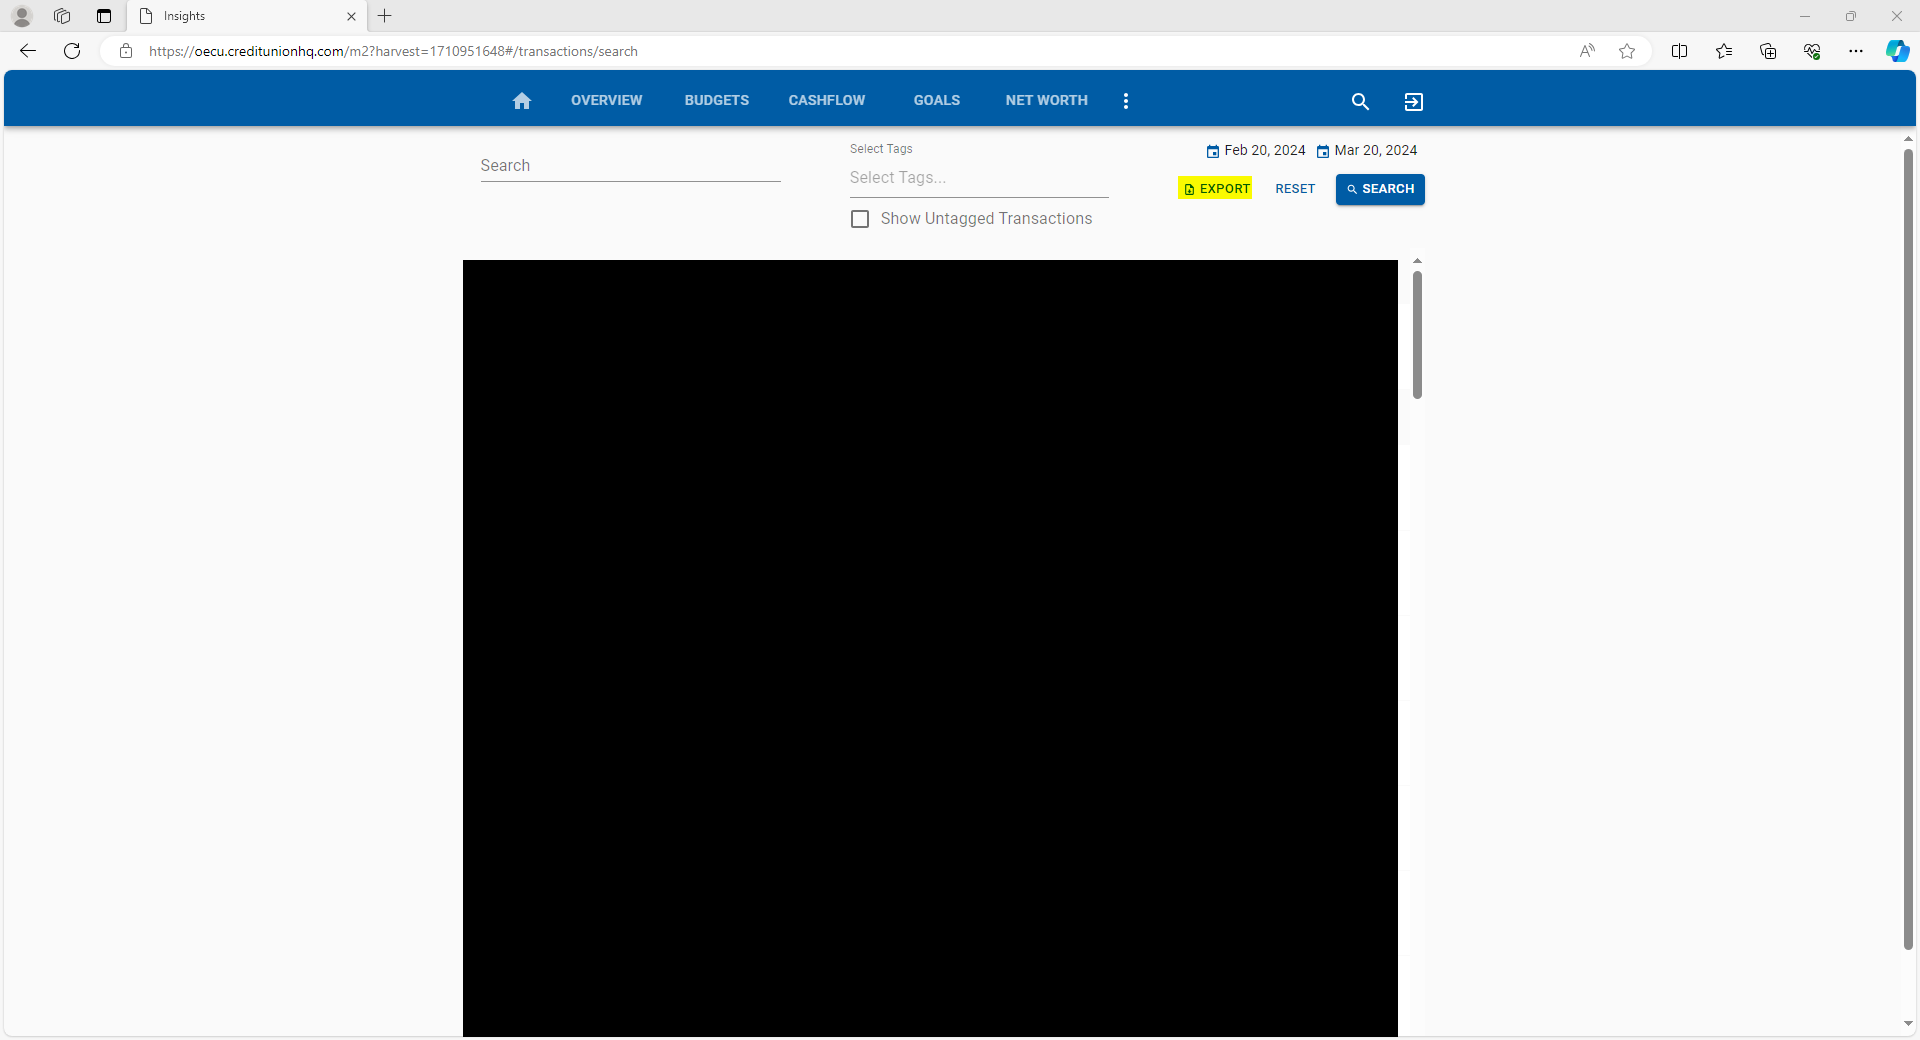
Ability to download a date range of transactions as a Spreadsheet, Text file, or Open Financial Exchange file.
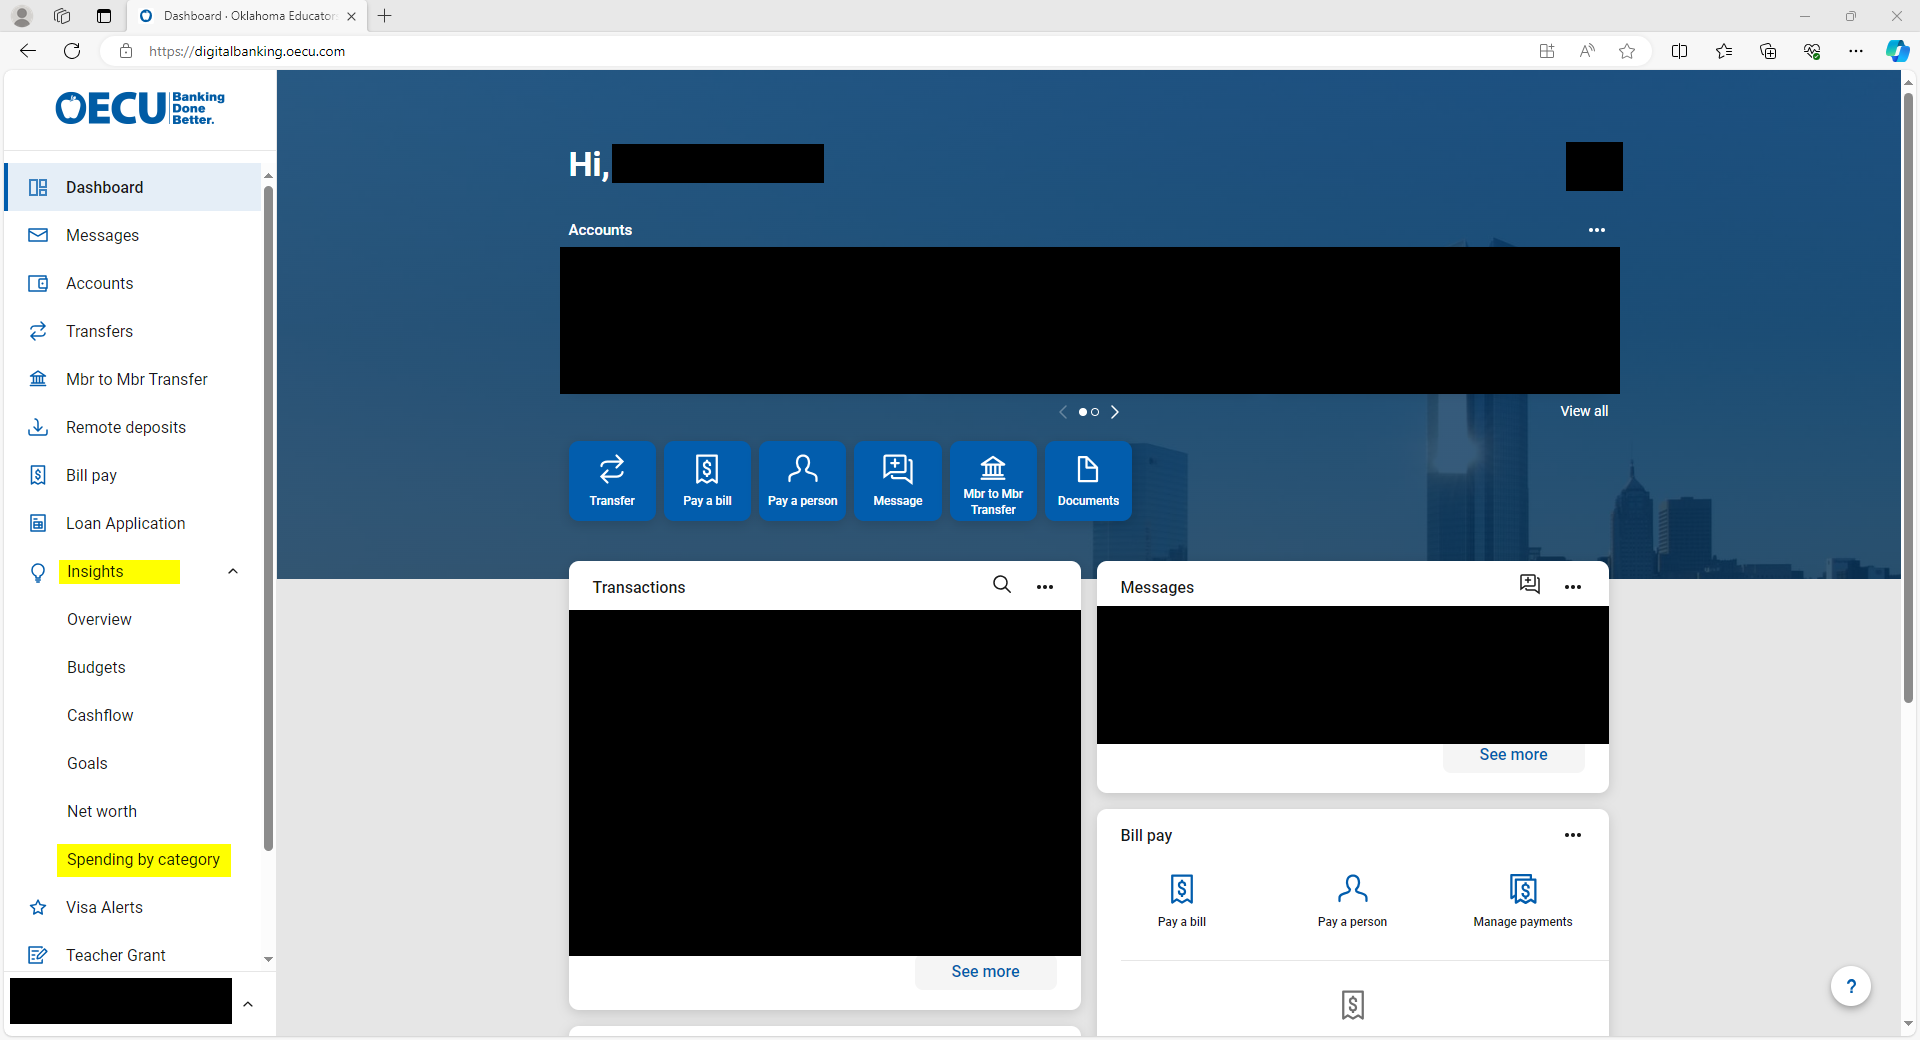
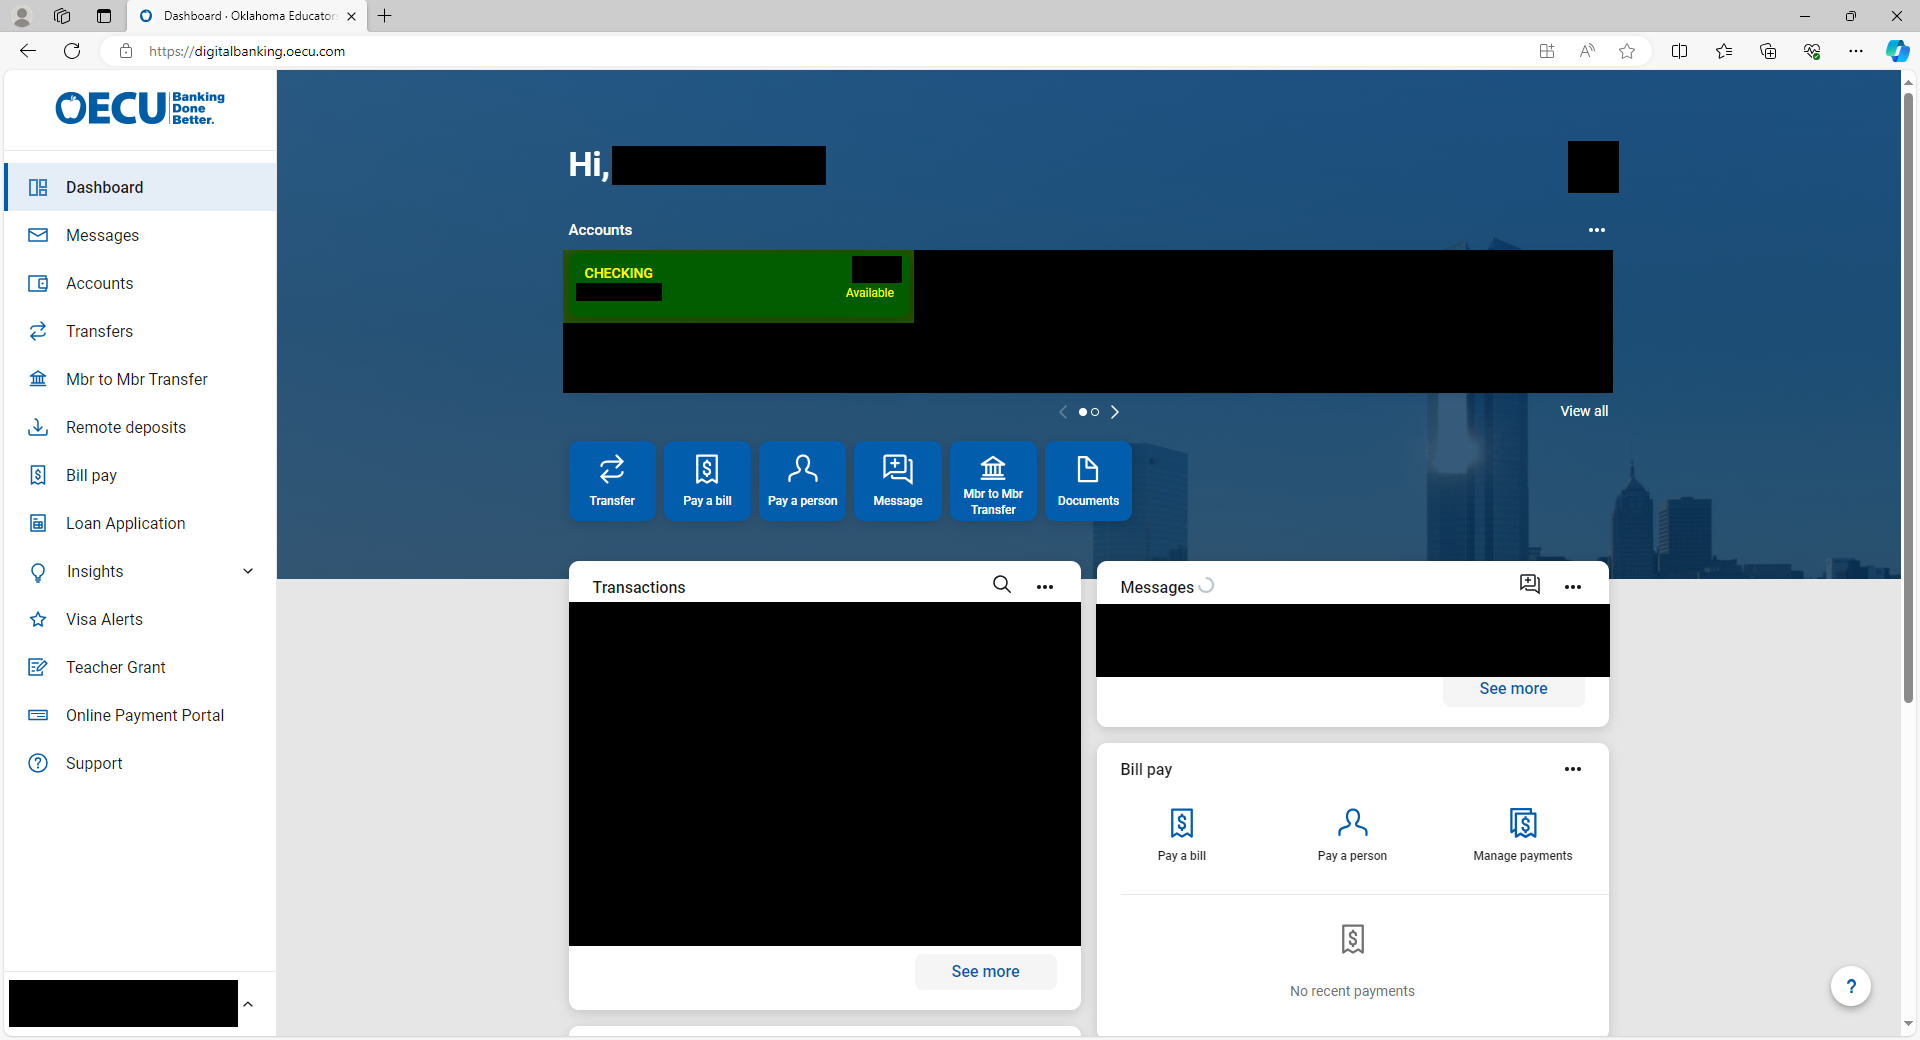
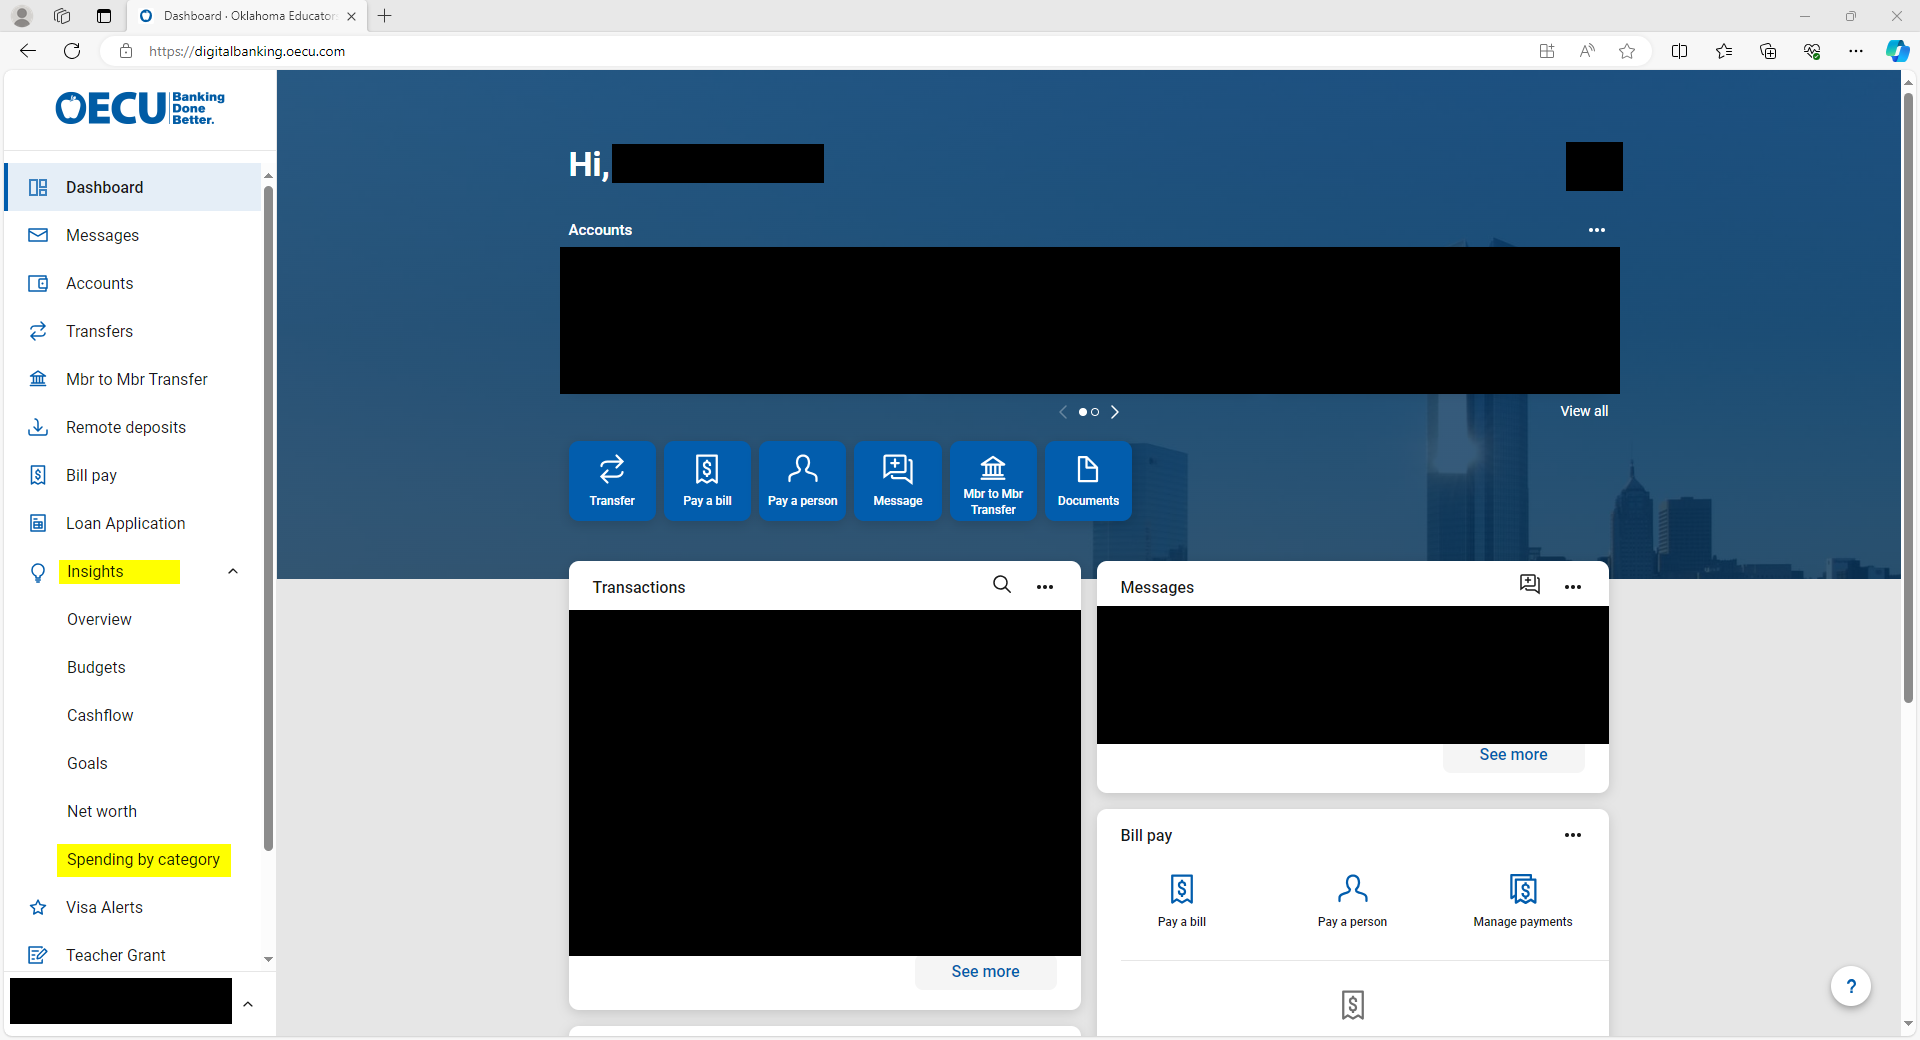
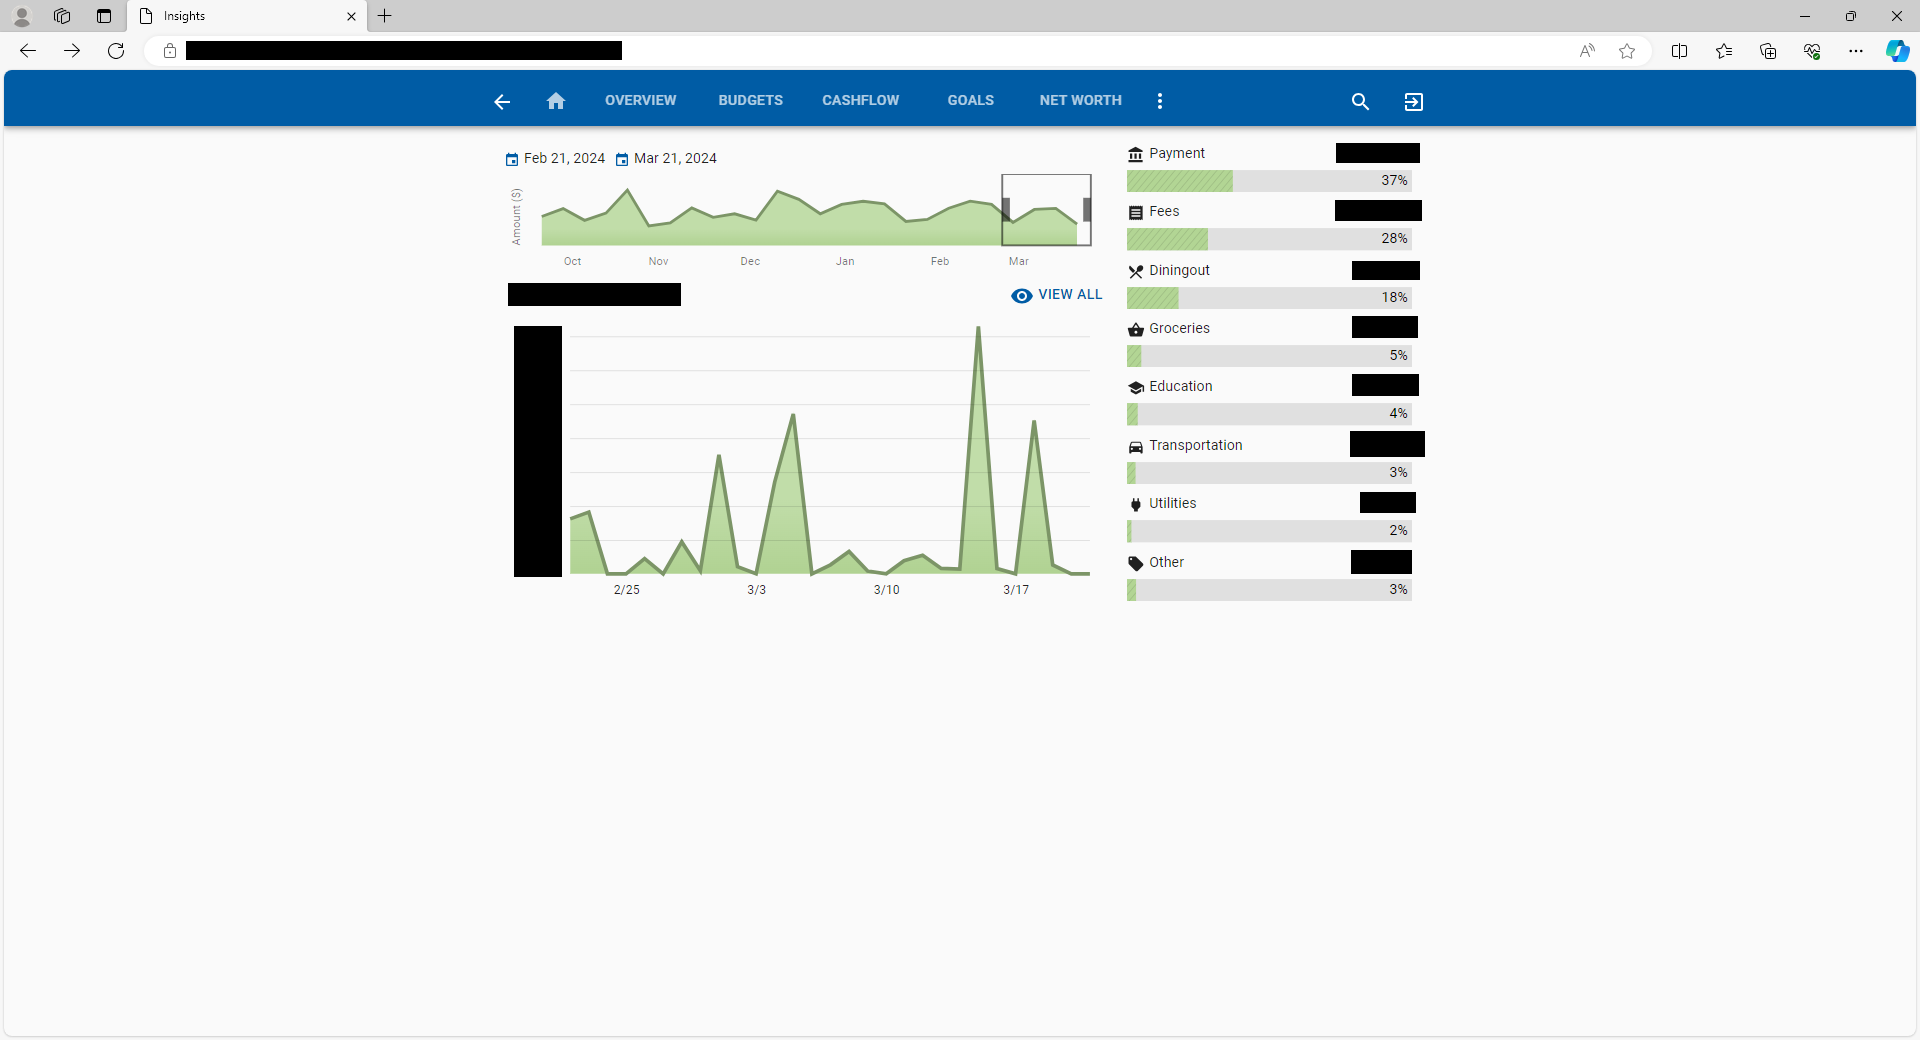
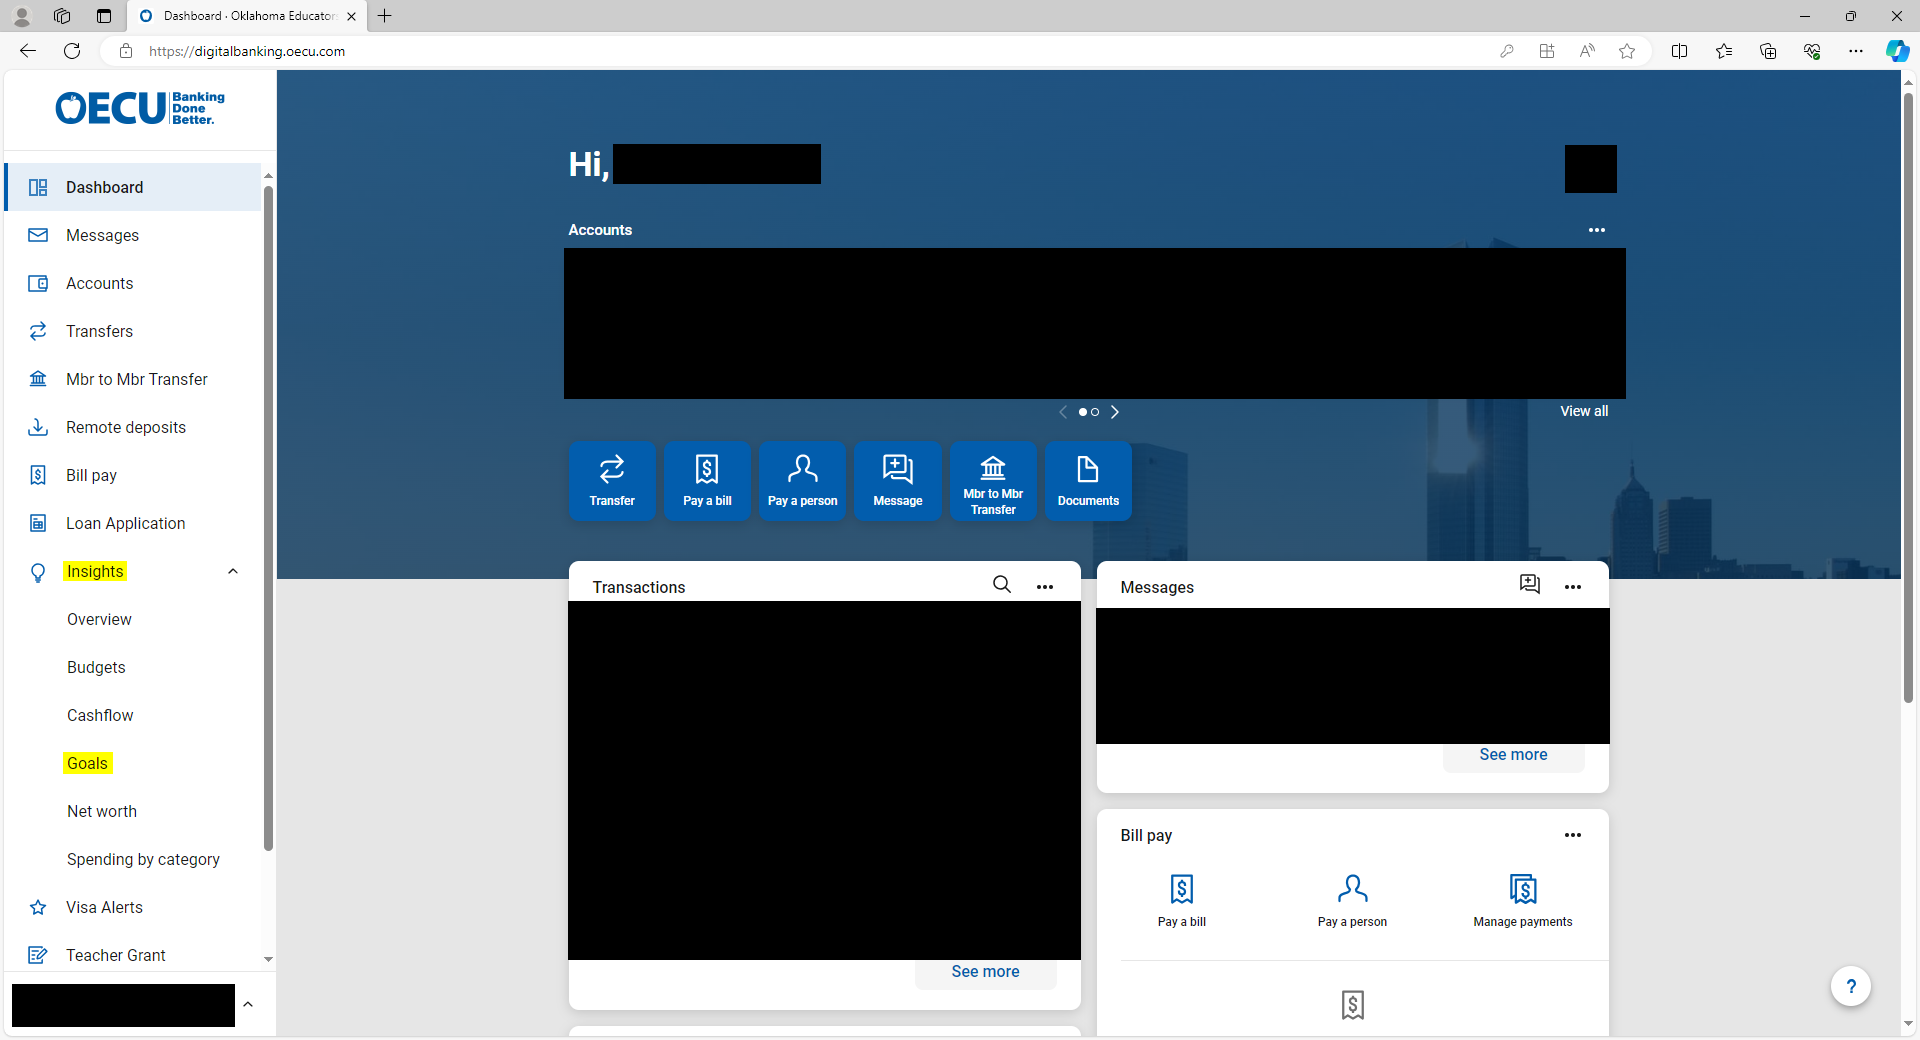
1. On the left-hand toolbar of the dashboard, open the “Insights” drop down and select “Spending by category”
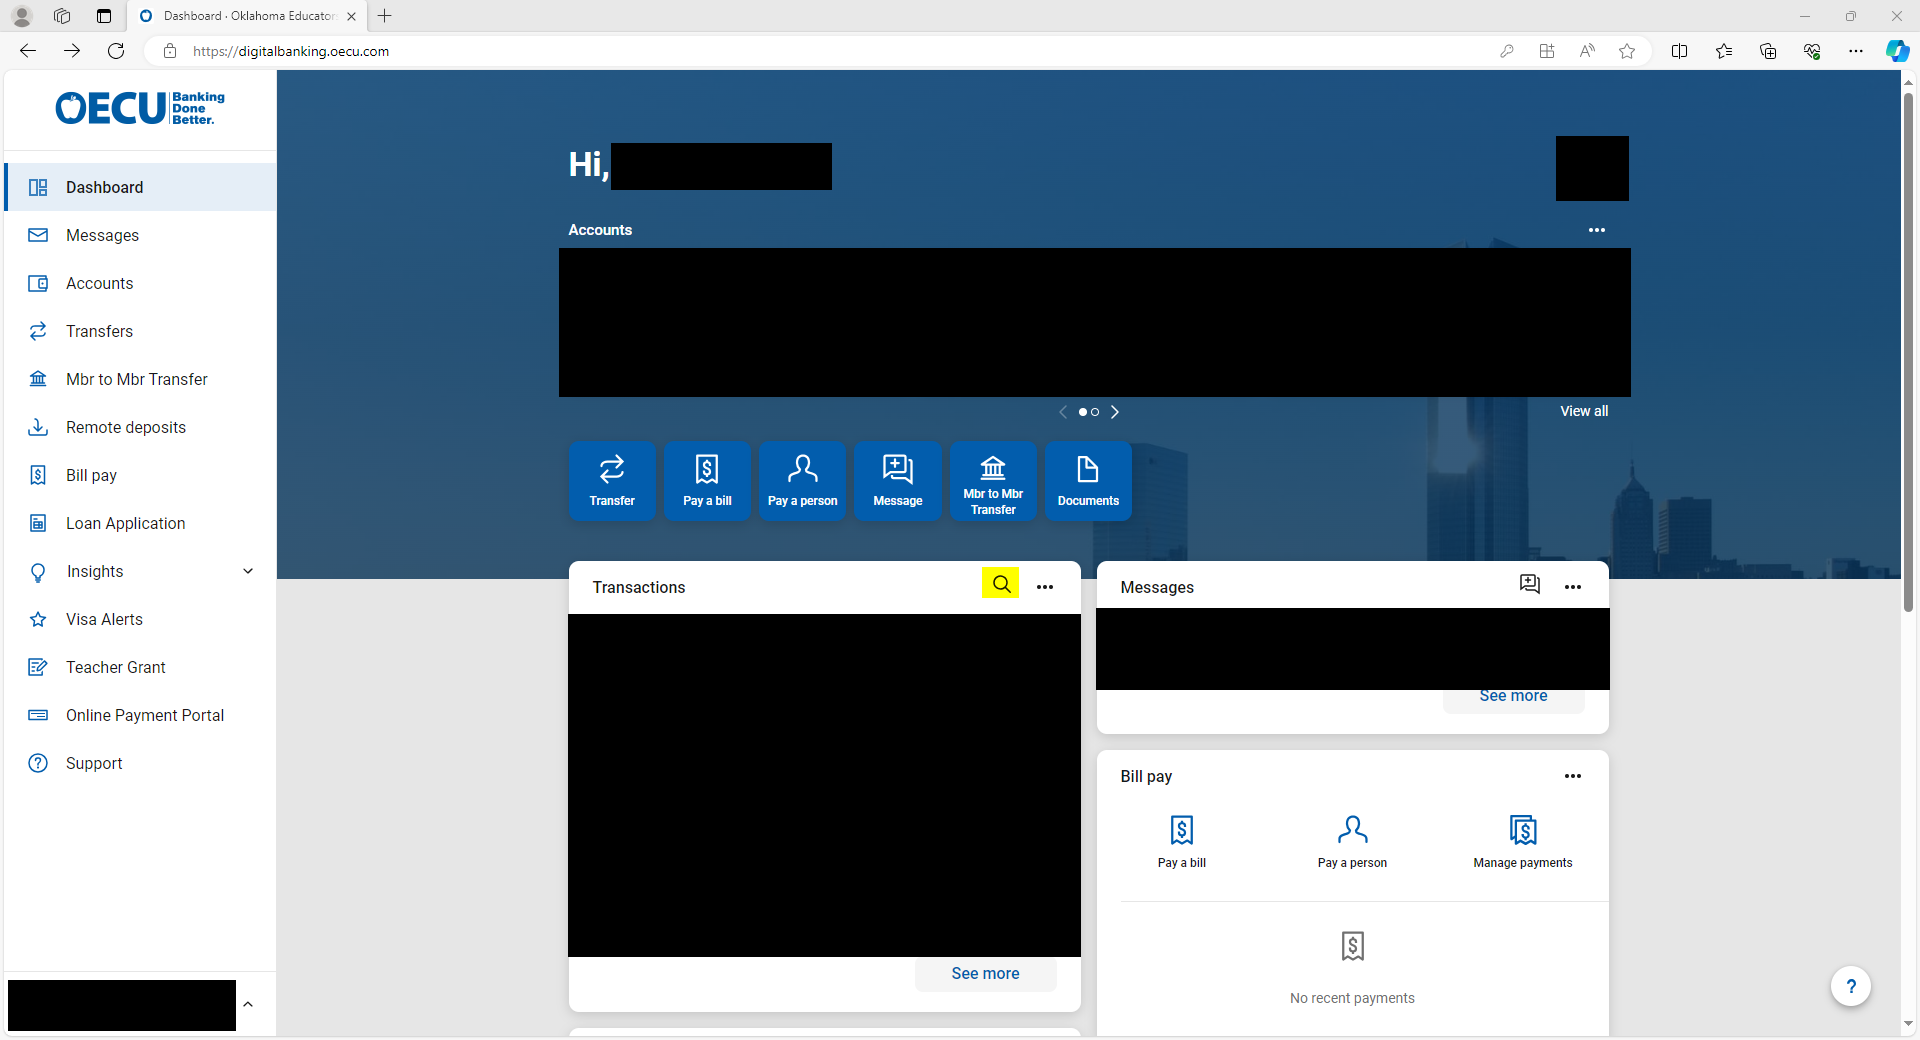
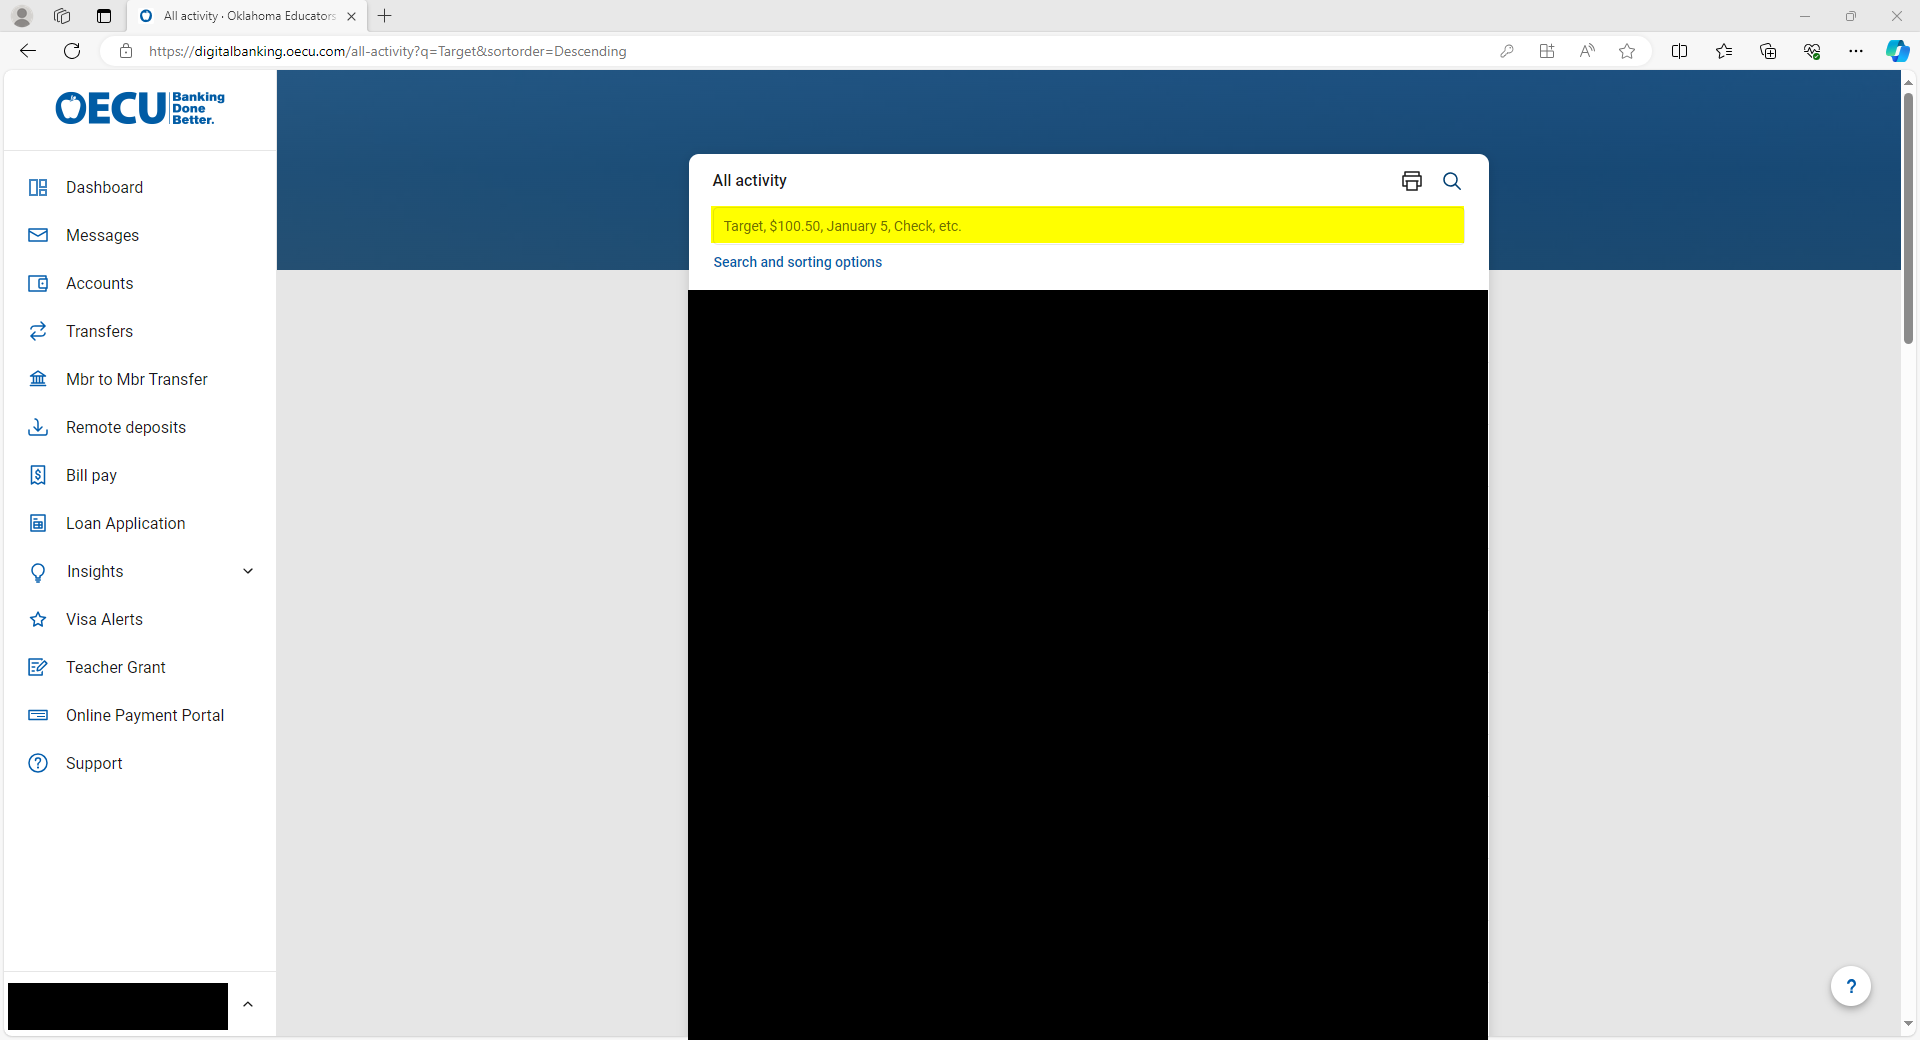
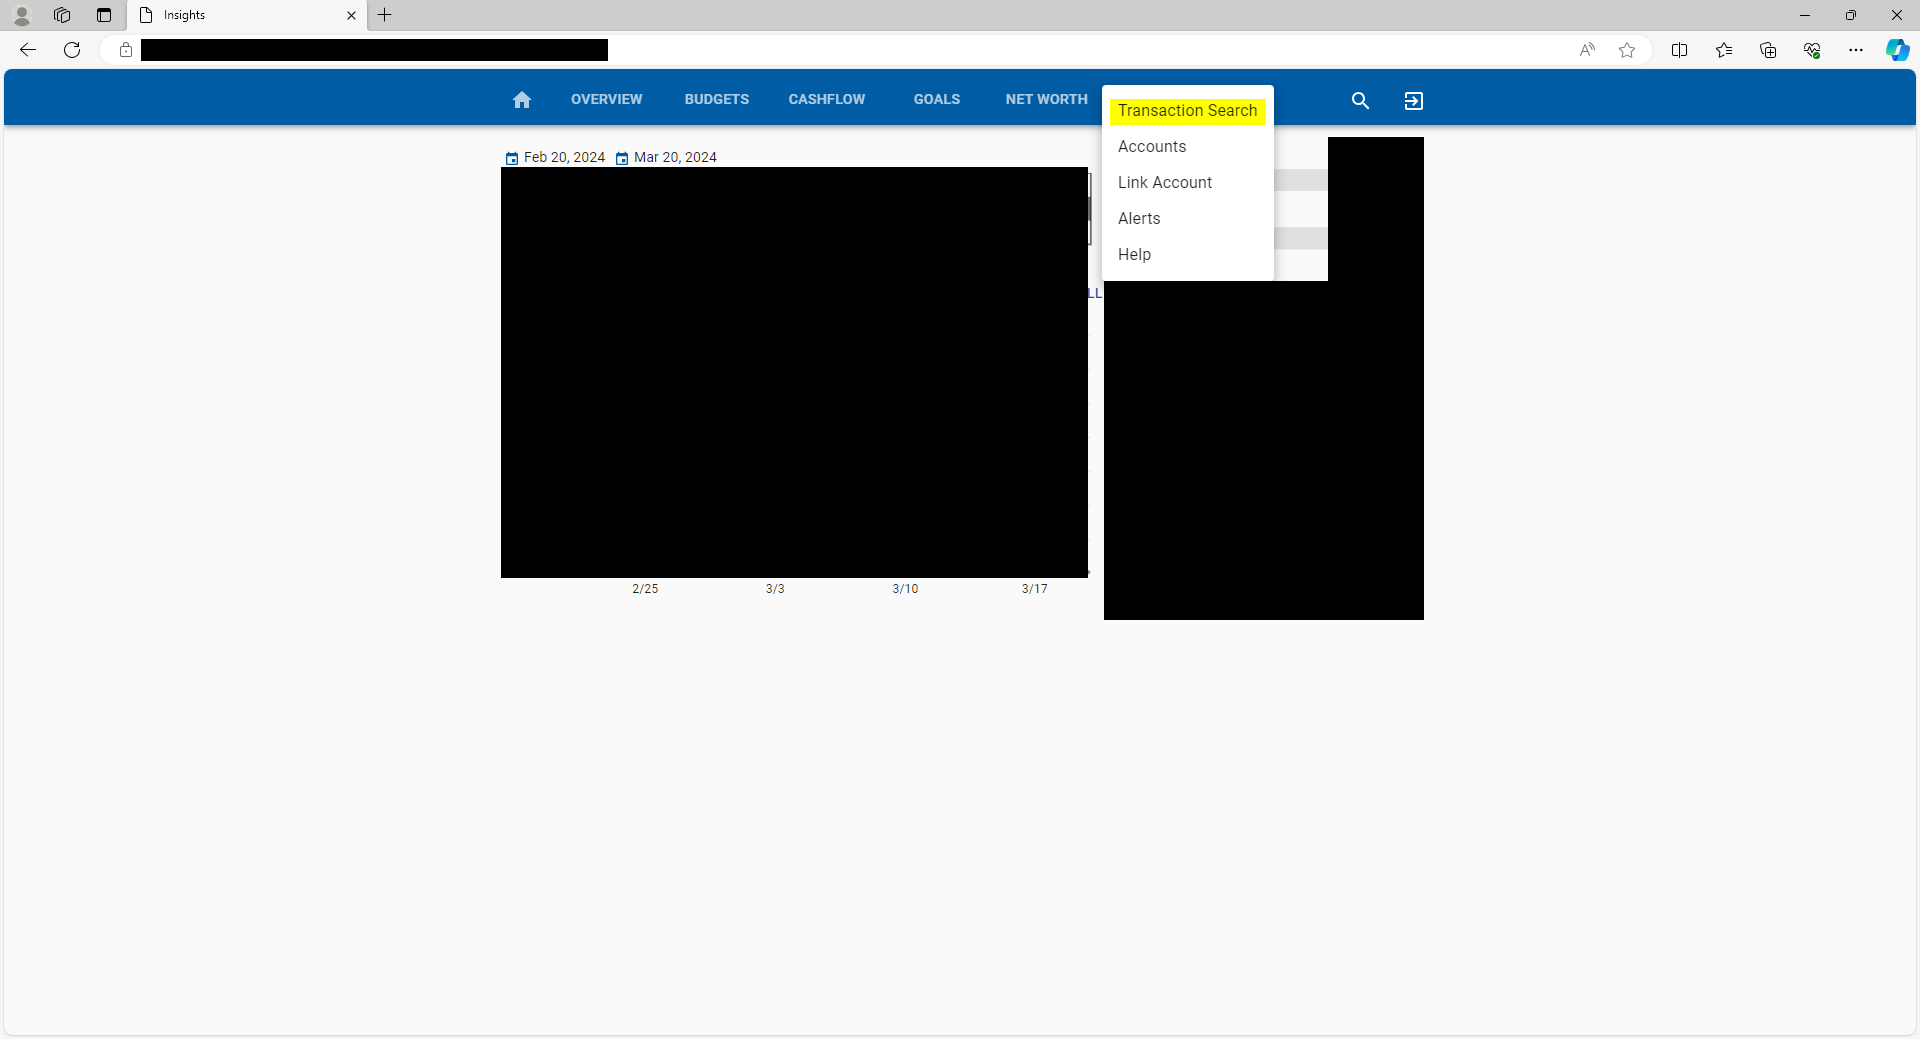
2. From this screen, Click the three vertical dots to open the menu, and select “Transaction Search”
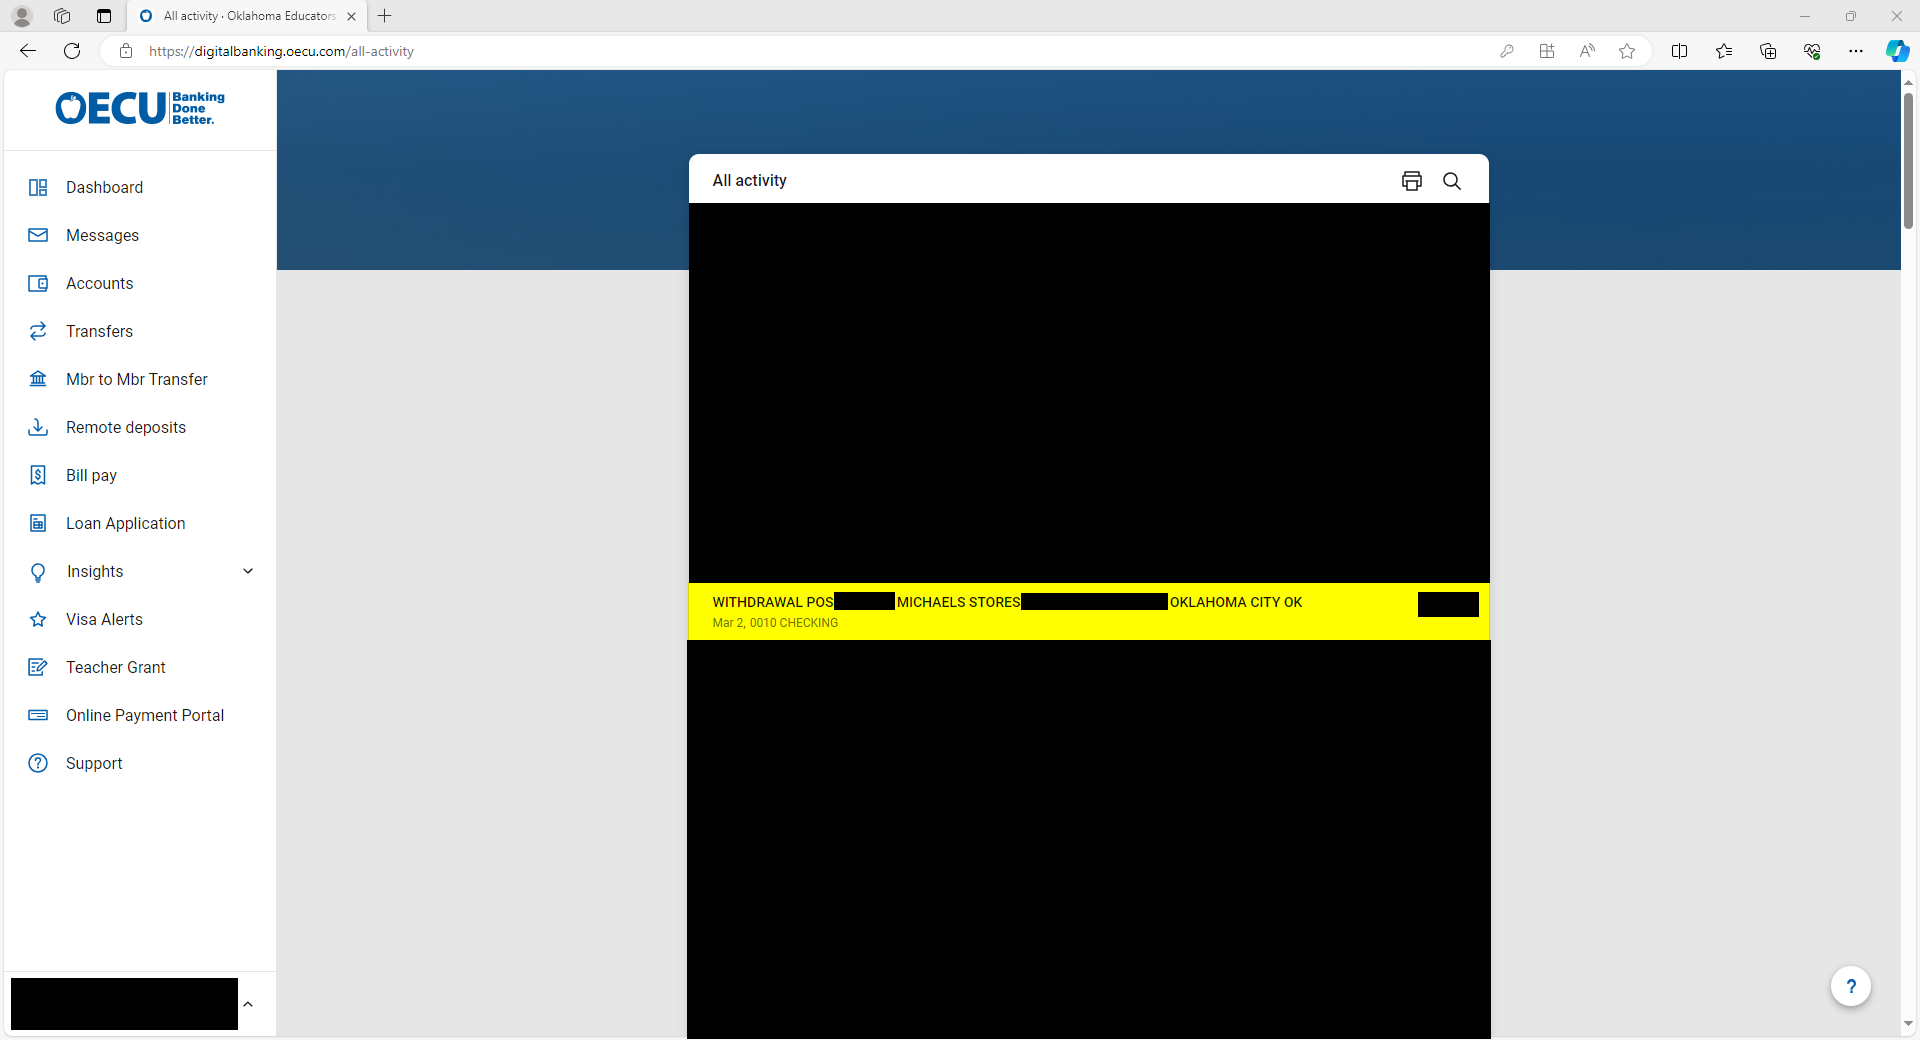
3. From here you can search for a specific transaction, a specific tag, or a date range. To download this information, click the export button to download it to an Excel file.
Make instant or scheduled transfers between your OECU accounts.
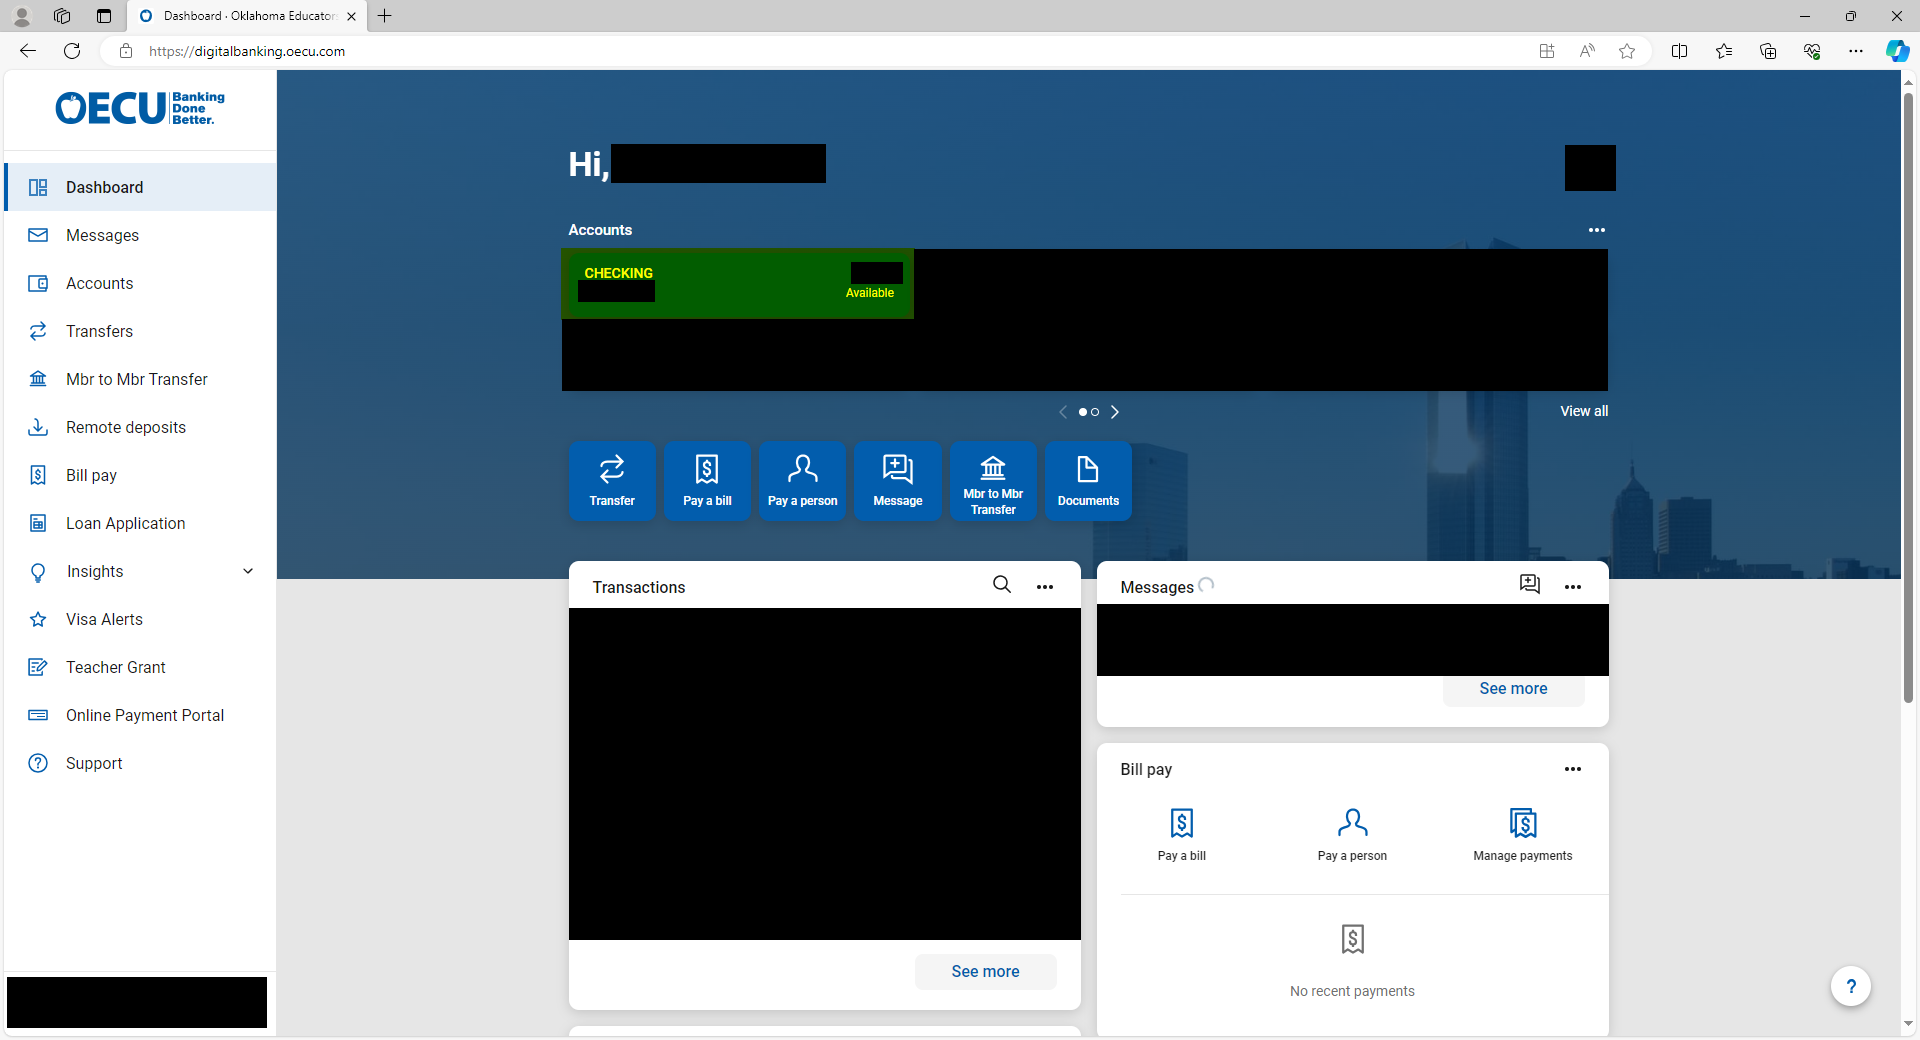
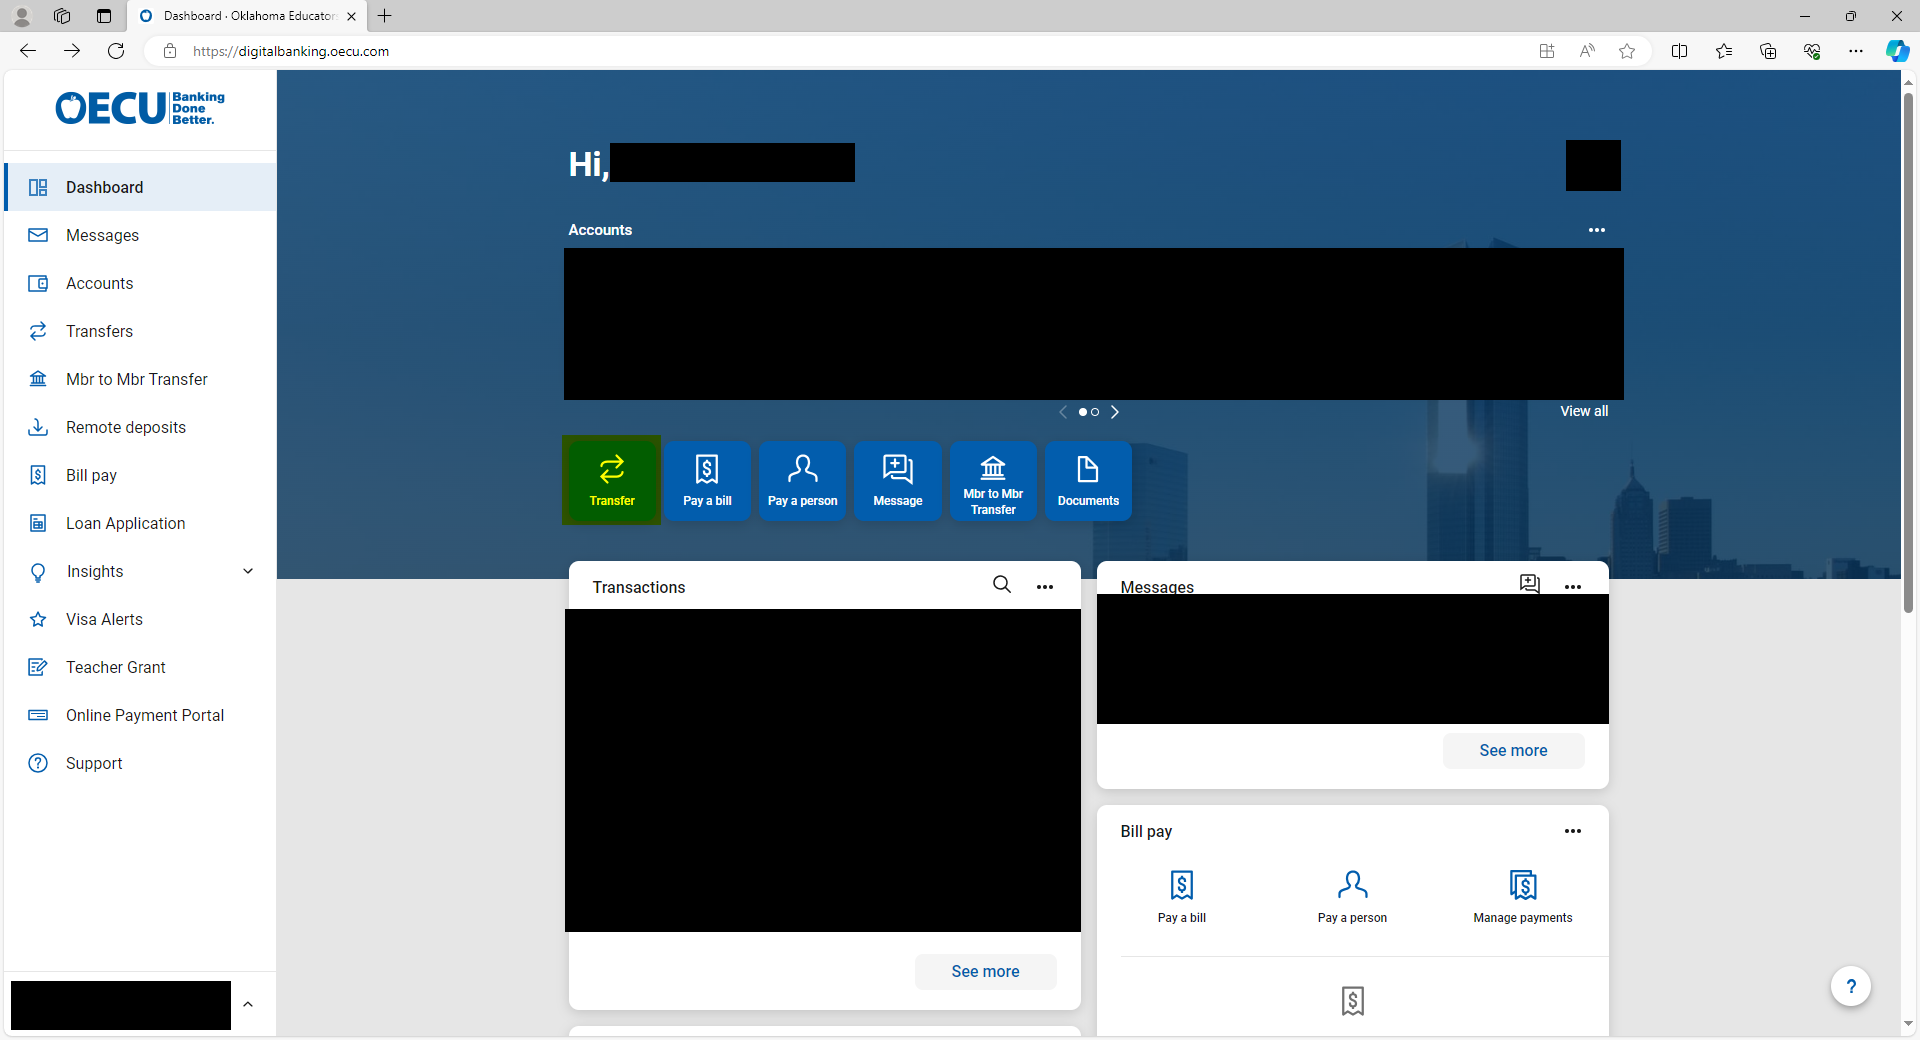
1. Click the “Transfer” button on the main accounts page
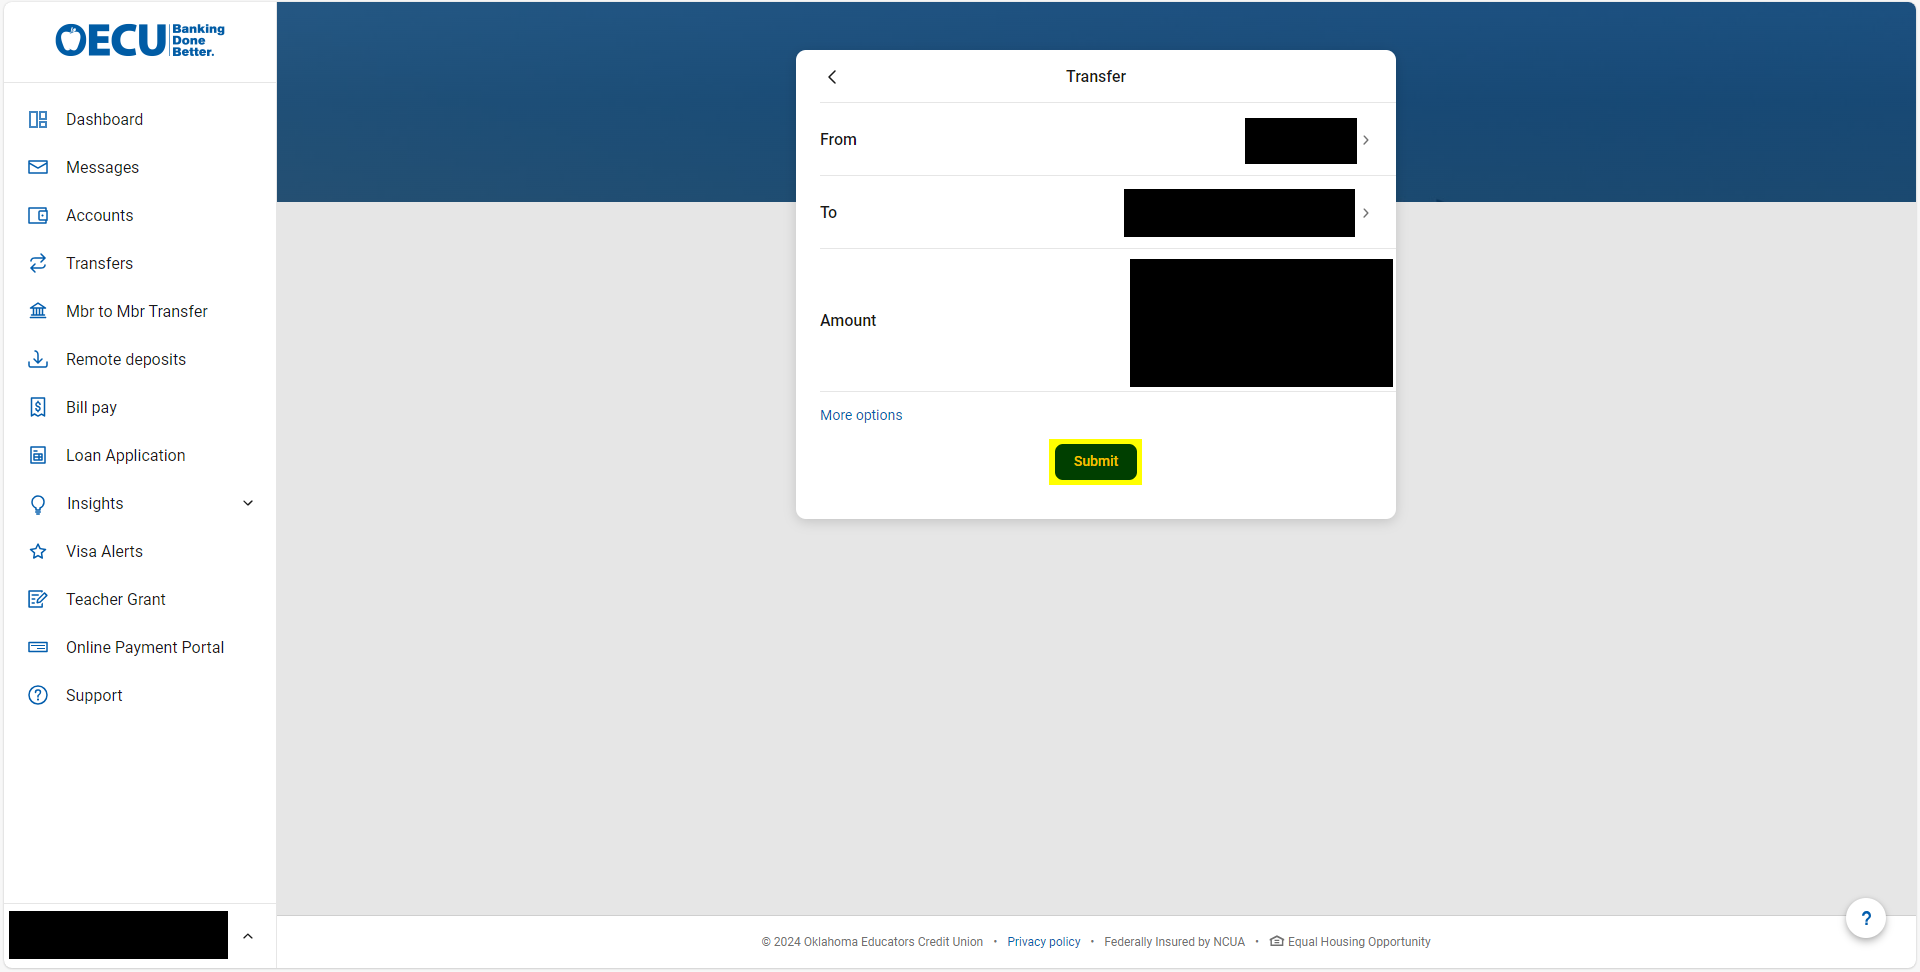
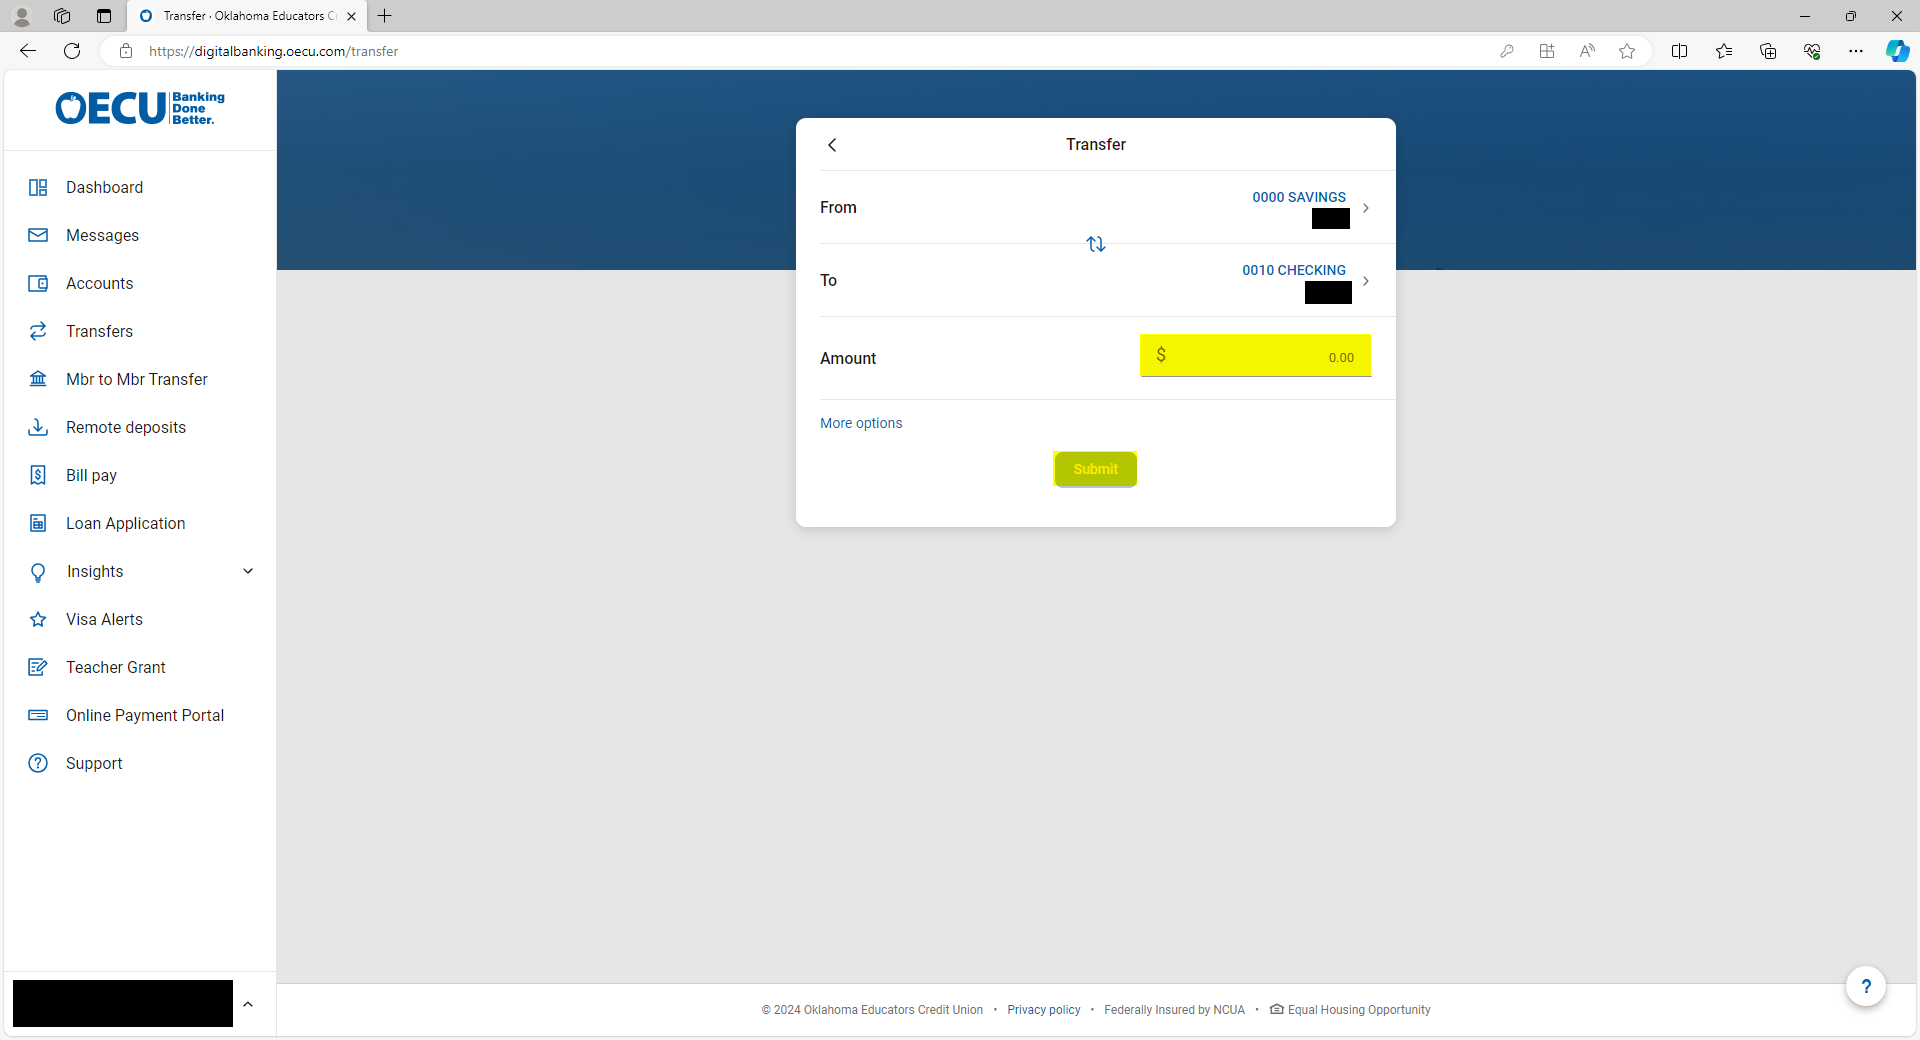
2. Select which account the funds are being transferred from and to, as well as enter the amount being transferred. Then click “Submit”
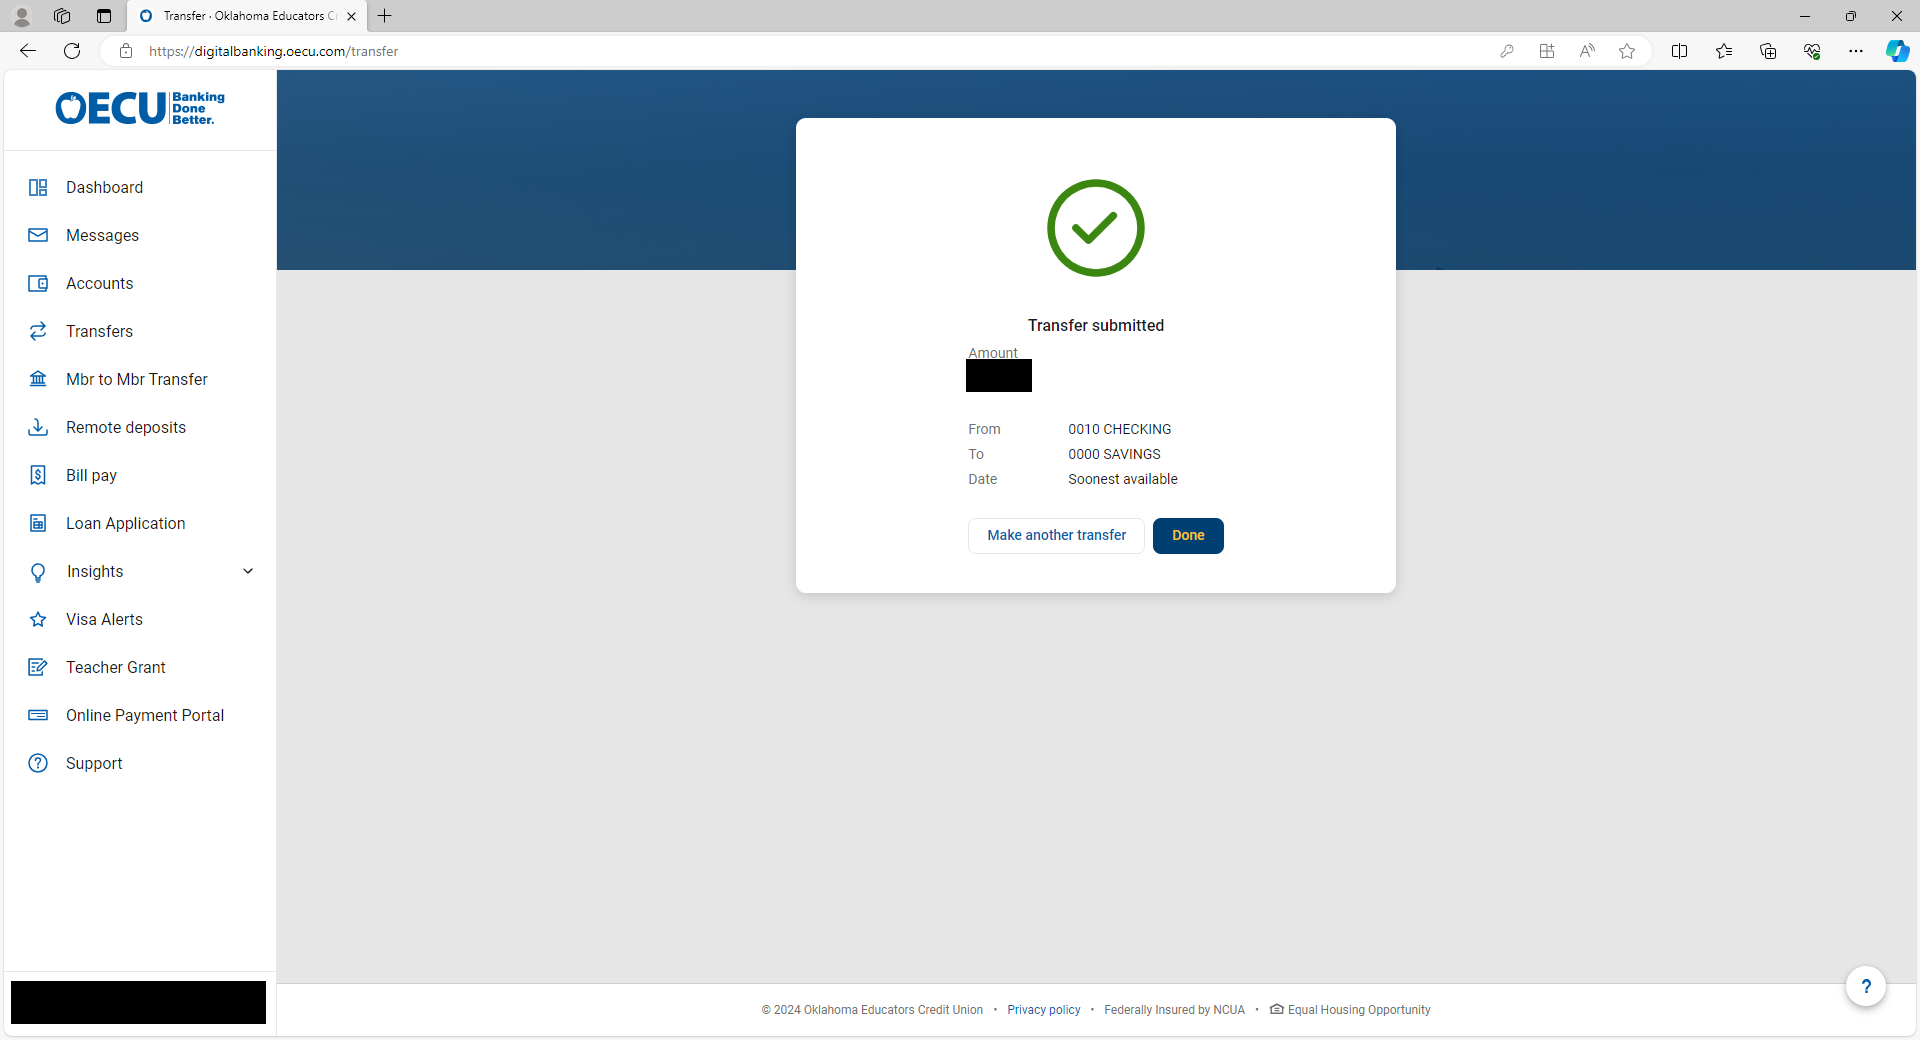
3. After transfer has been submitted, a screen showing that the transfer has been successfully submitted will be shown.
Ability to see pending transactions
(COMING SOON) Card management tools so you can toggle the card on or off, report it lost or stolen, or re-order you card quickly and easily.
1. From the main accounts screen, scroll down to see the tile labelled “Card Management”. Select the card you wish to work with.
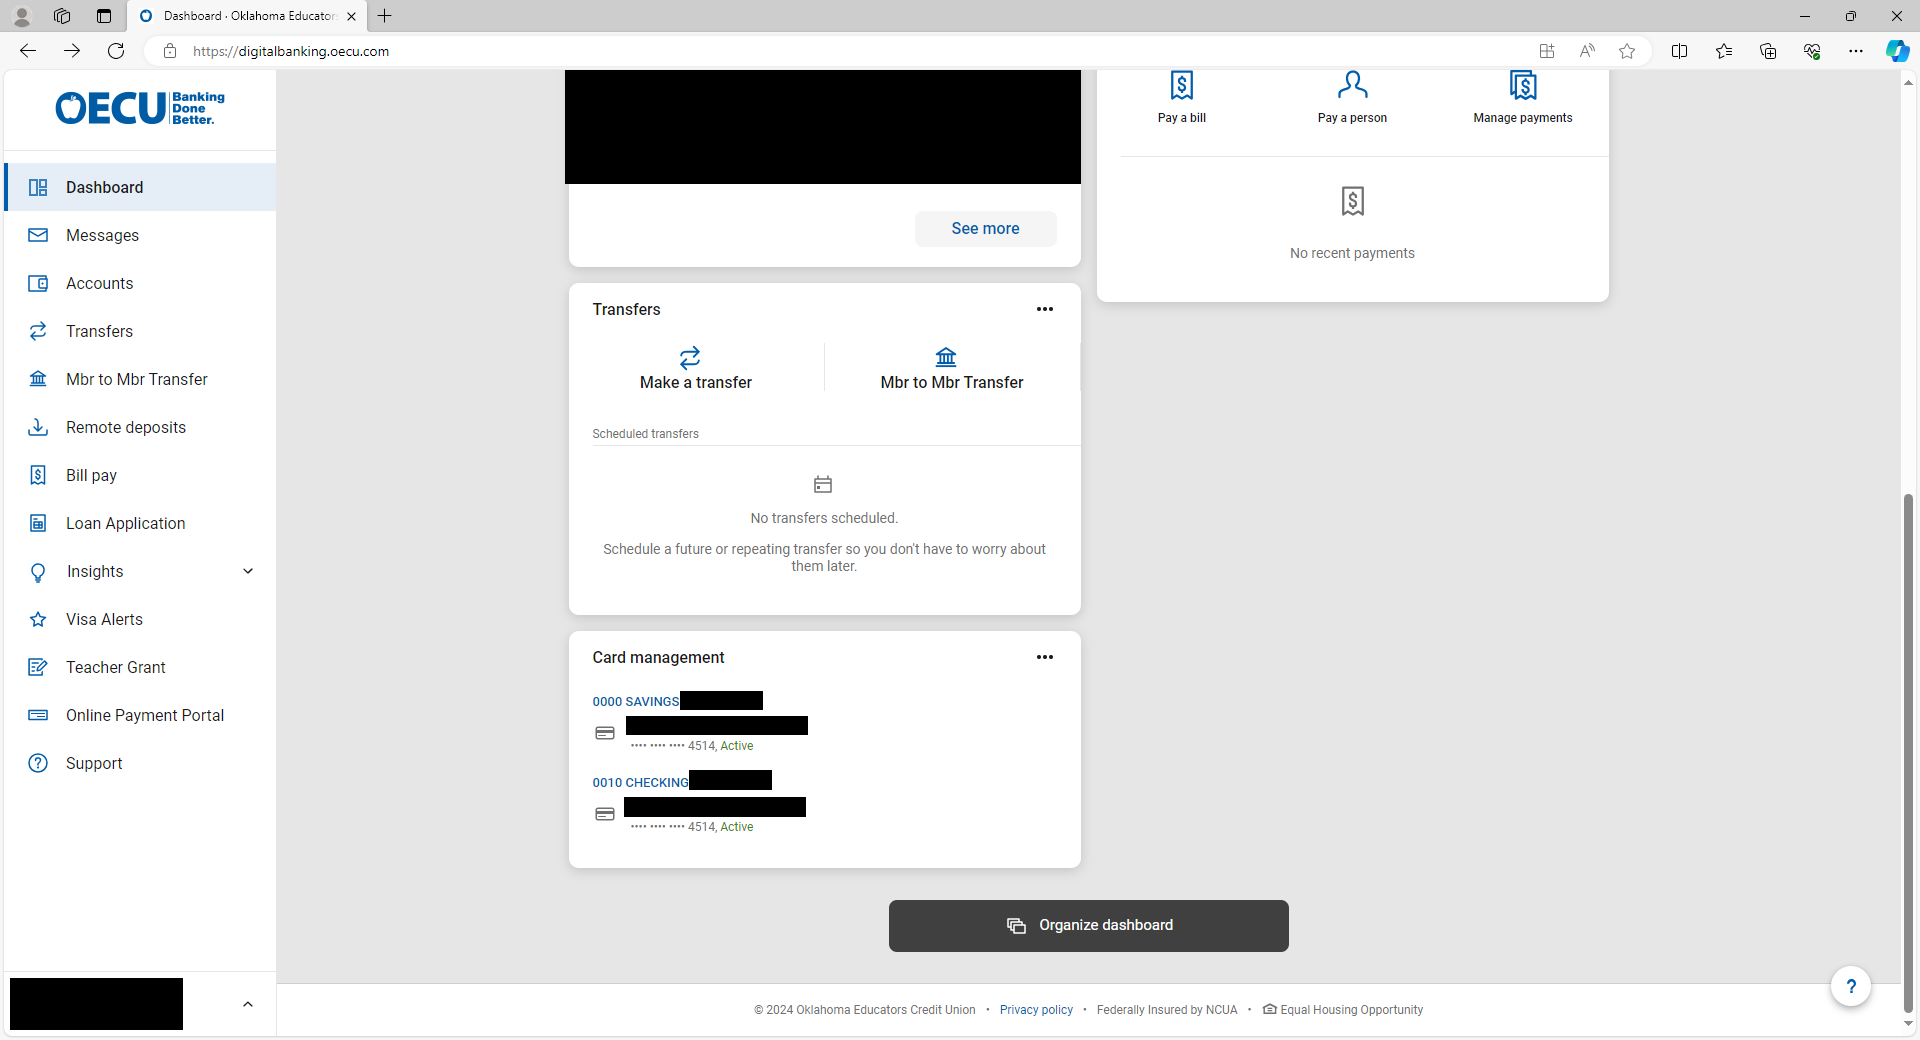
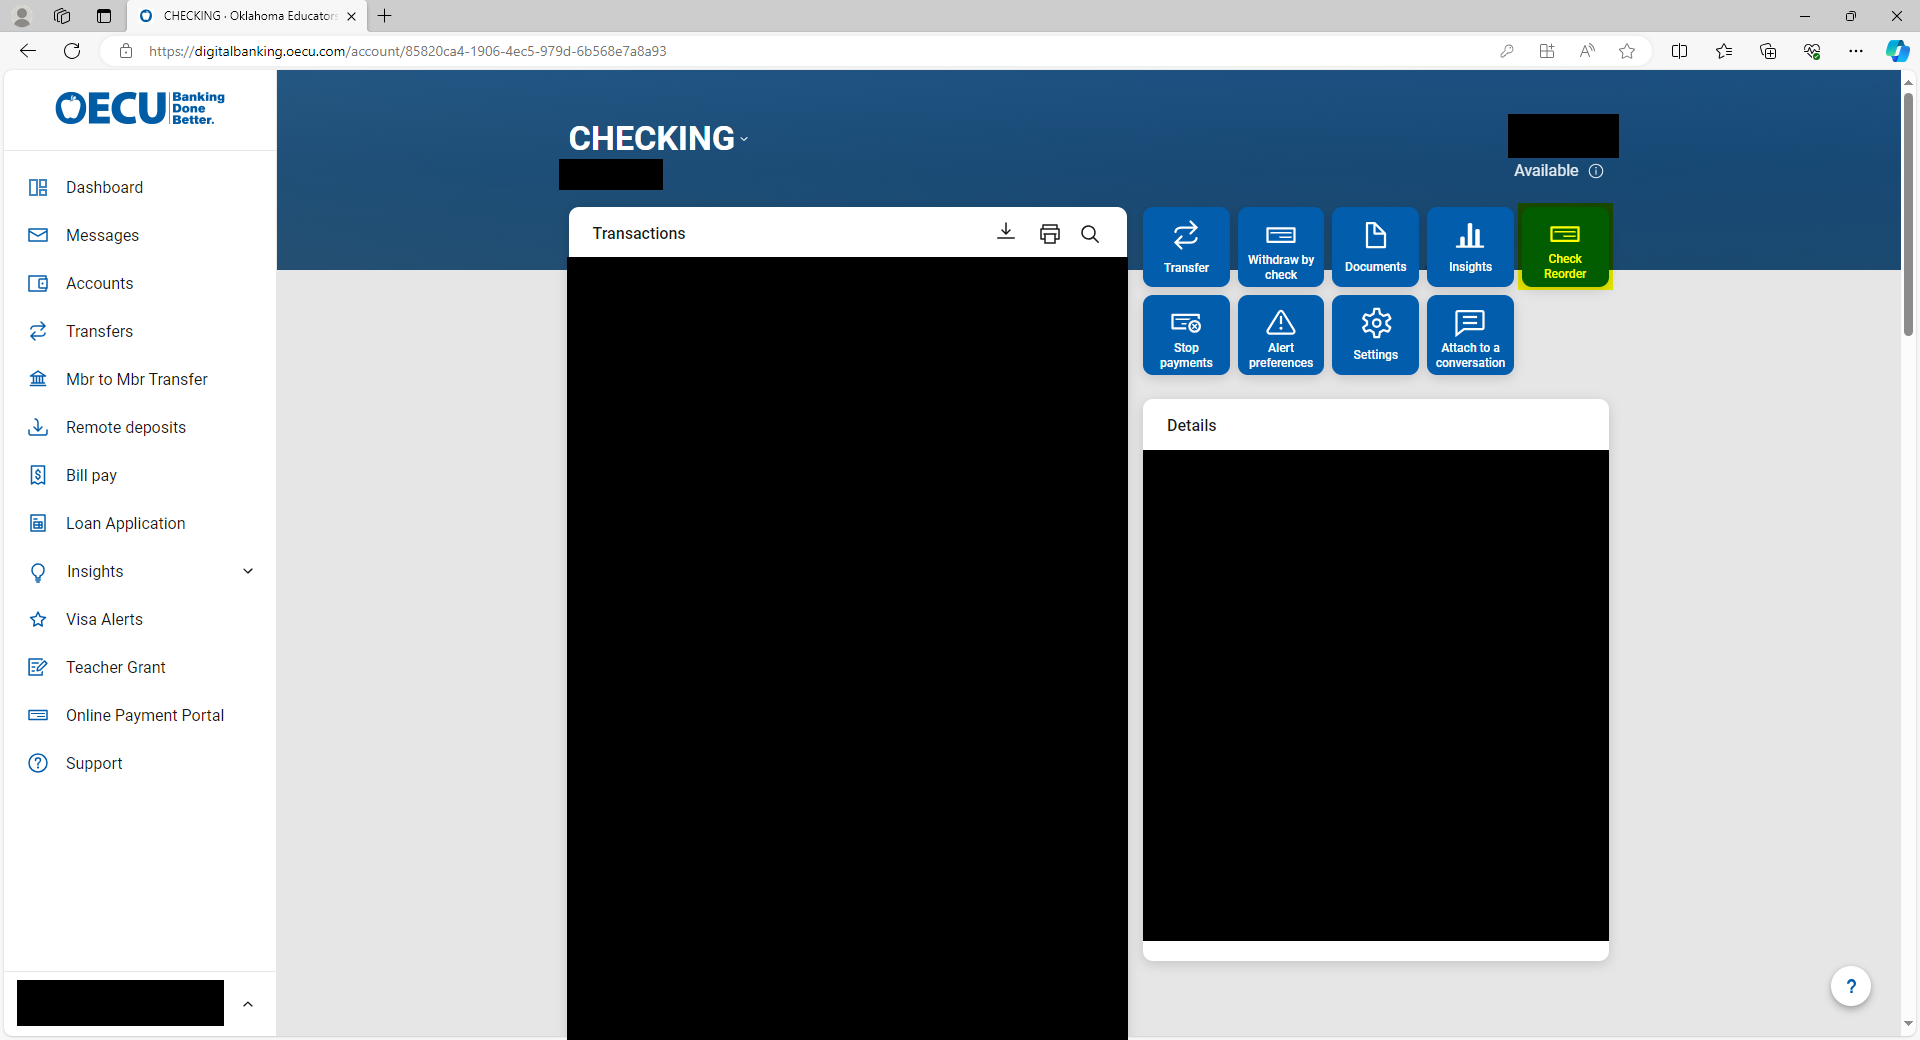
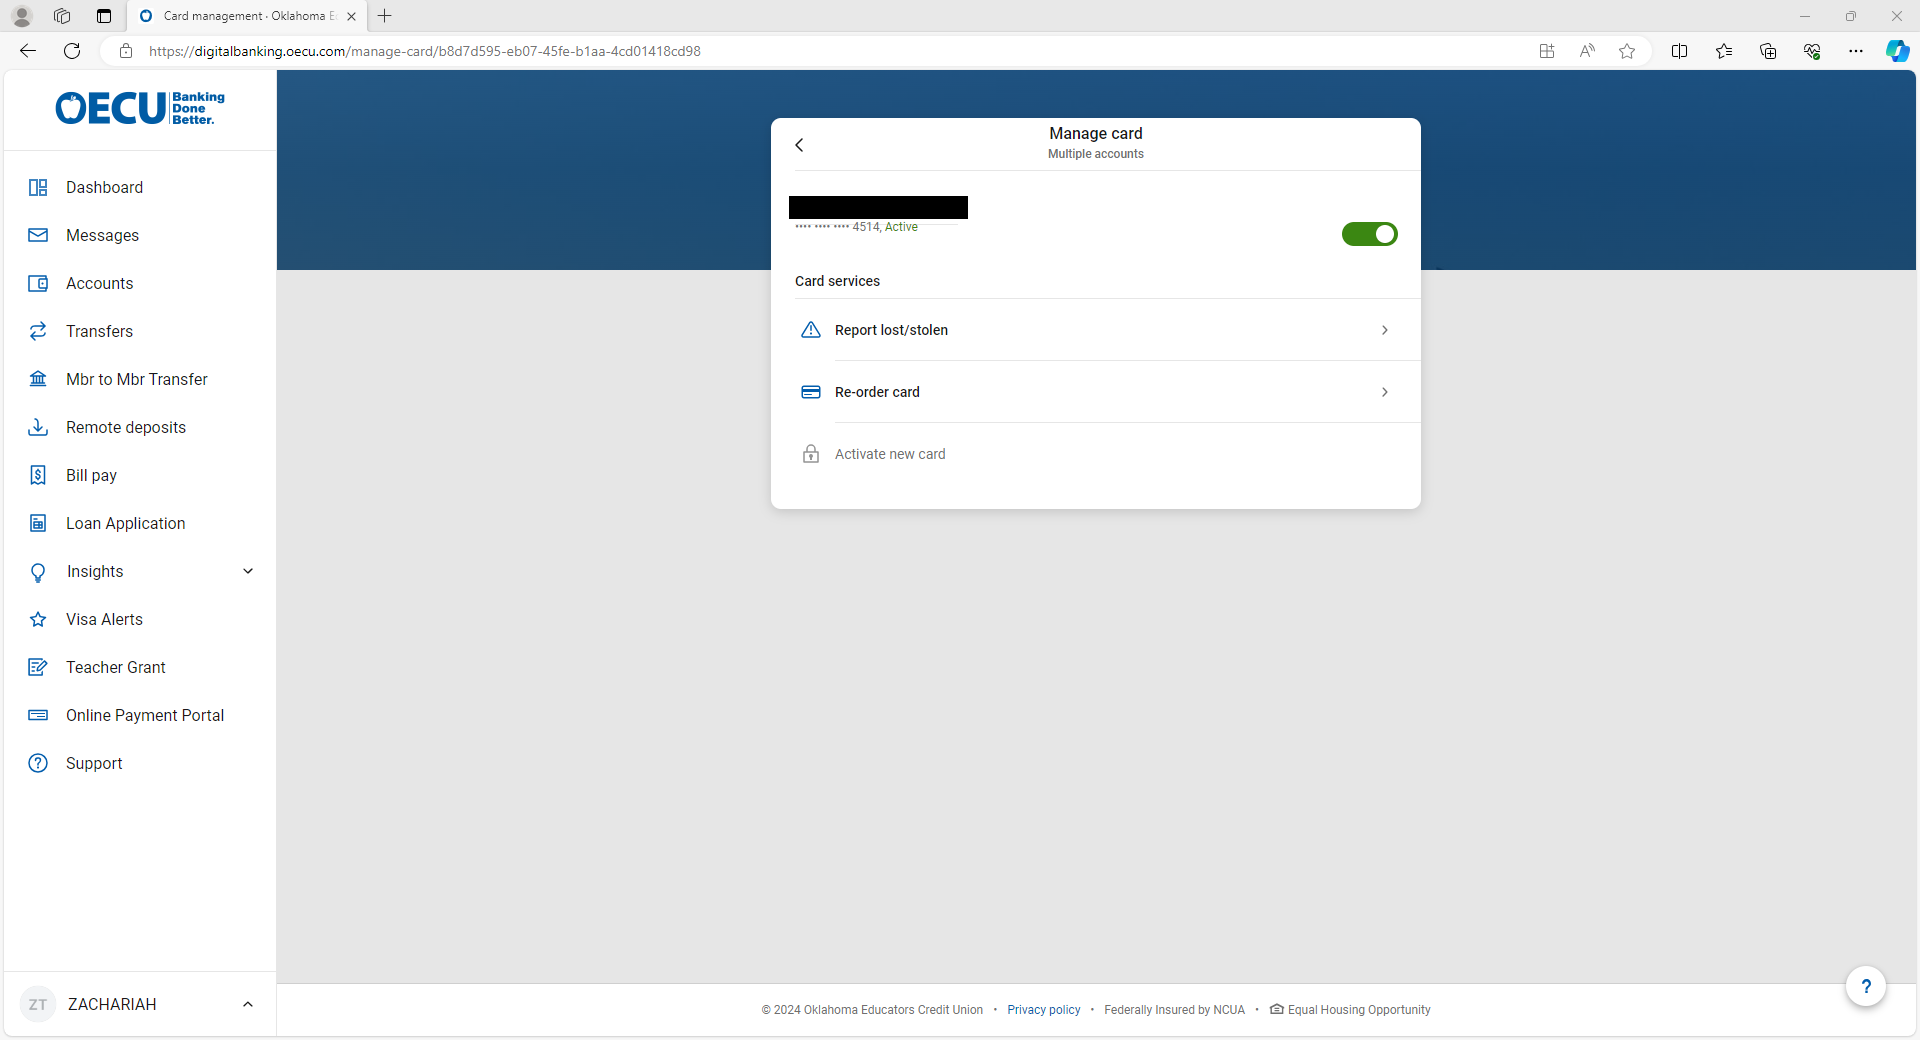
2. From this screen, you can use the toggle to either lock or unlock your card, report a lost/stolen card, and even Re-order a card. You can also activate a new card by selecting that card once you receive it.
DASHBOARD
Ability to organize the dashboard to fit your experience
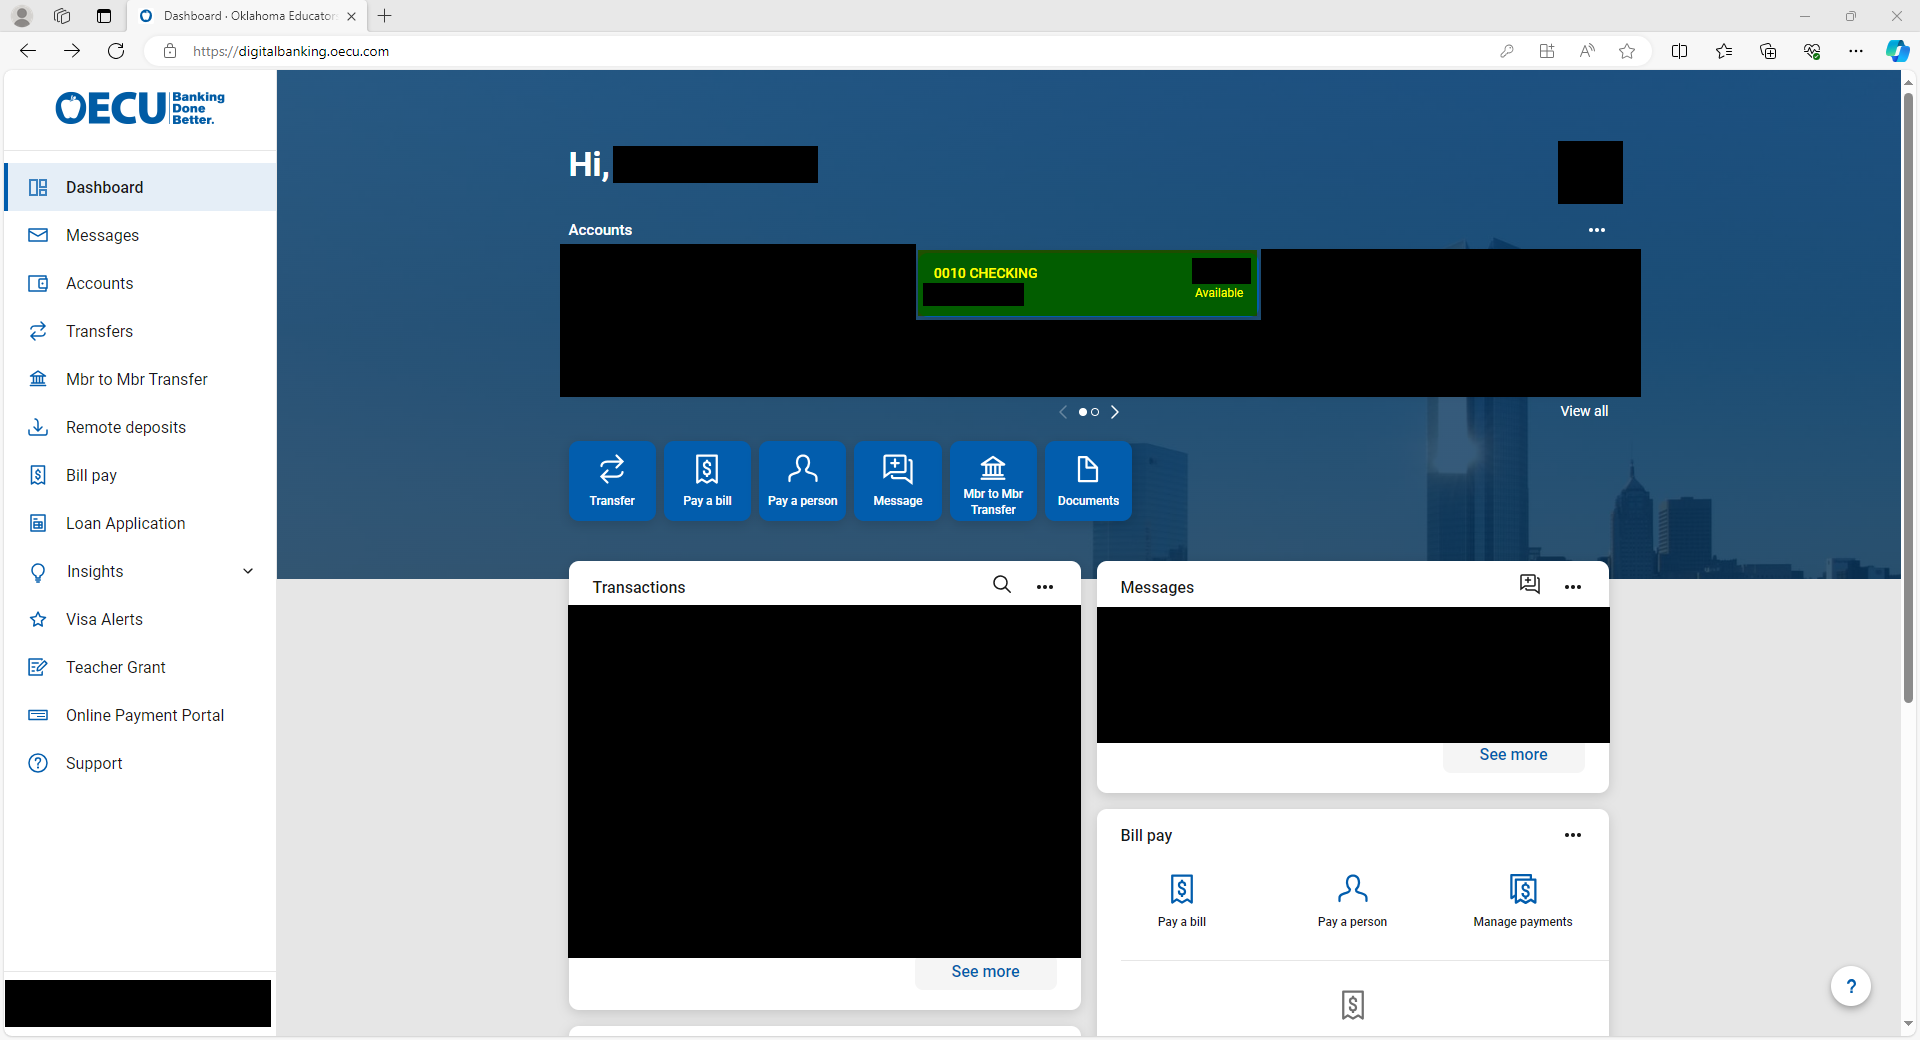
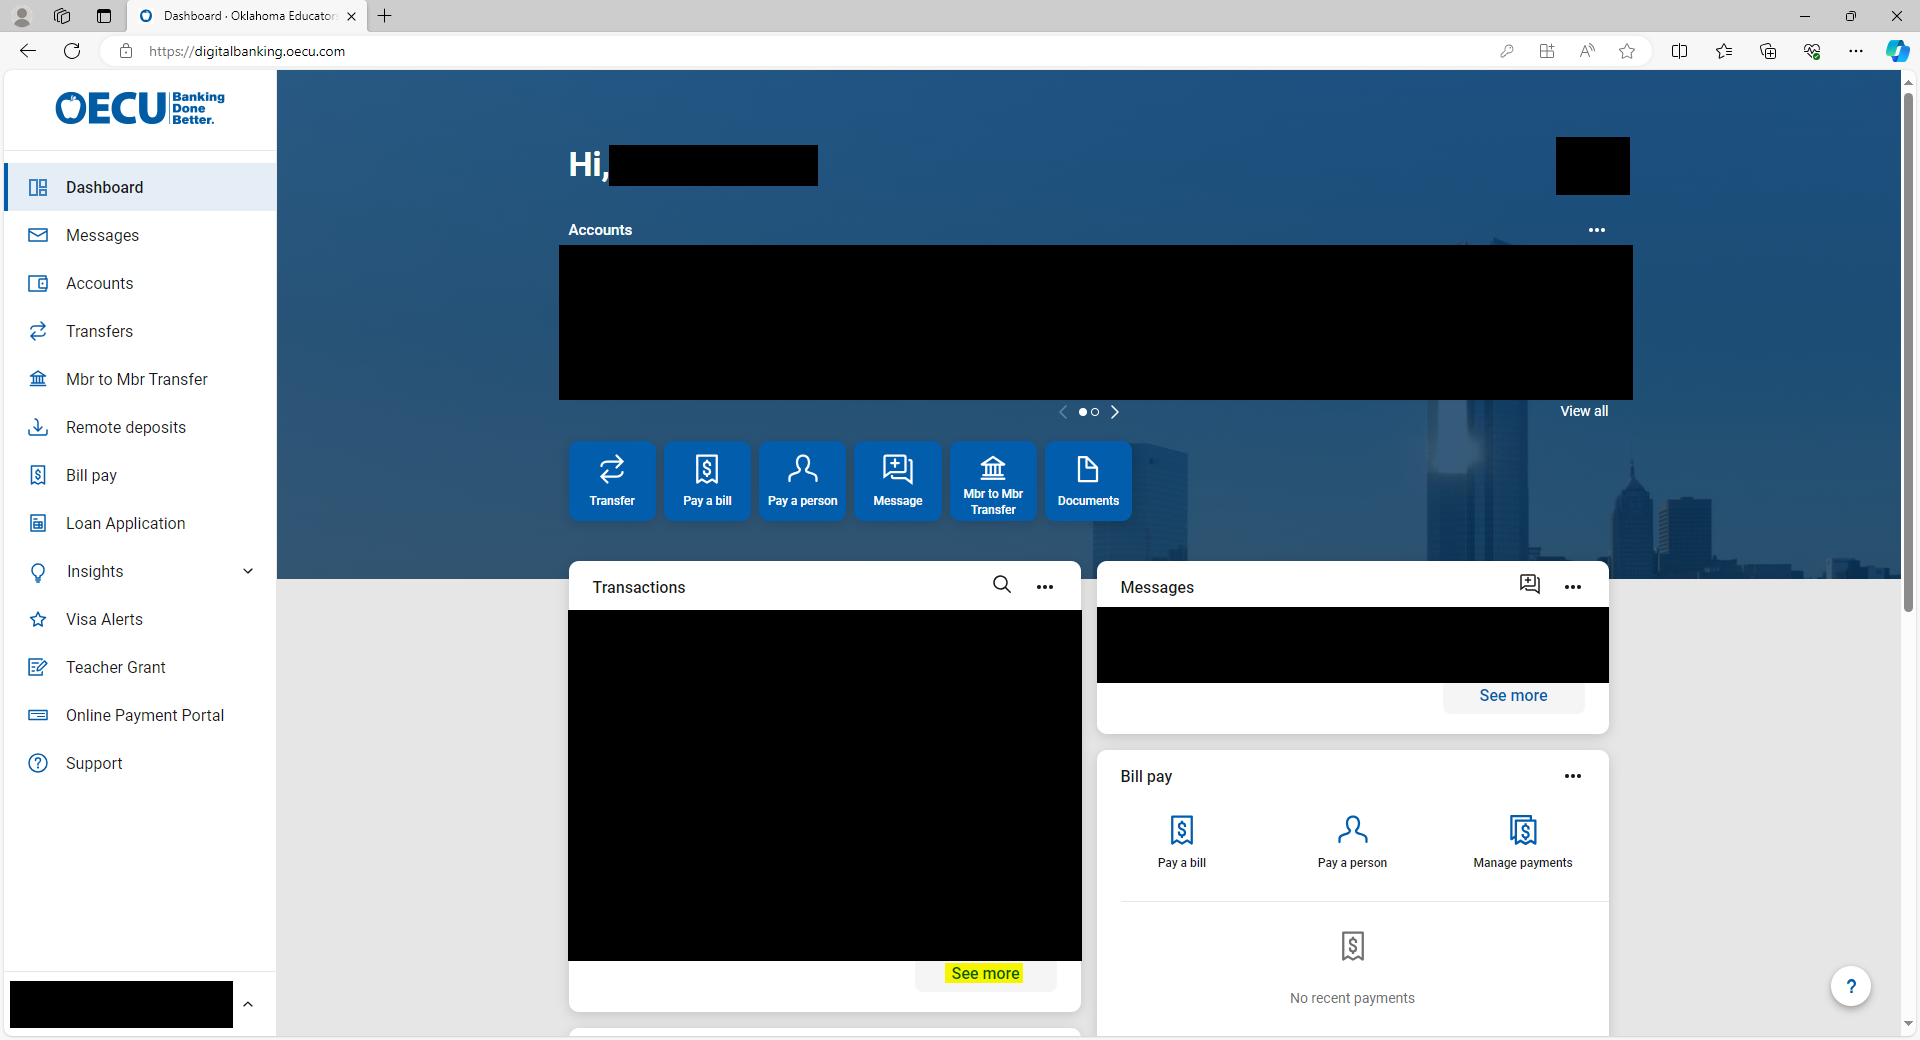
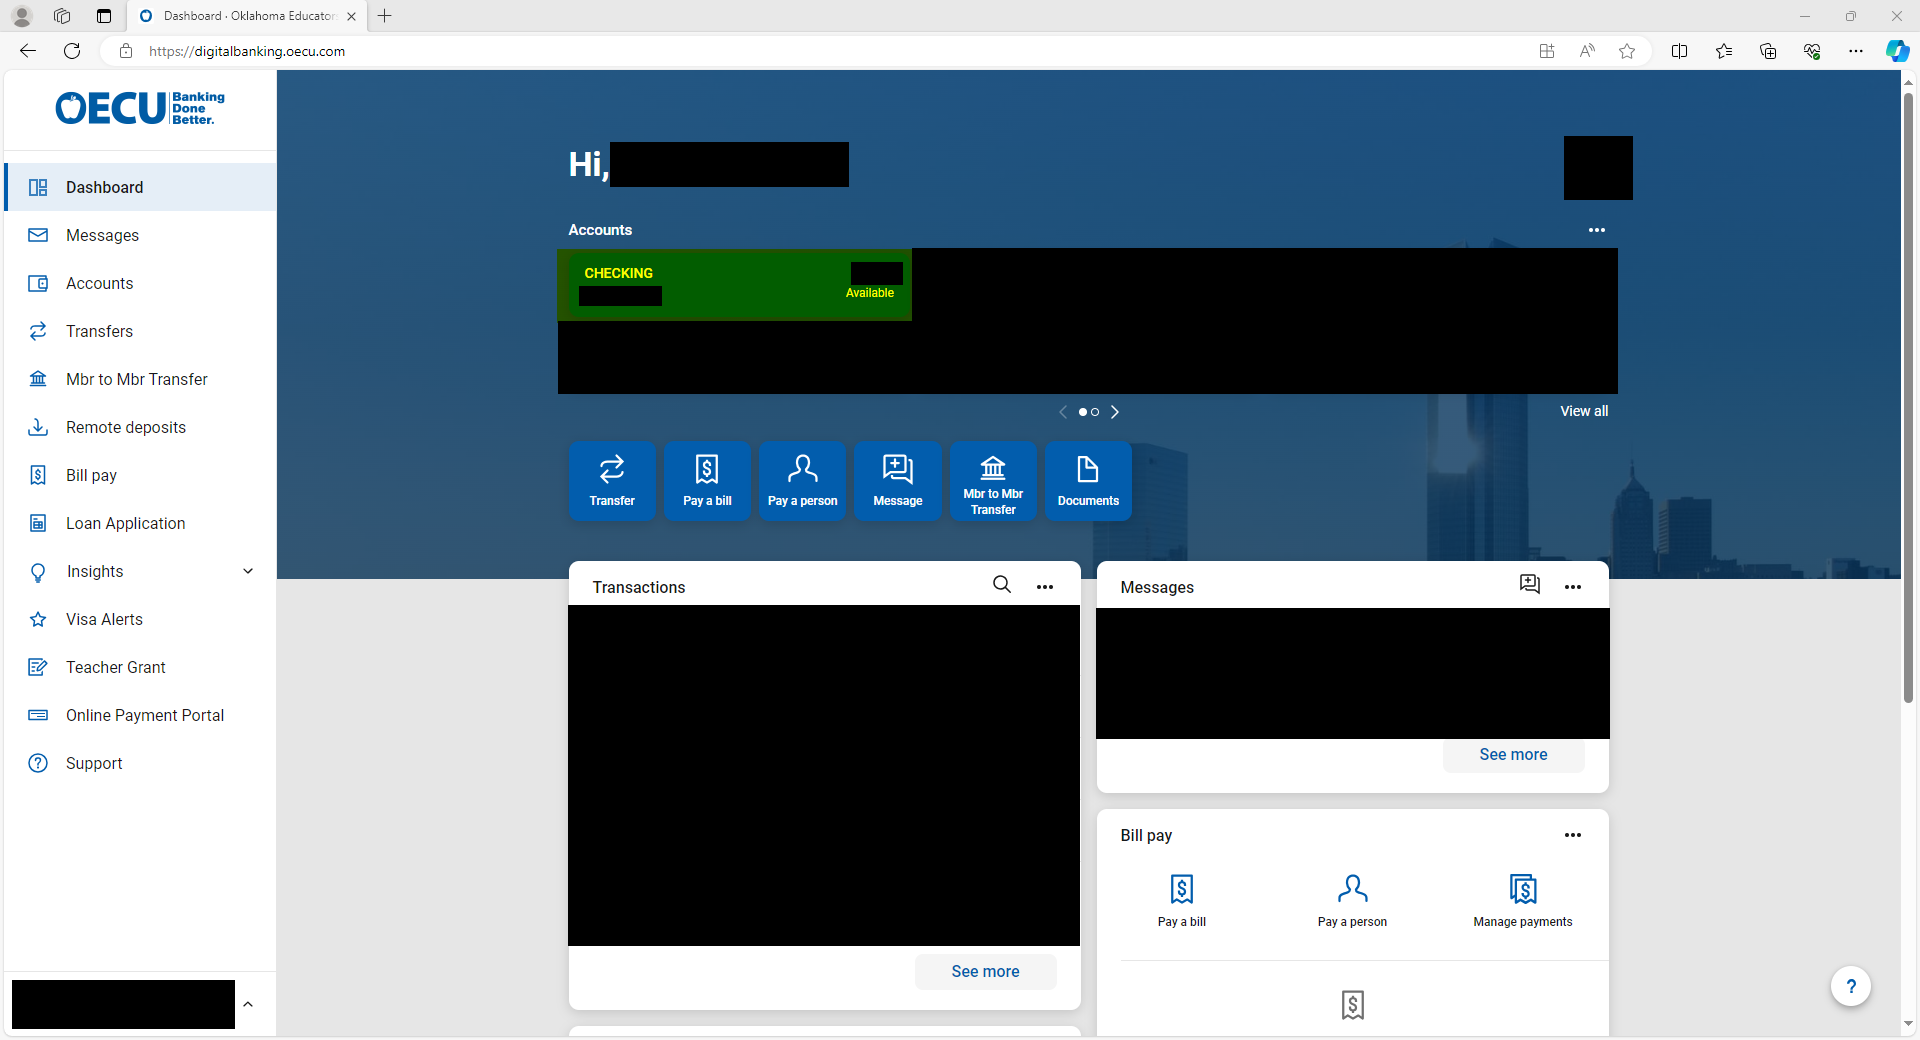
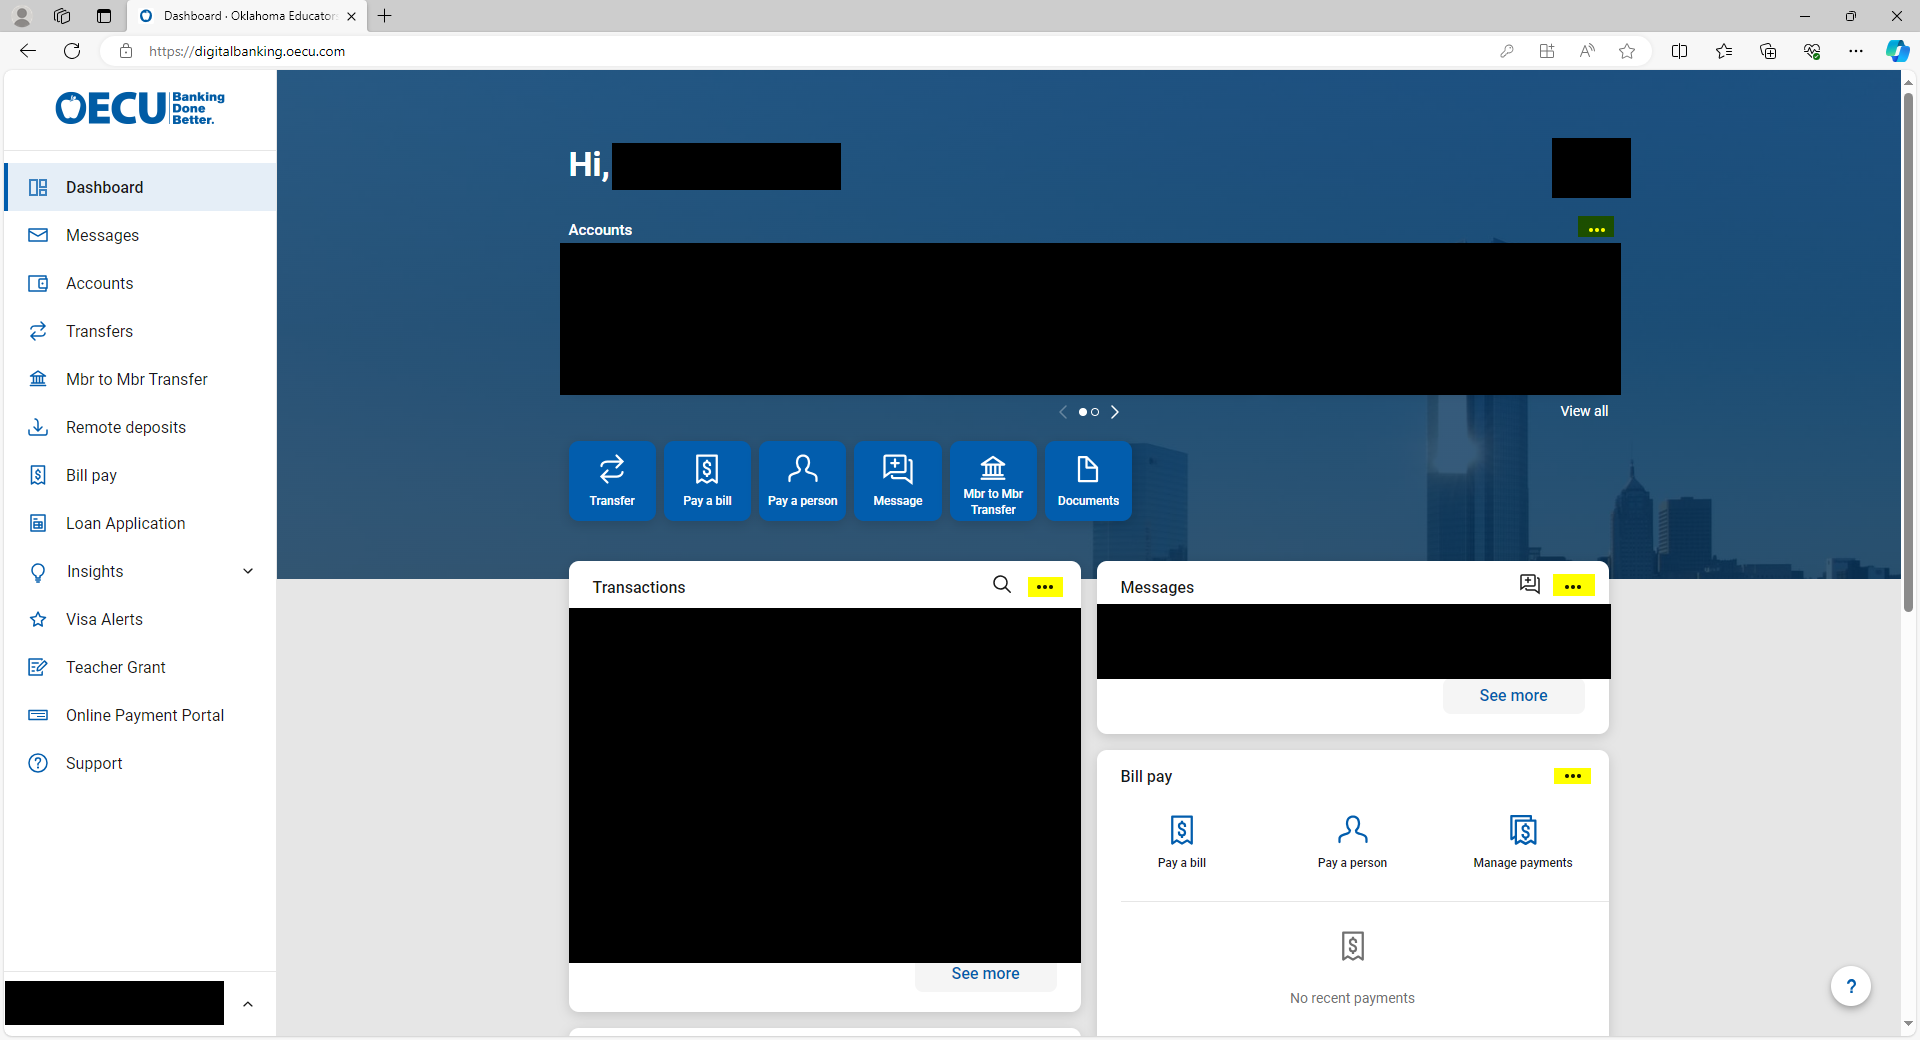
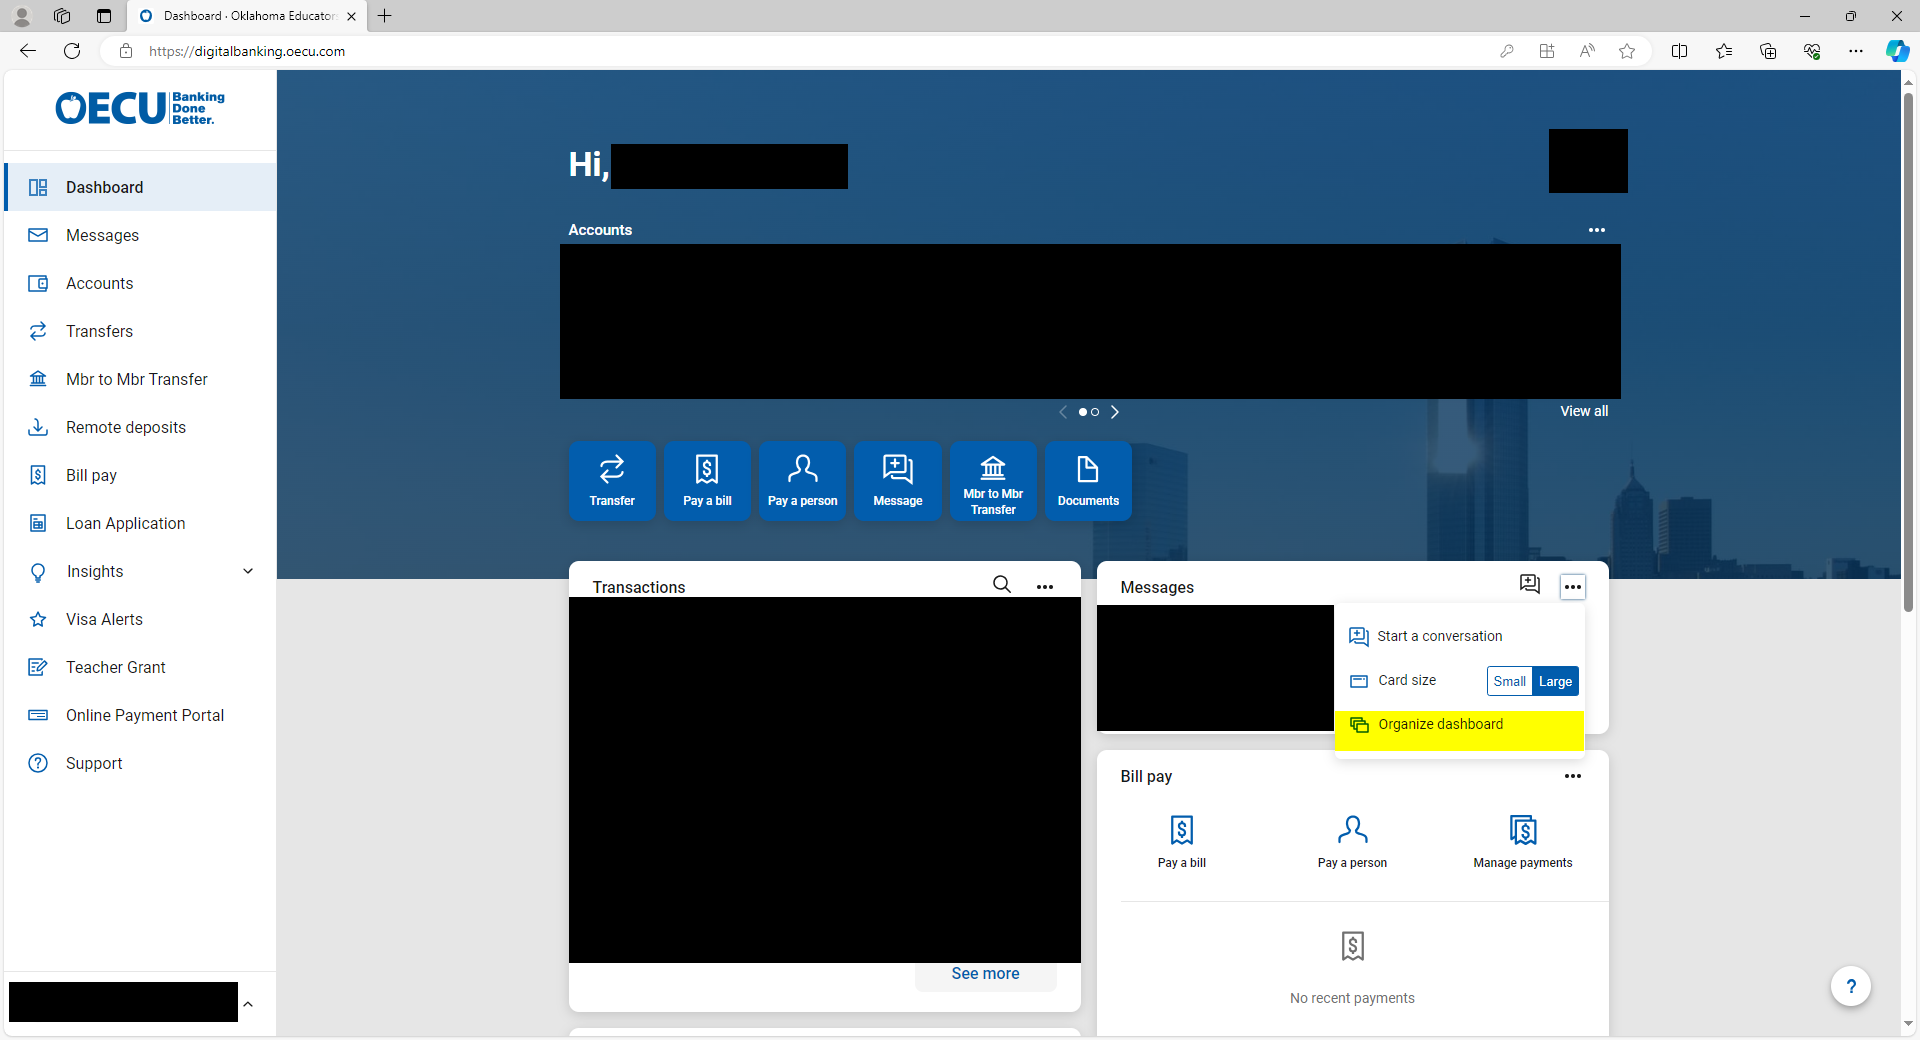
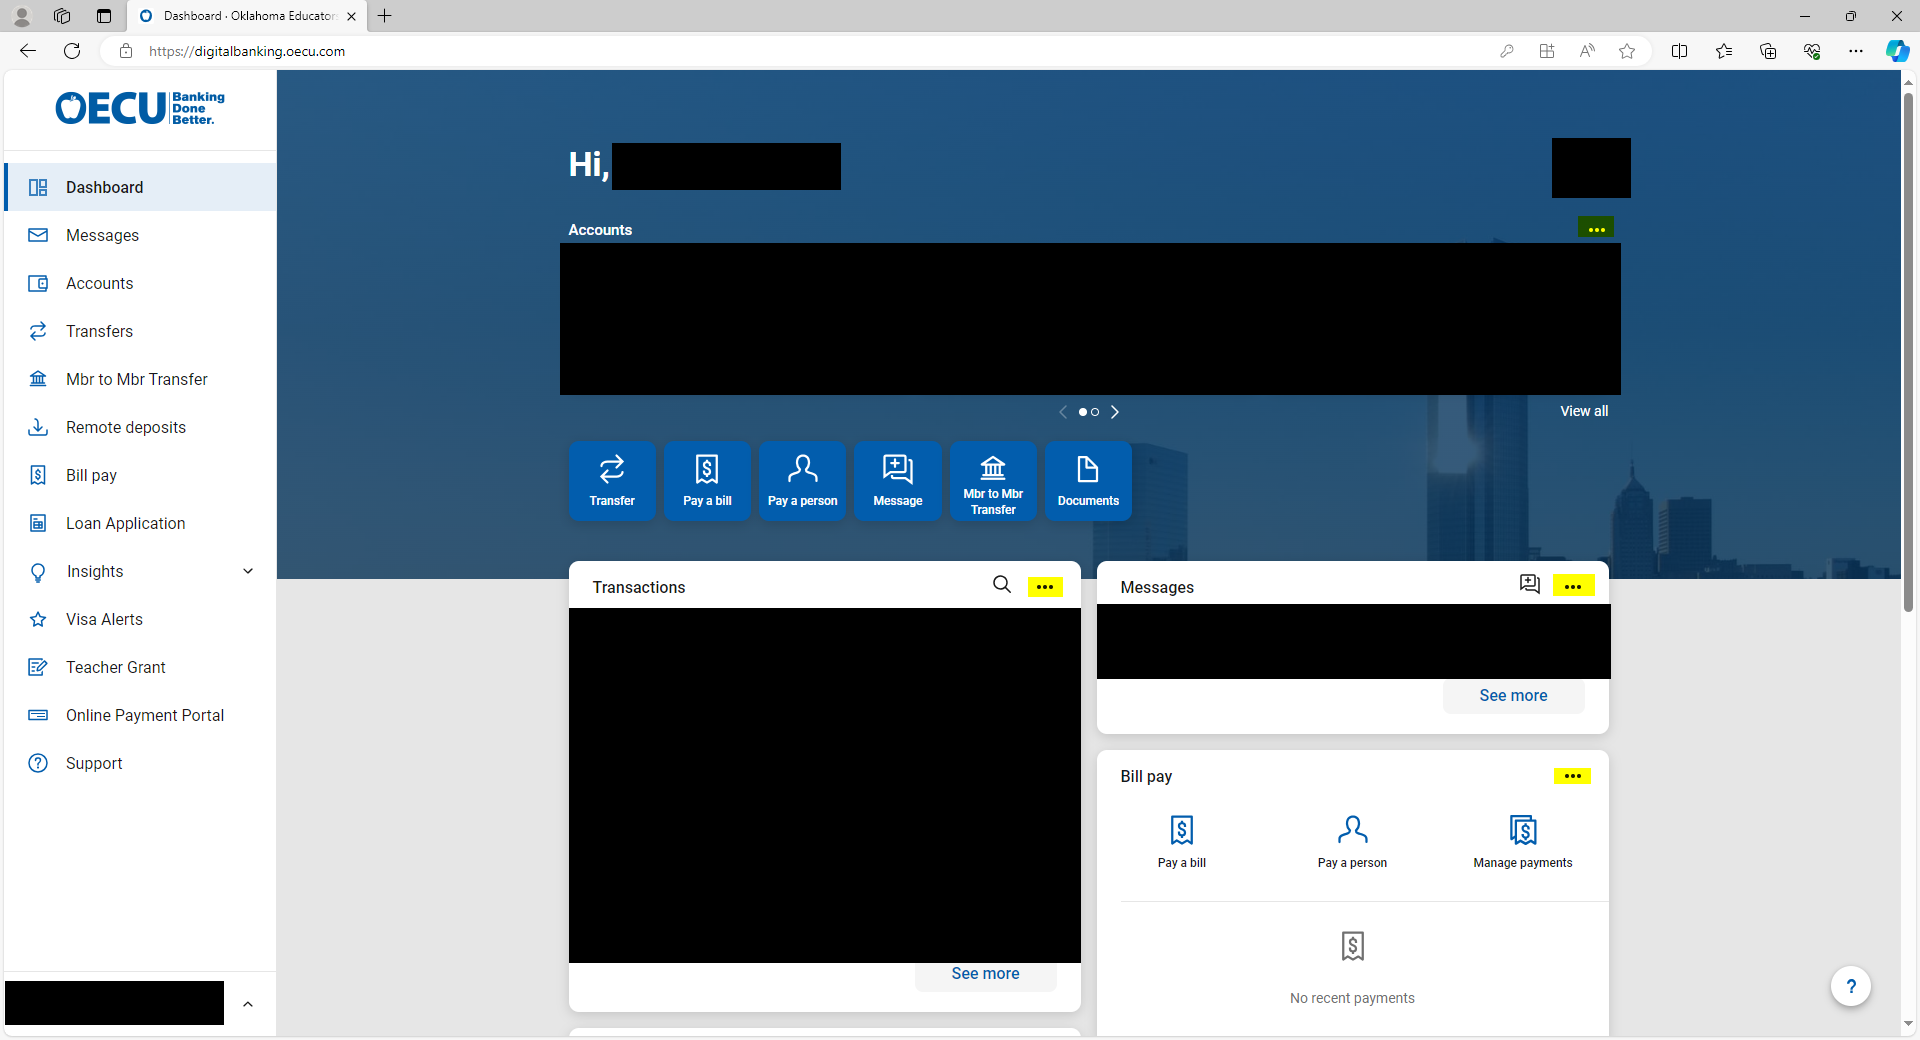
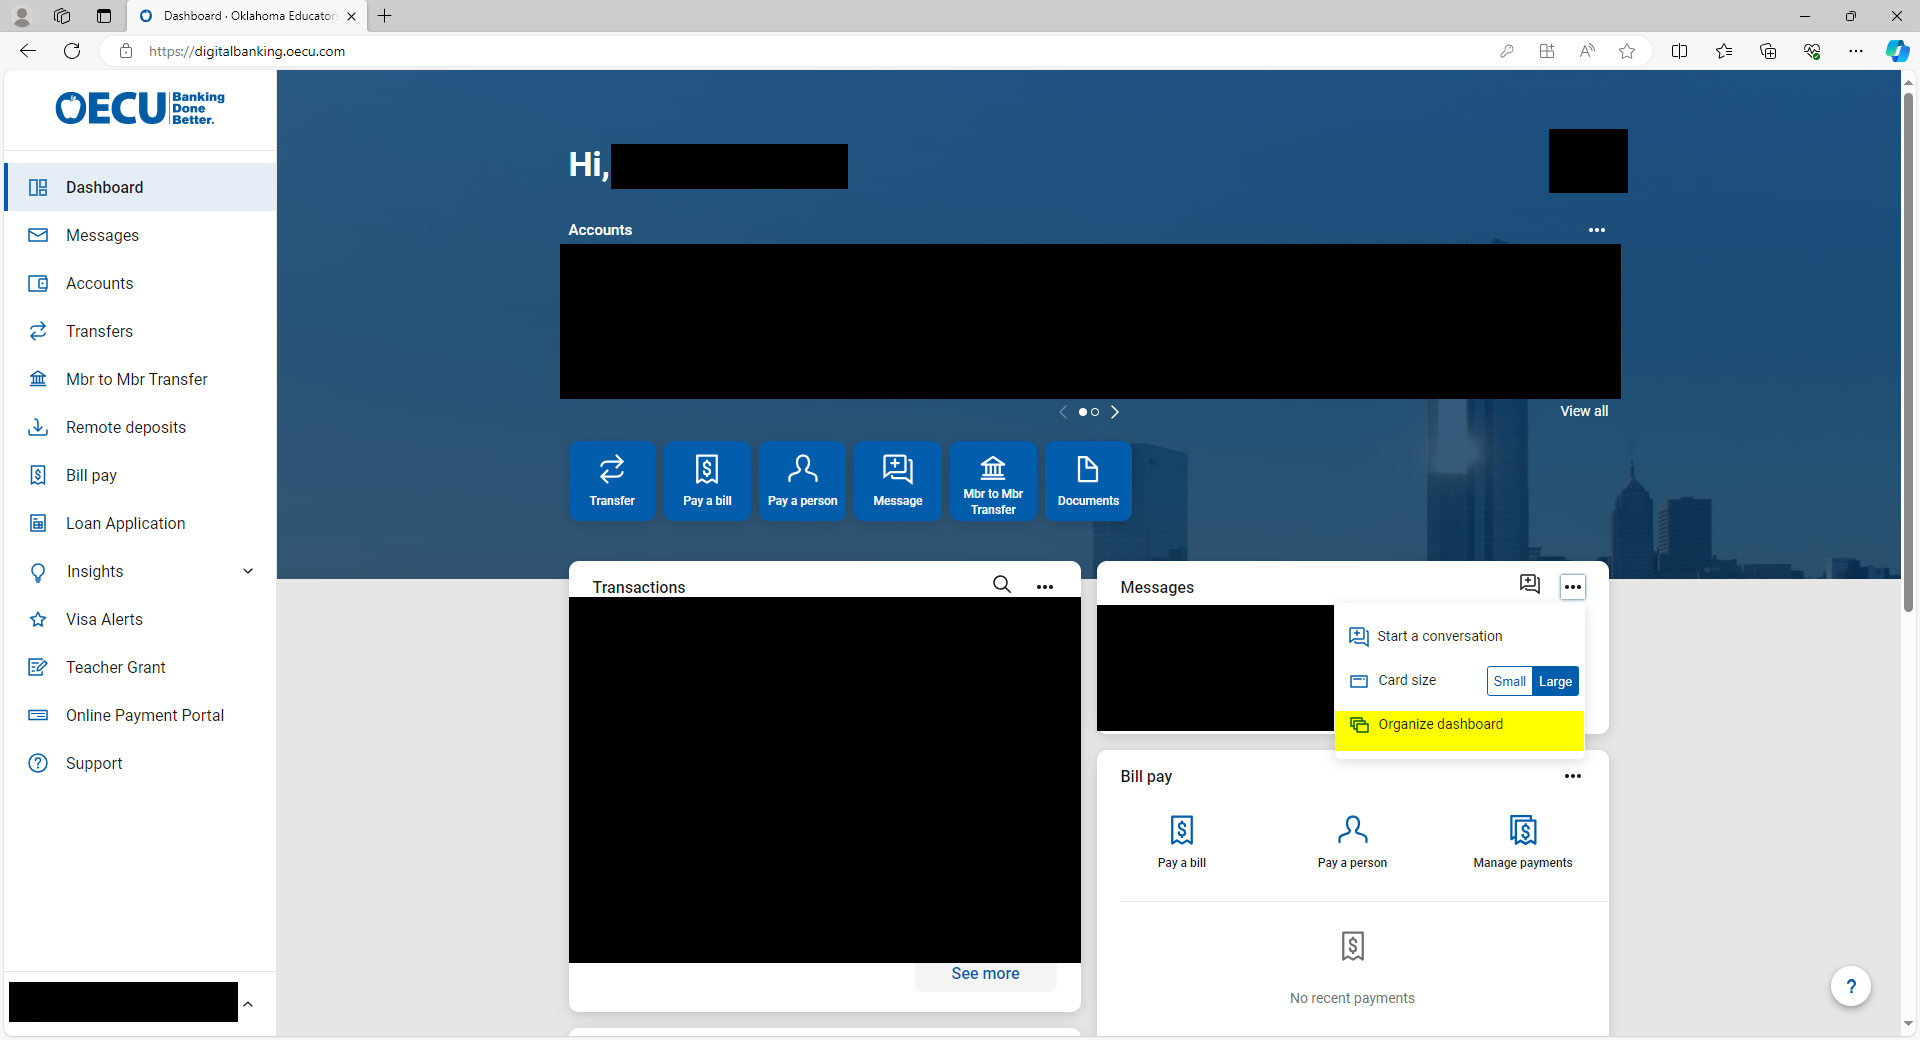
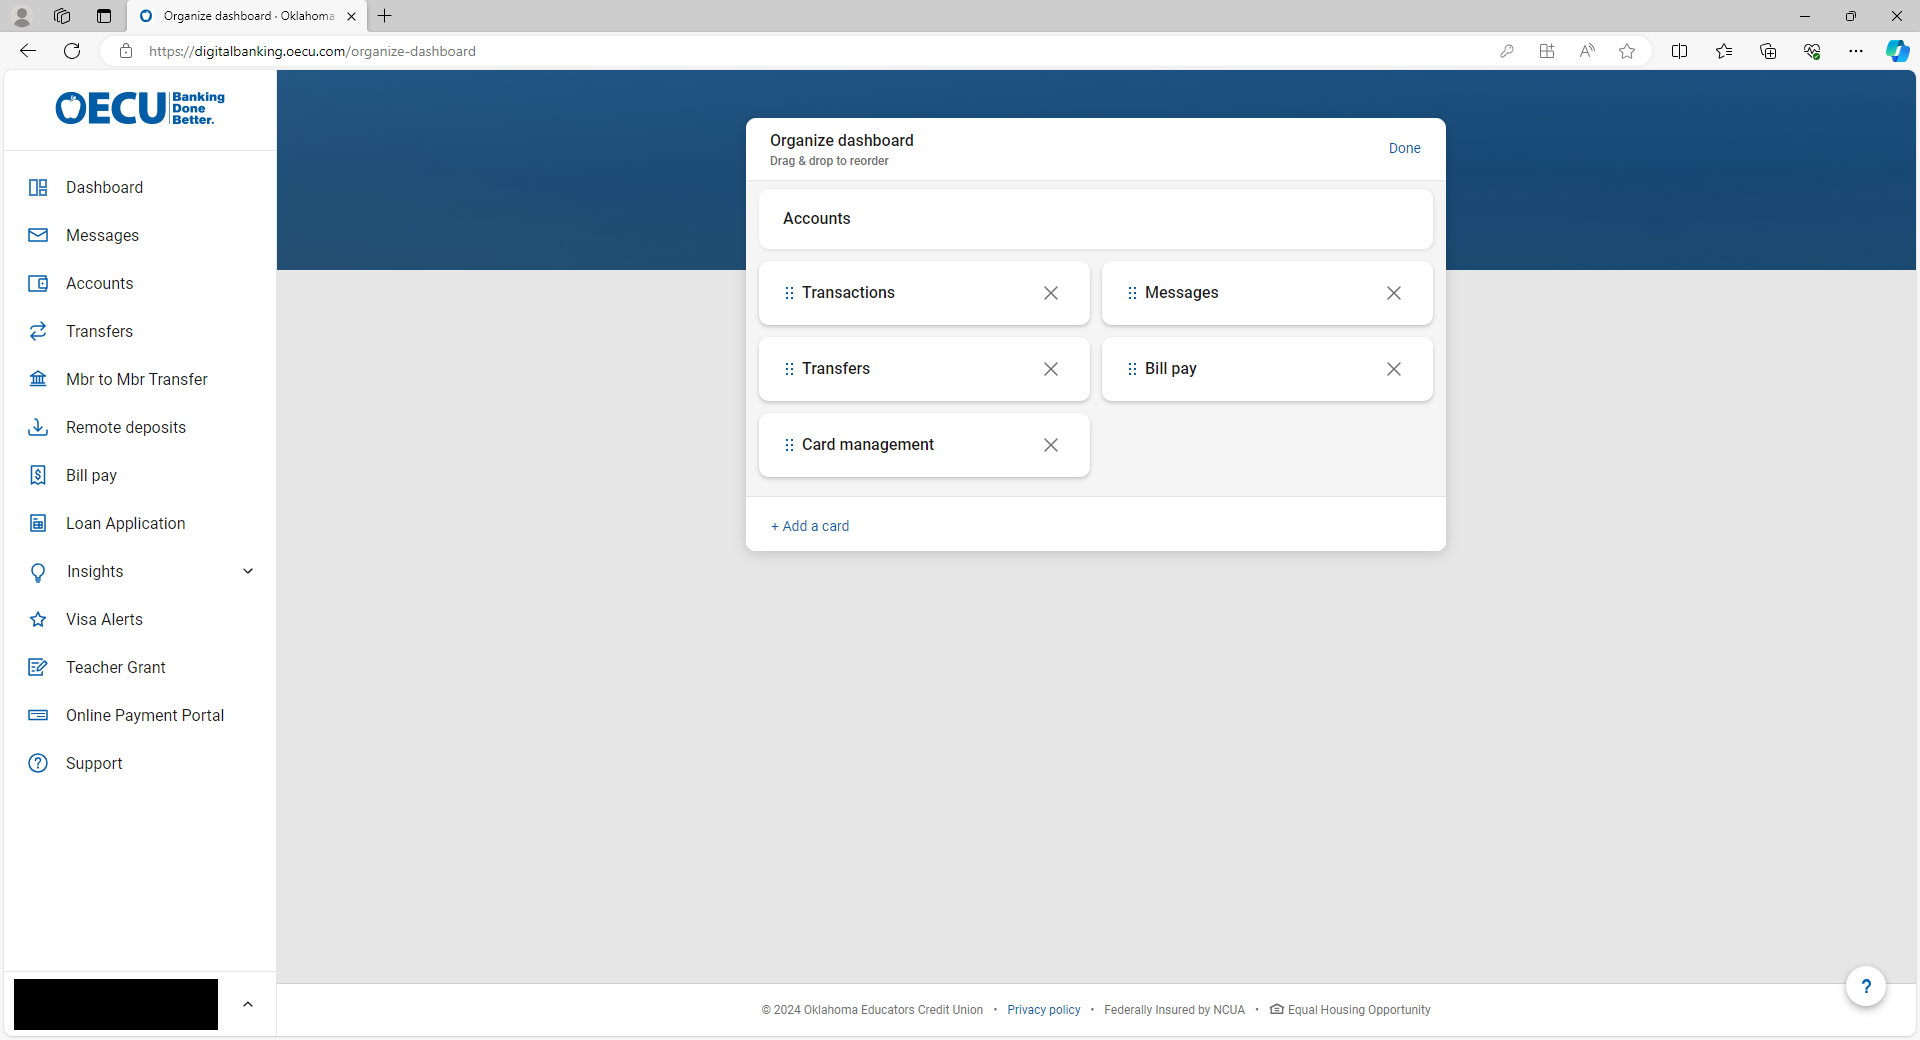
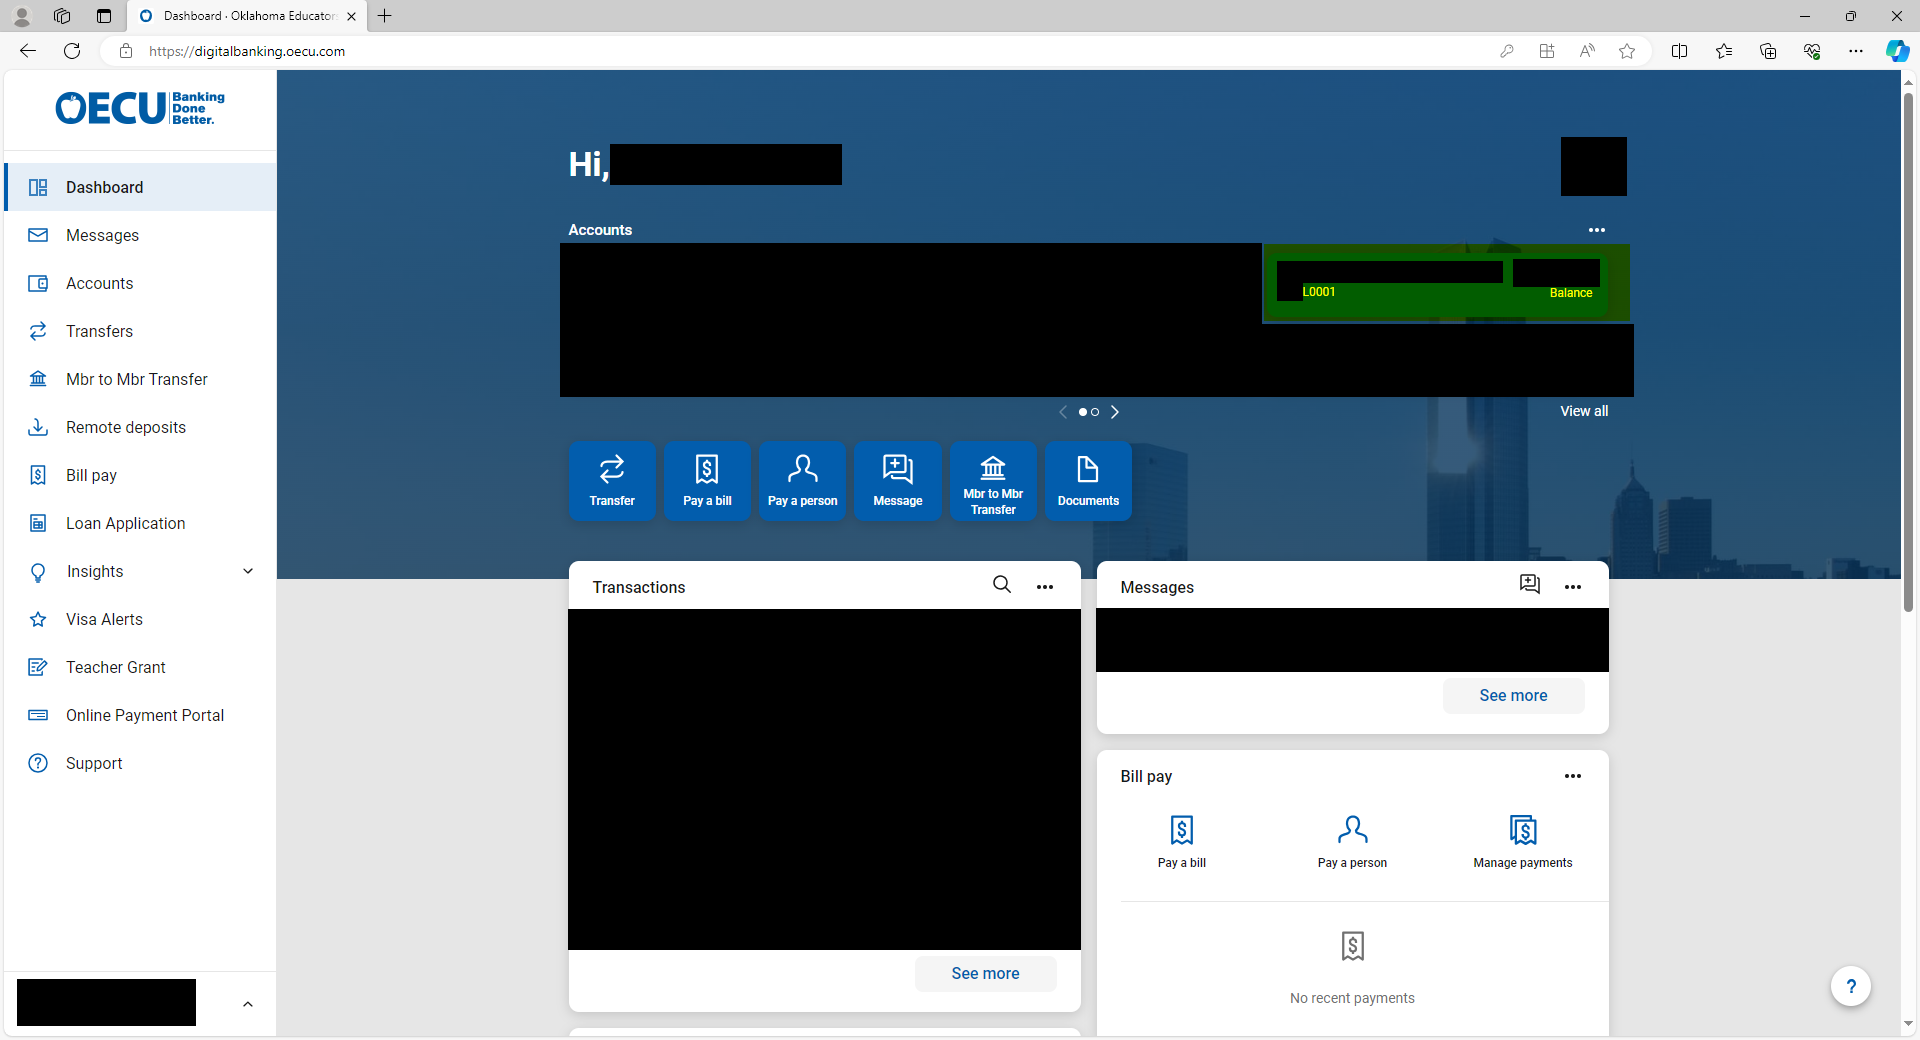
1. After logging in to the online banking platform, Click any of the three-dot symbols highlighted to open the menu. Select “Organize Dashboard”.
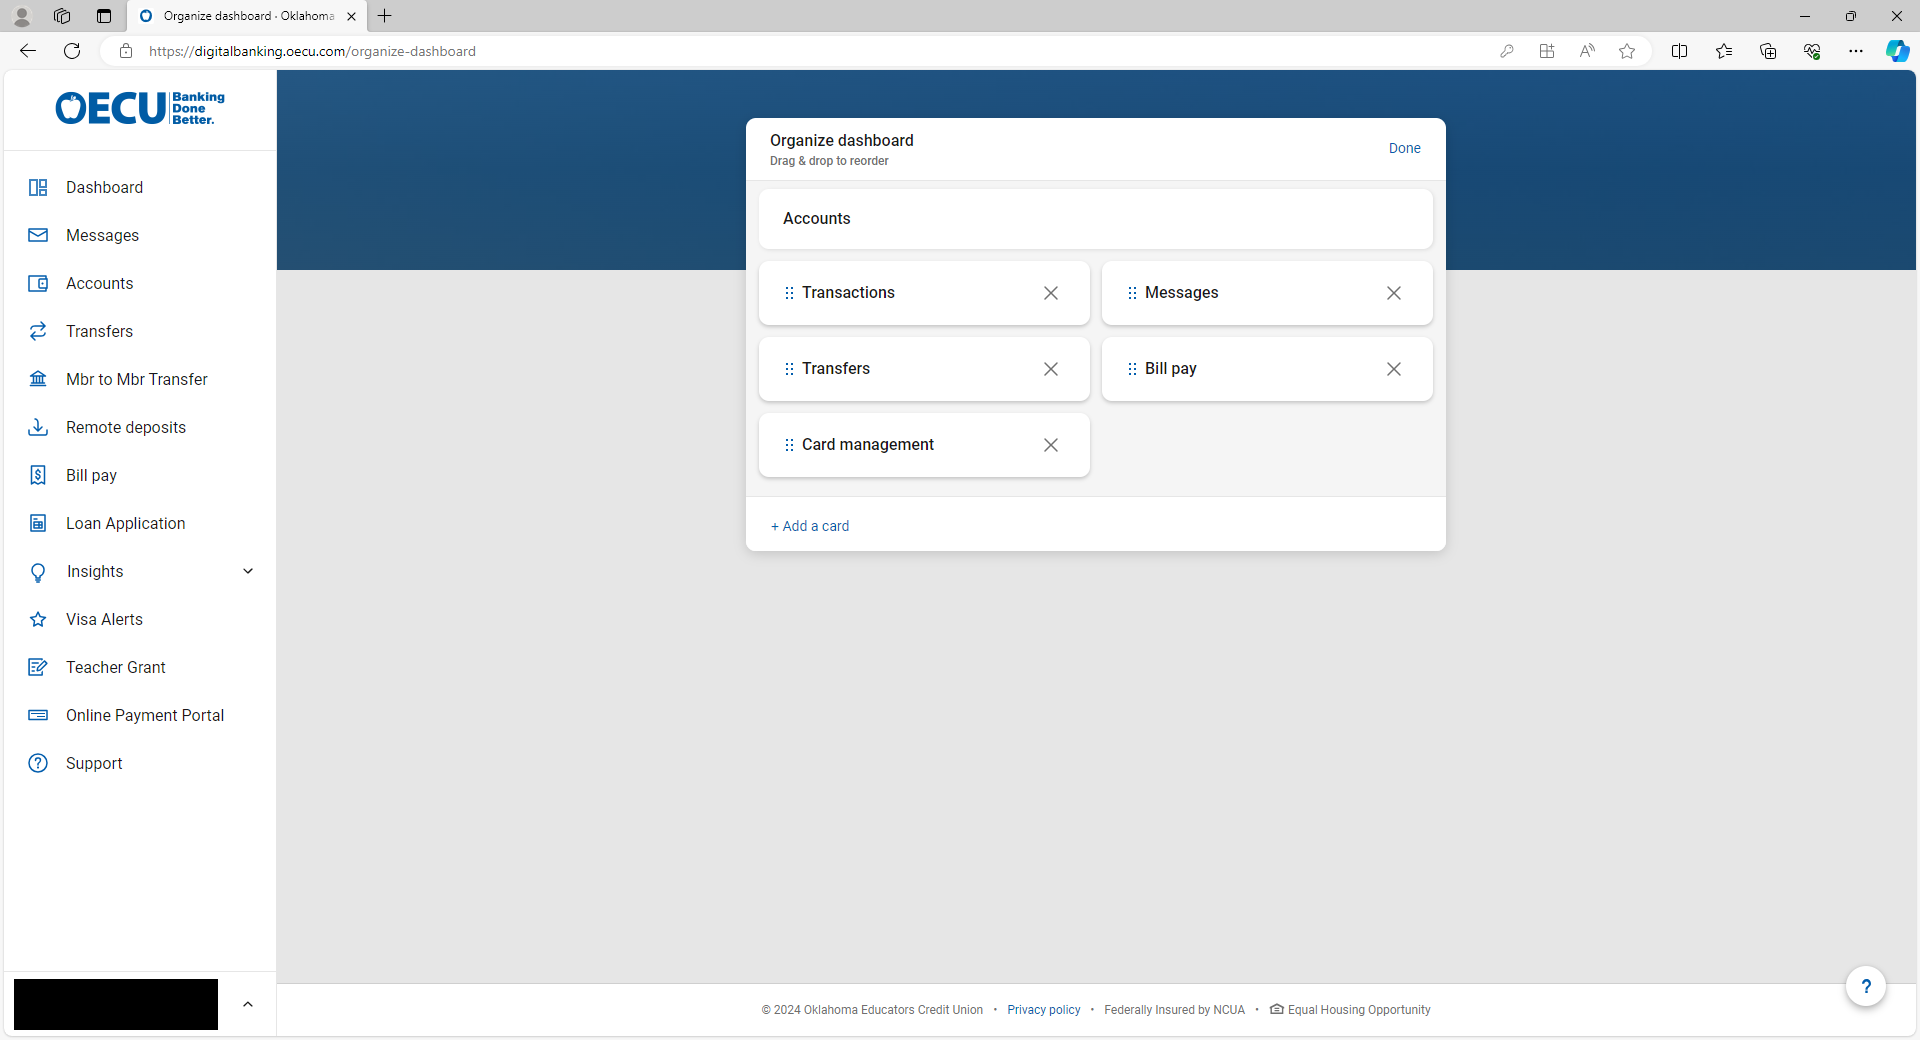
2. From this menu, you can drag cards to reorganize them, remove cards you don’t wish to use, and add extra cards that are not on your dashboard by default.
Ability to view accounts linked through Finicity on the dashboard
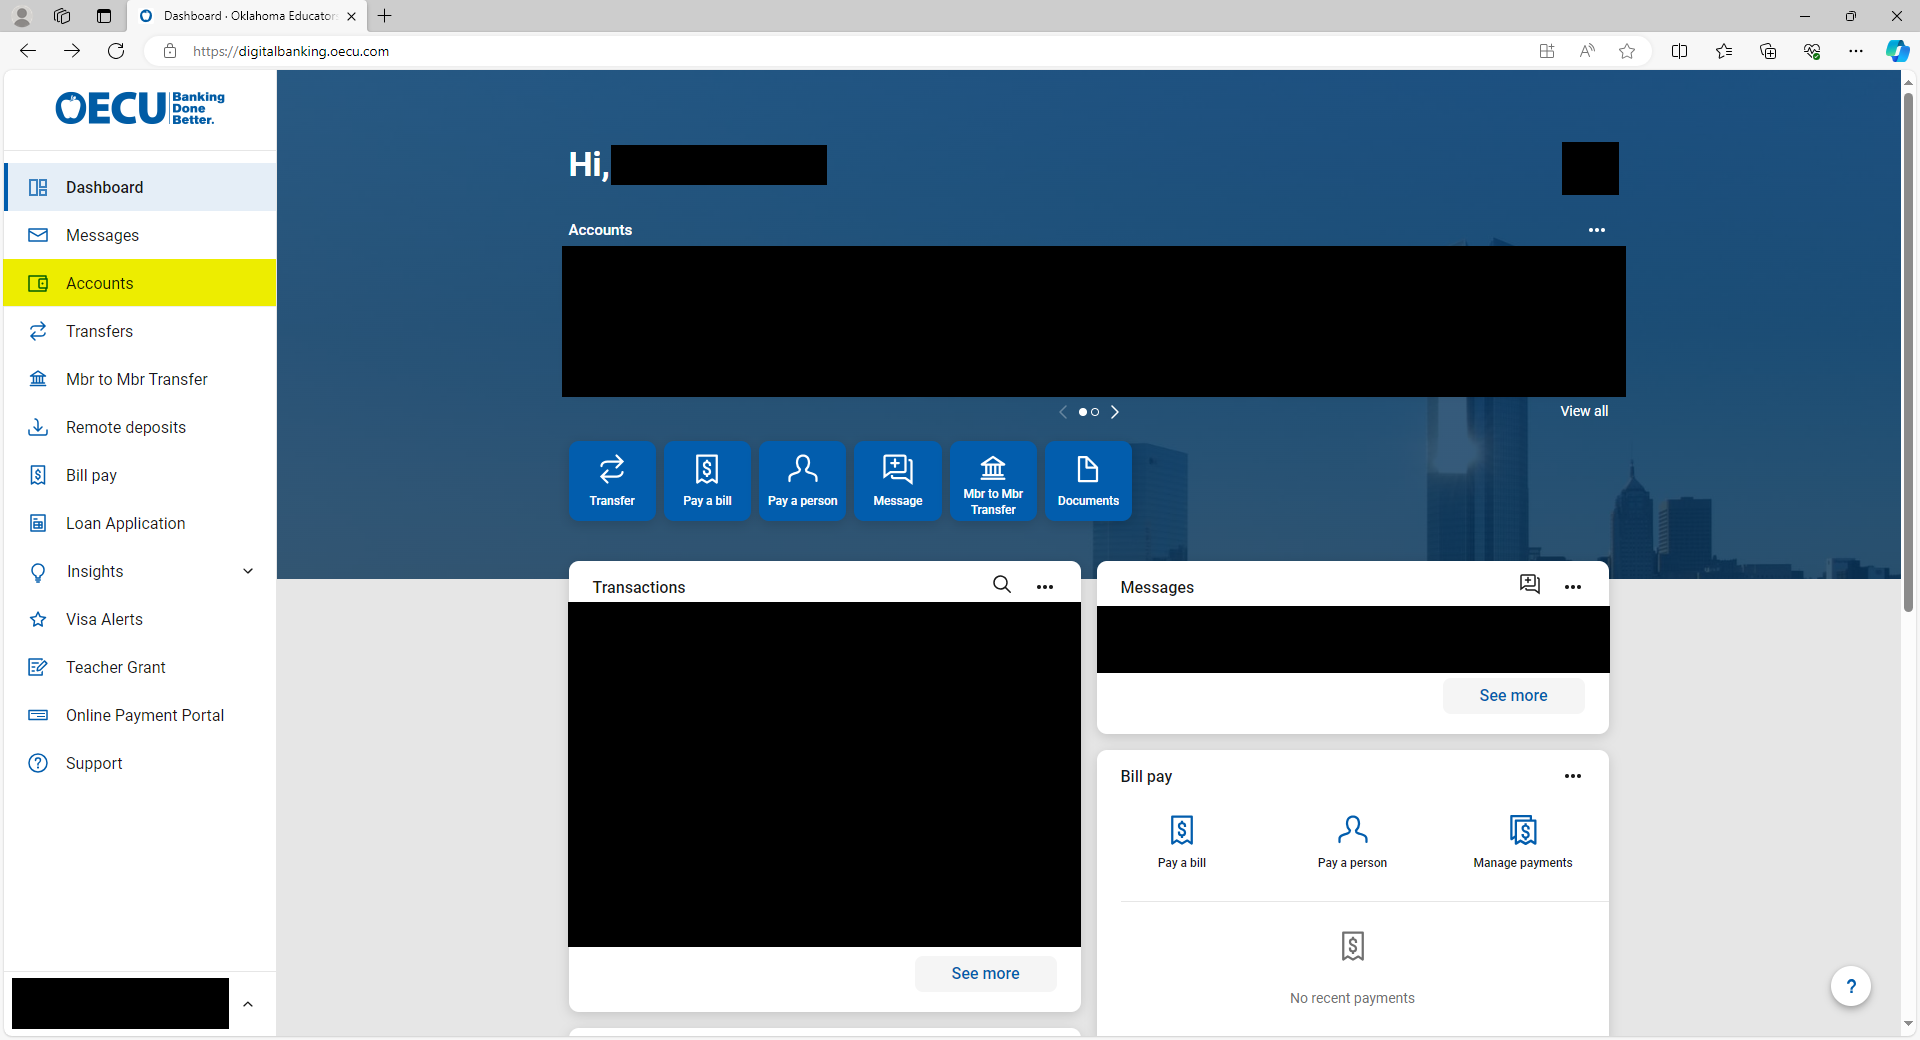
1. From the main accounts screen, select the “Accounts” option on the right-hand toolbar.
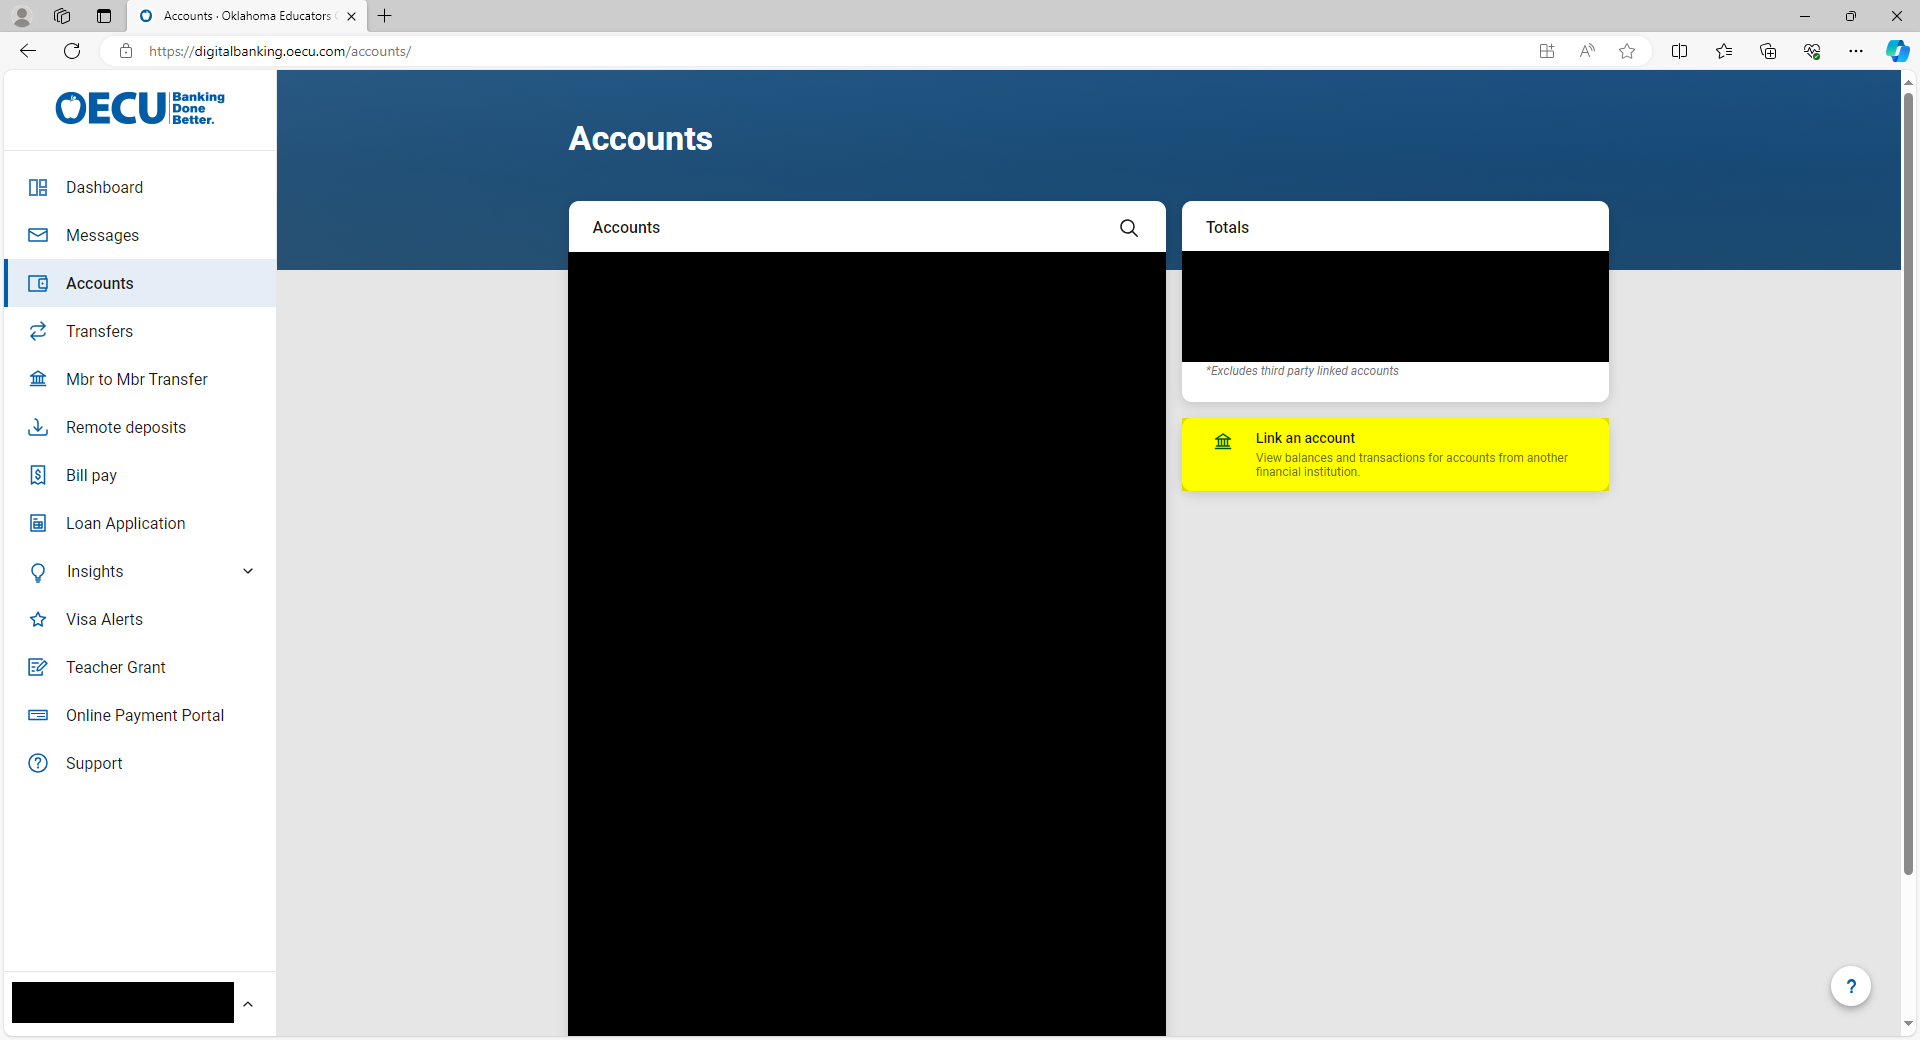
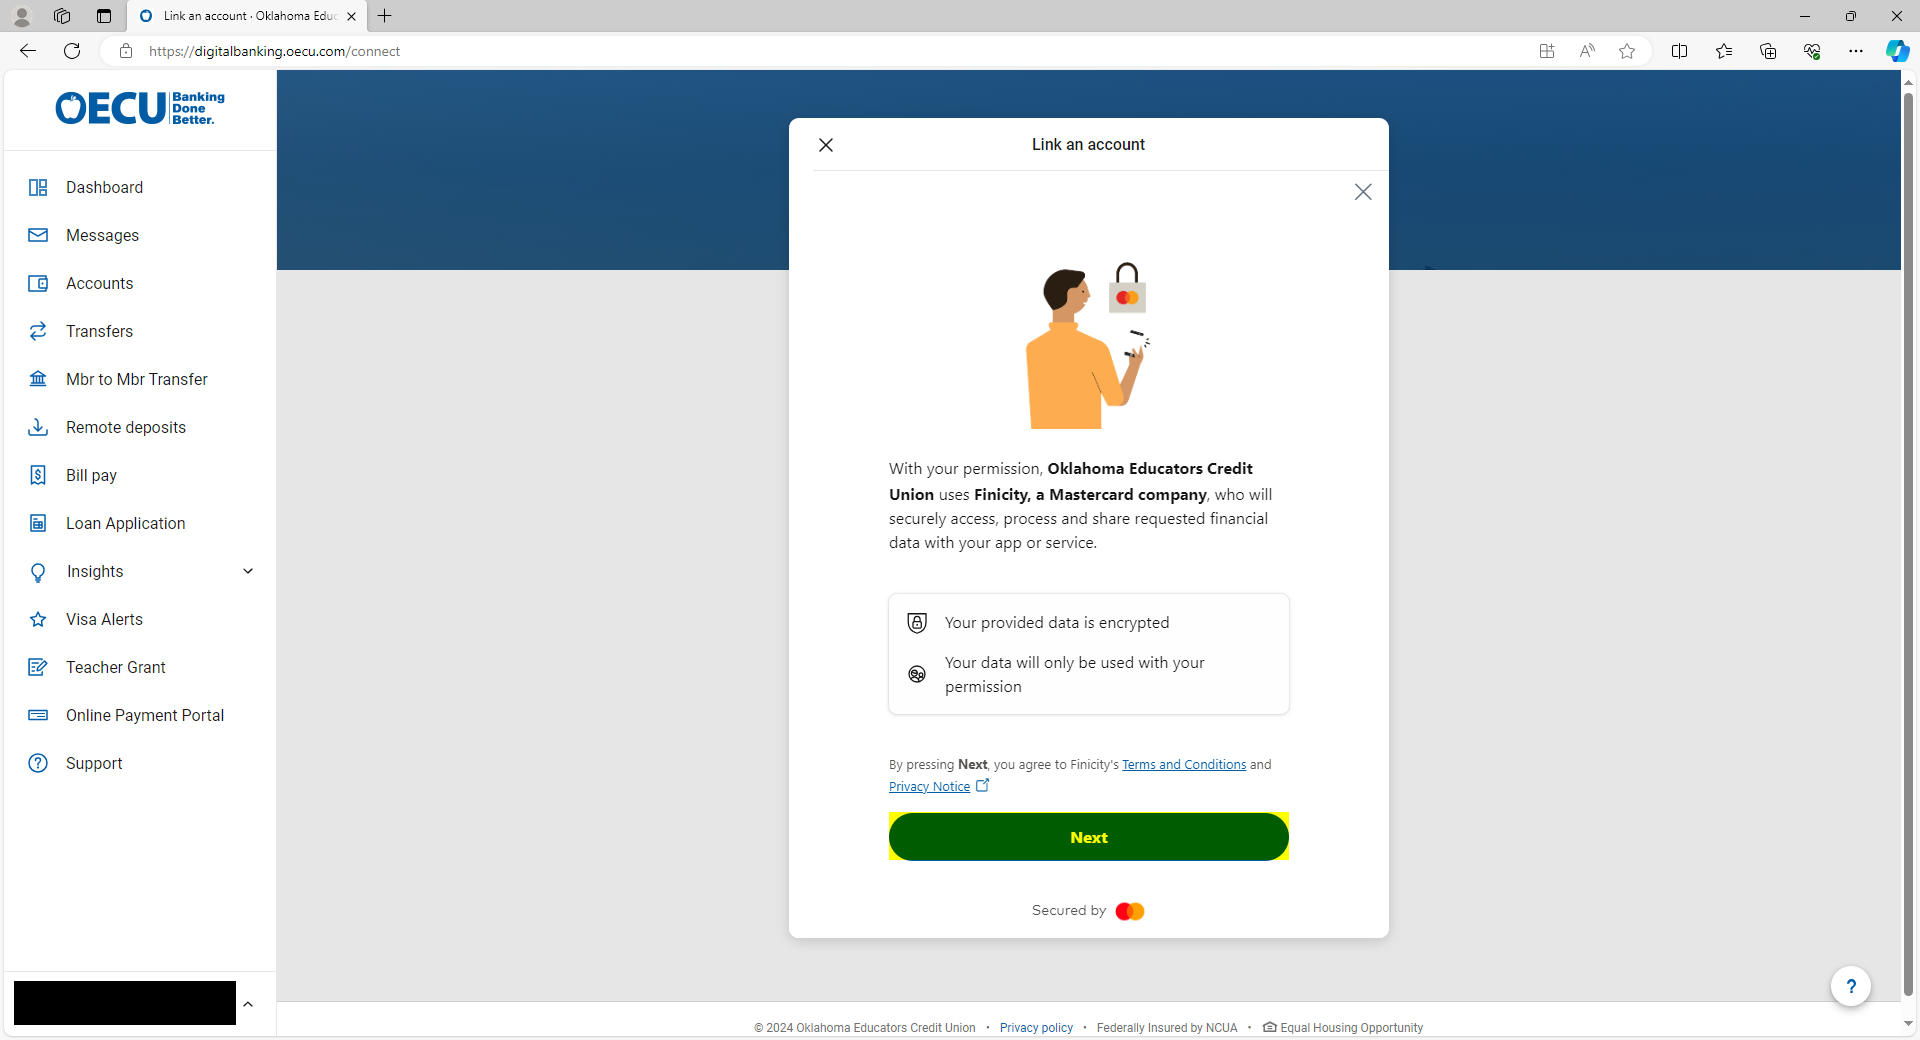
2. From this screen, select “Link an account”.
3. You will need to agree to the terms and conditions by clicking “Next”
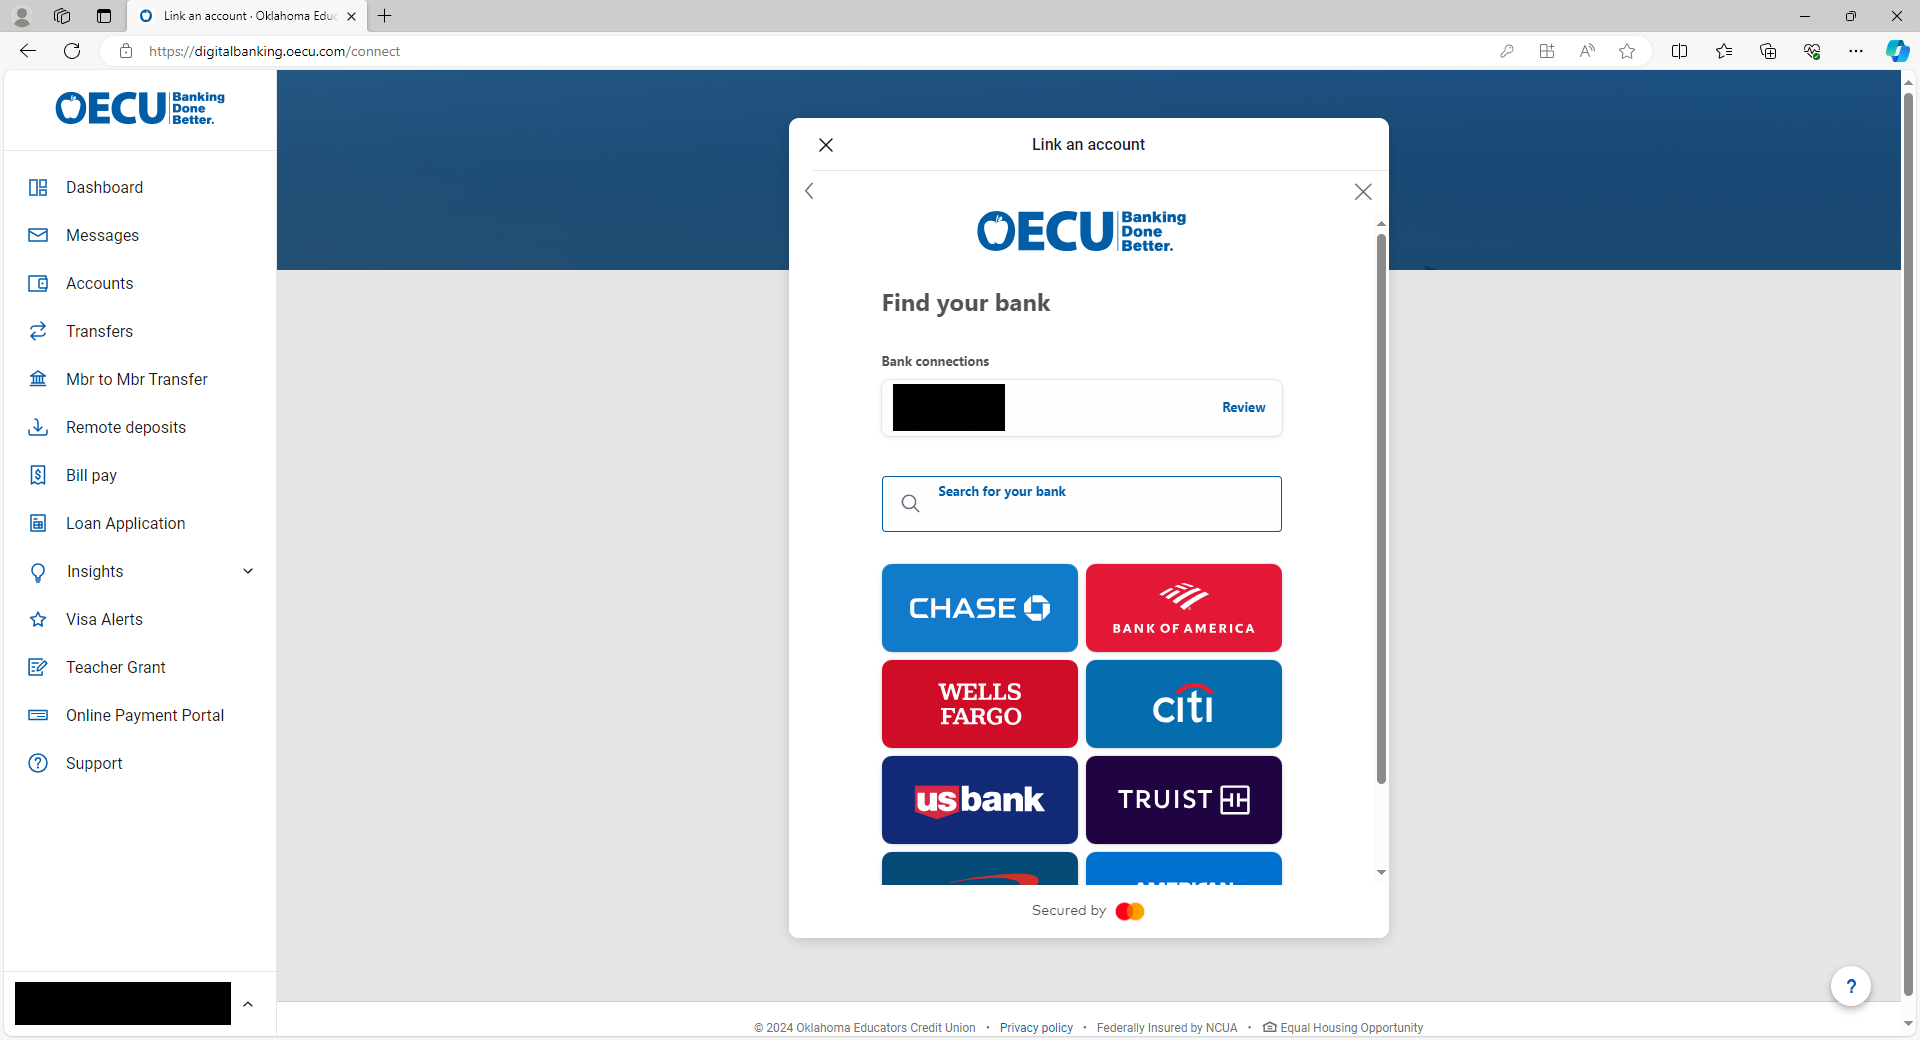
4. Using the search bar or quick-pick buttons, select the bank or credit union the account you wish to add is located at.
5. This will take you to a login page for your other financial institution.
6. Your external accounts have now been added to your Banno application.
INSIGHTS
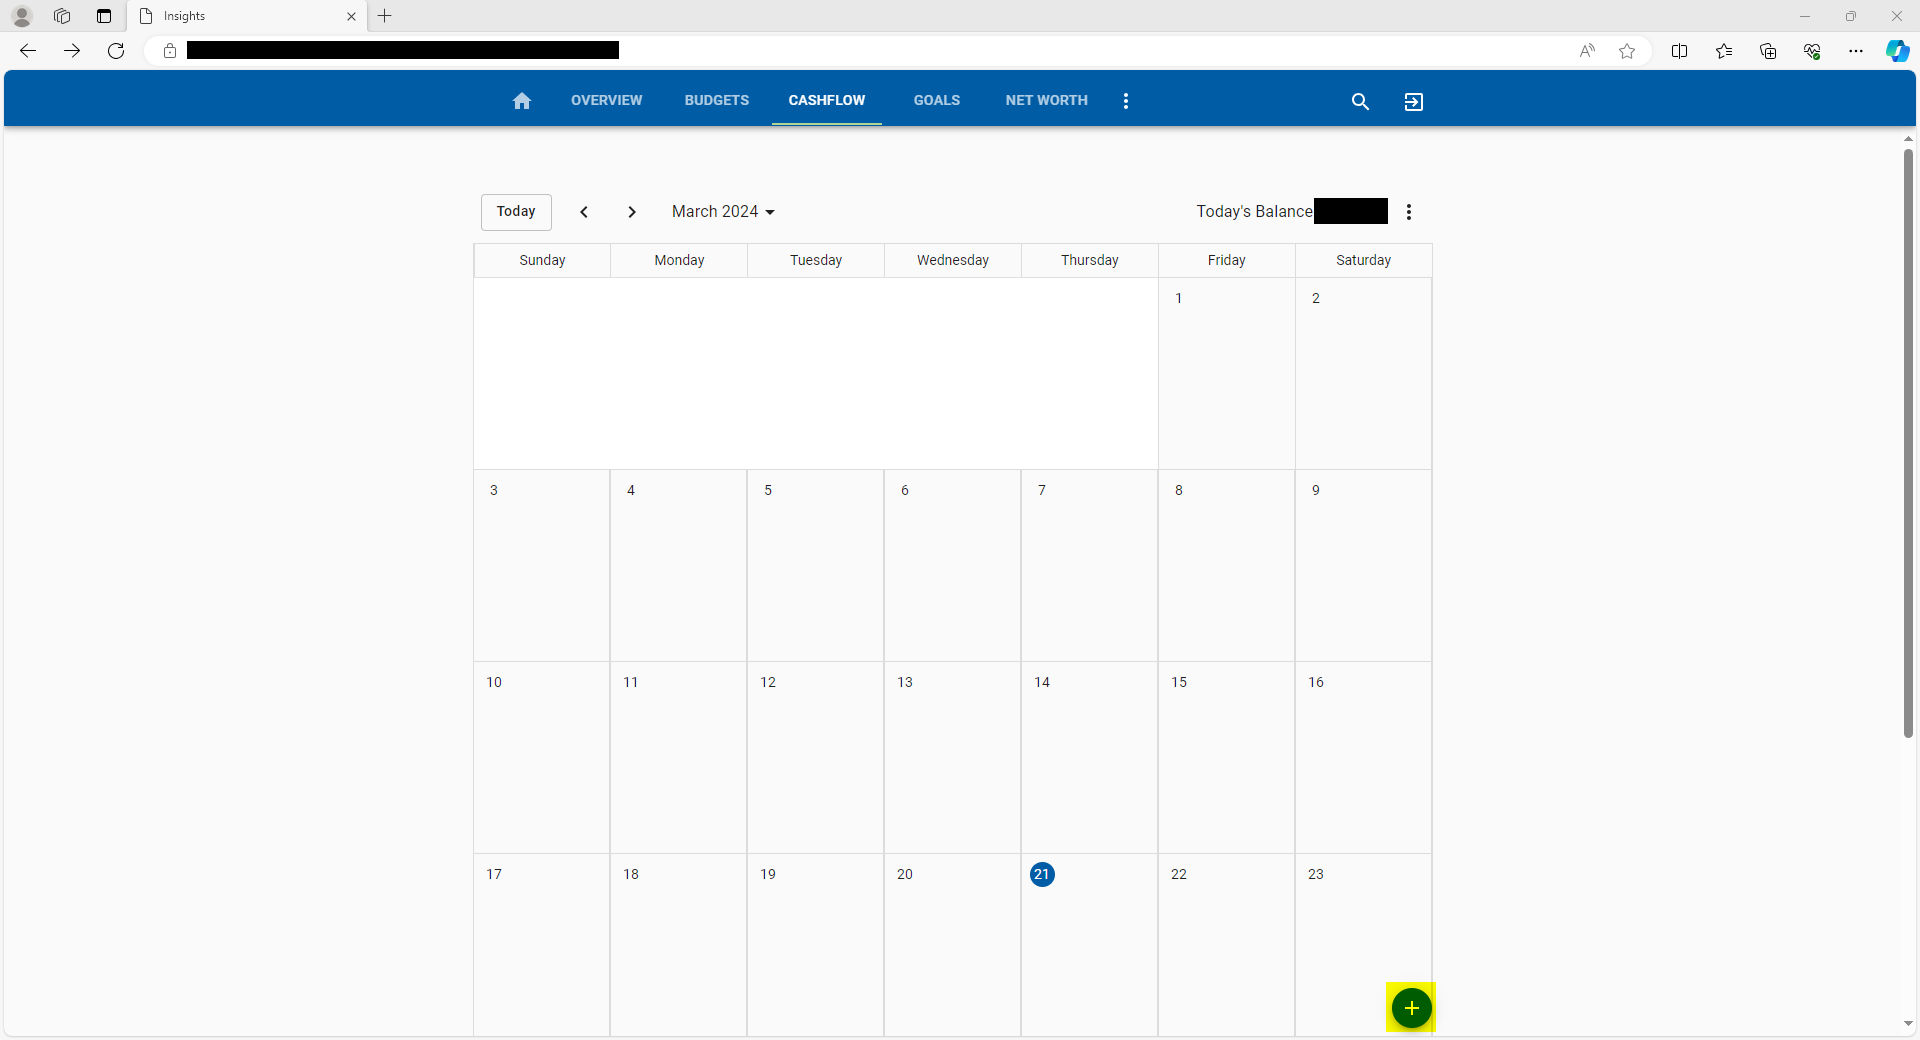
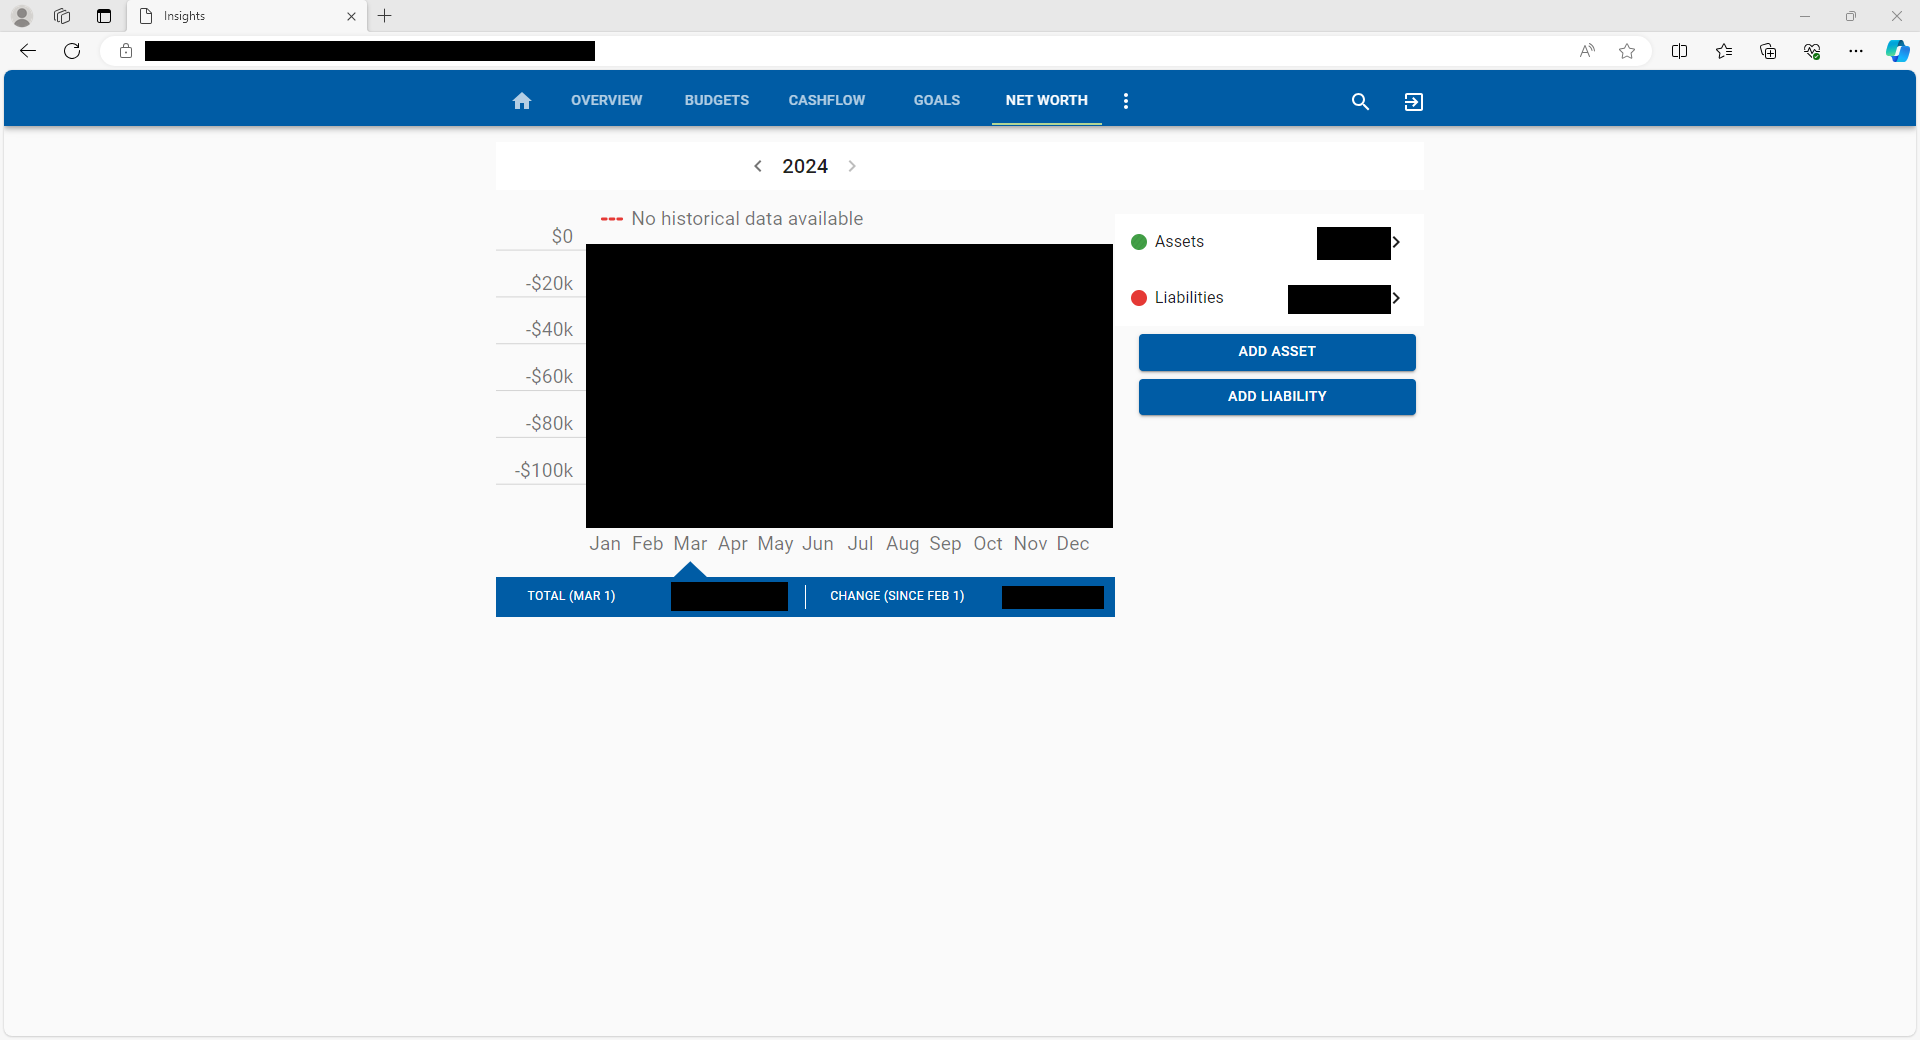
1. To manage cashflow, open up the “Insights” drop down menu on the left-hand tool bar, and select “Cashflow”. 2. This is the main “Cashflow” screen. From here you can see on the calendar all the income and bills that you have already added, as well as add new ones by clicking the “+” down at the bottom. 3. By clicking the three vertical dots, you can open the menu to see a list of bills and income, as well as configure which accounts count toward your cashflow. 4. To track net worth, you will select “Net worth” in the “Insights” drop down menu. 5. This will take you to the Net worth screen, where you can see changes to your net worth, as well as add additional assets or liabilities that you have not already added to Finicity. Customize your dashboard to only see the information you need
1. After logging in to the online banking platform, Click any of the three dot symbols highlighted to open the menu. Select “Organize Dashboard”.
2. From this menu, you can drag cards to reorganize them, remove cards you don’t wish to use, and add extra cards that are not on your dashboard by default.
Manage spending through the creation of Budgets
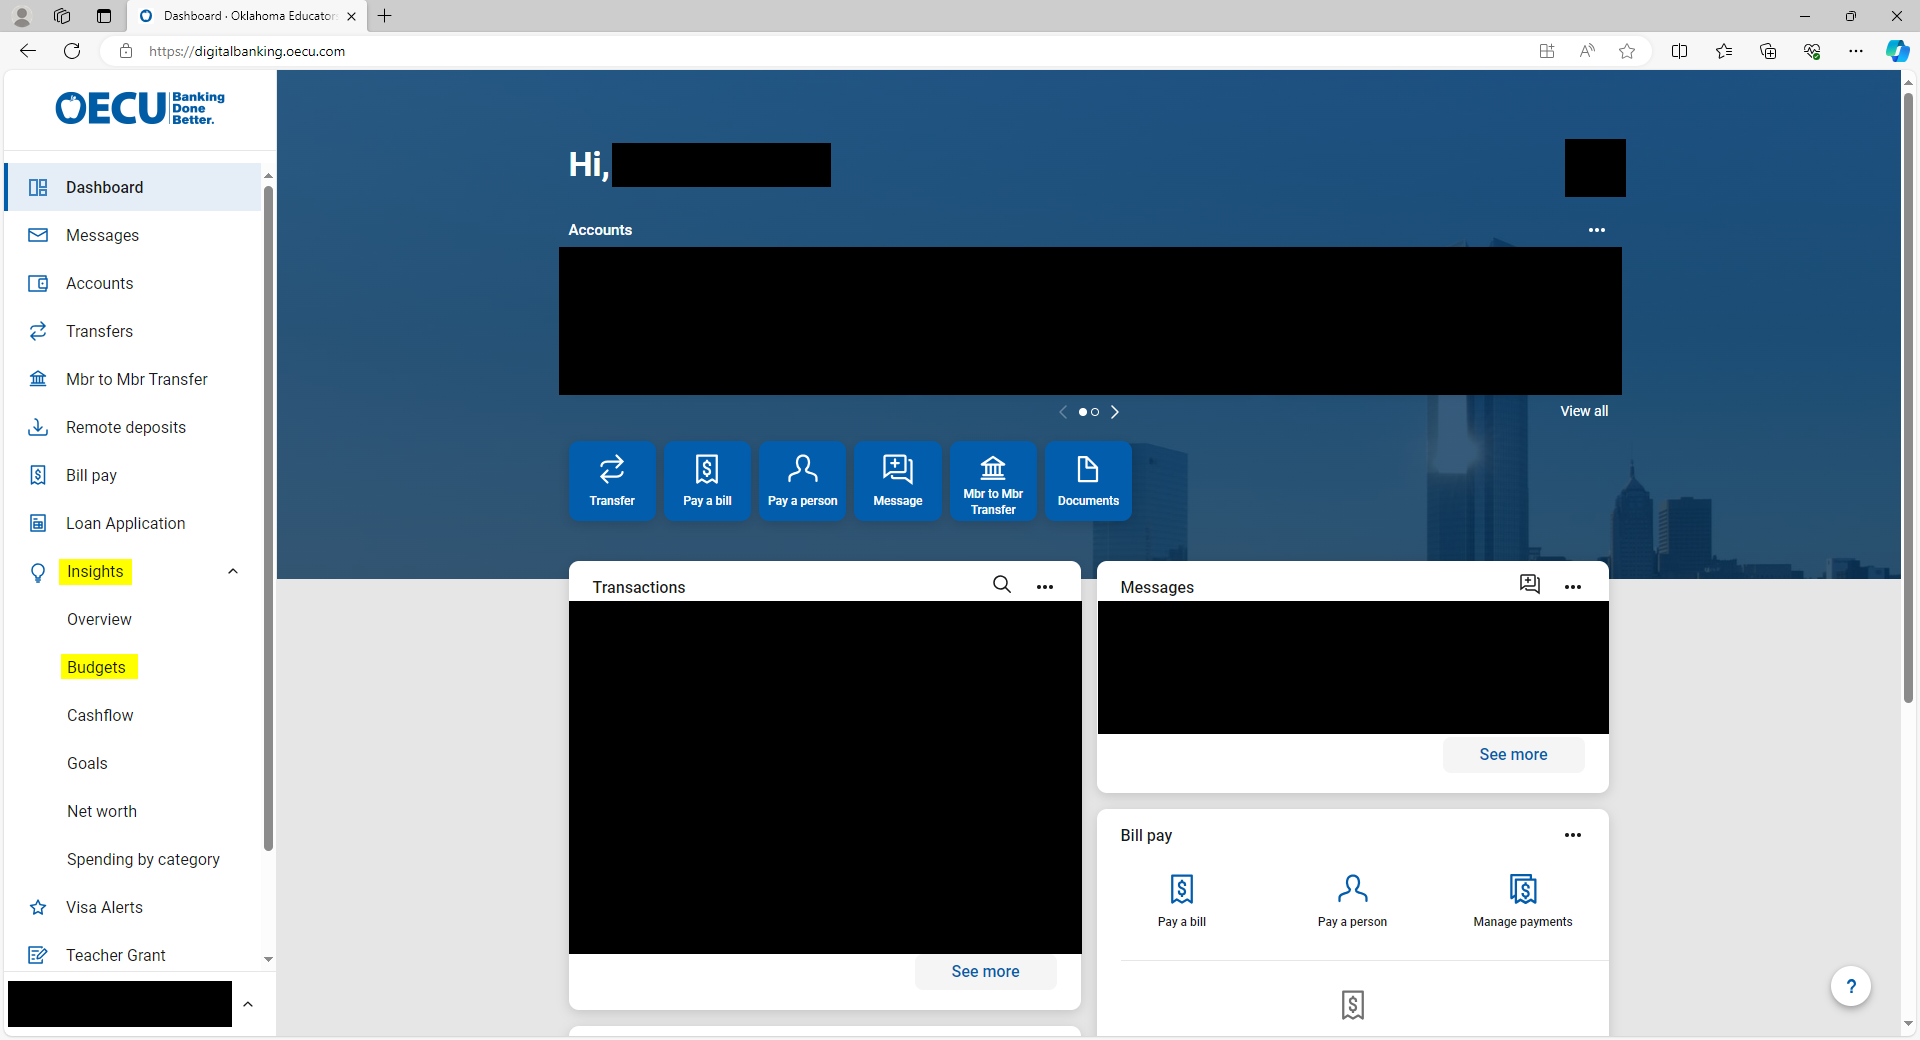
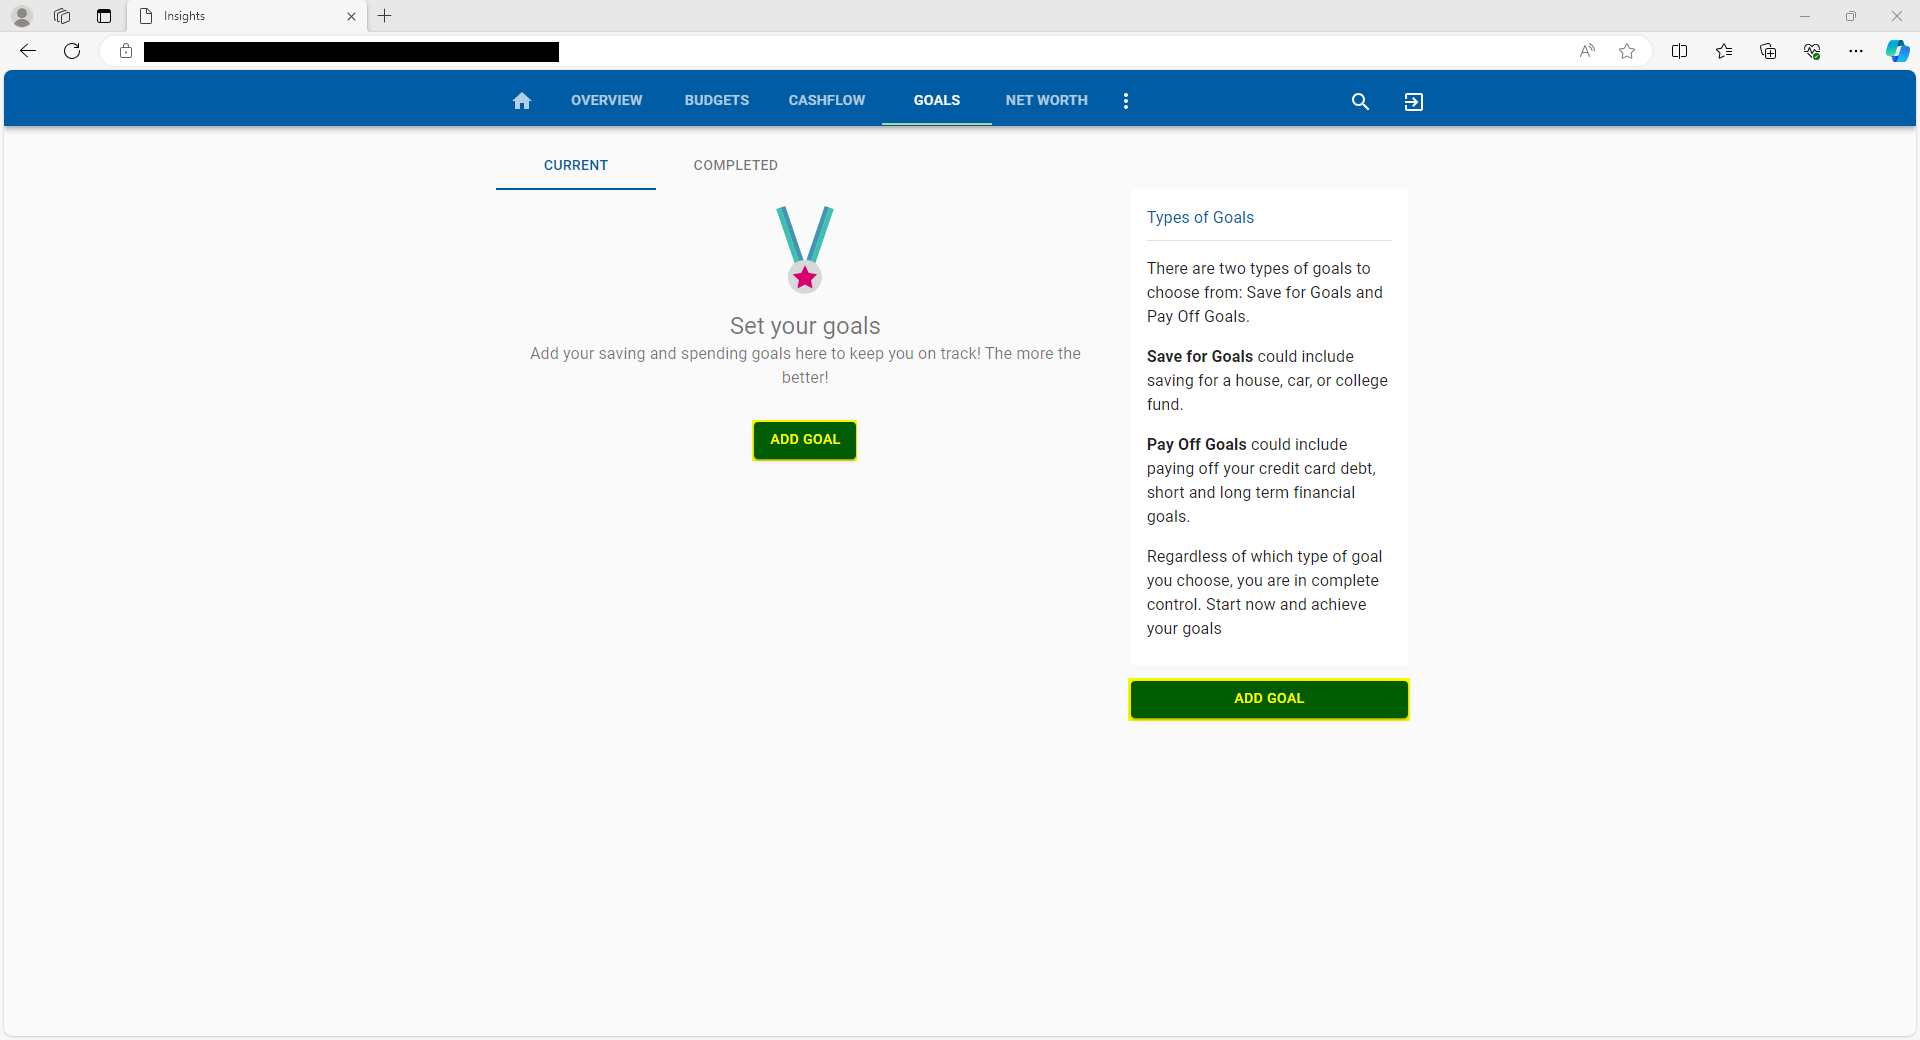
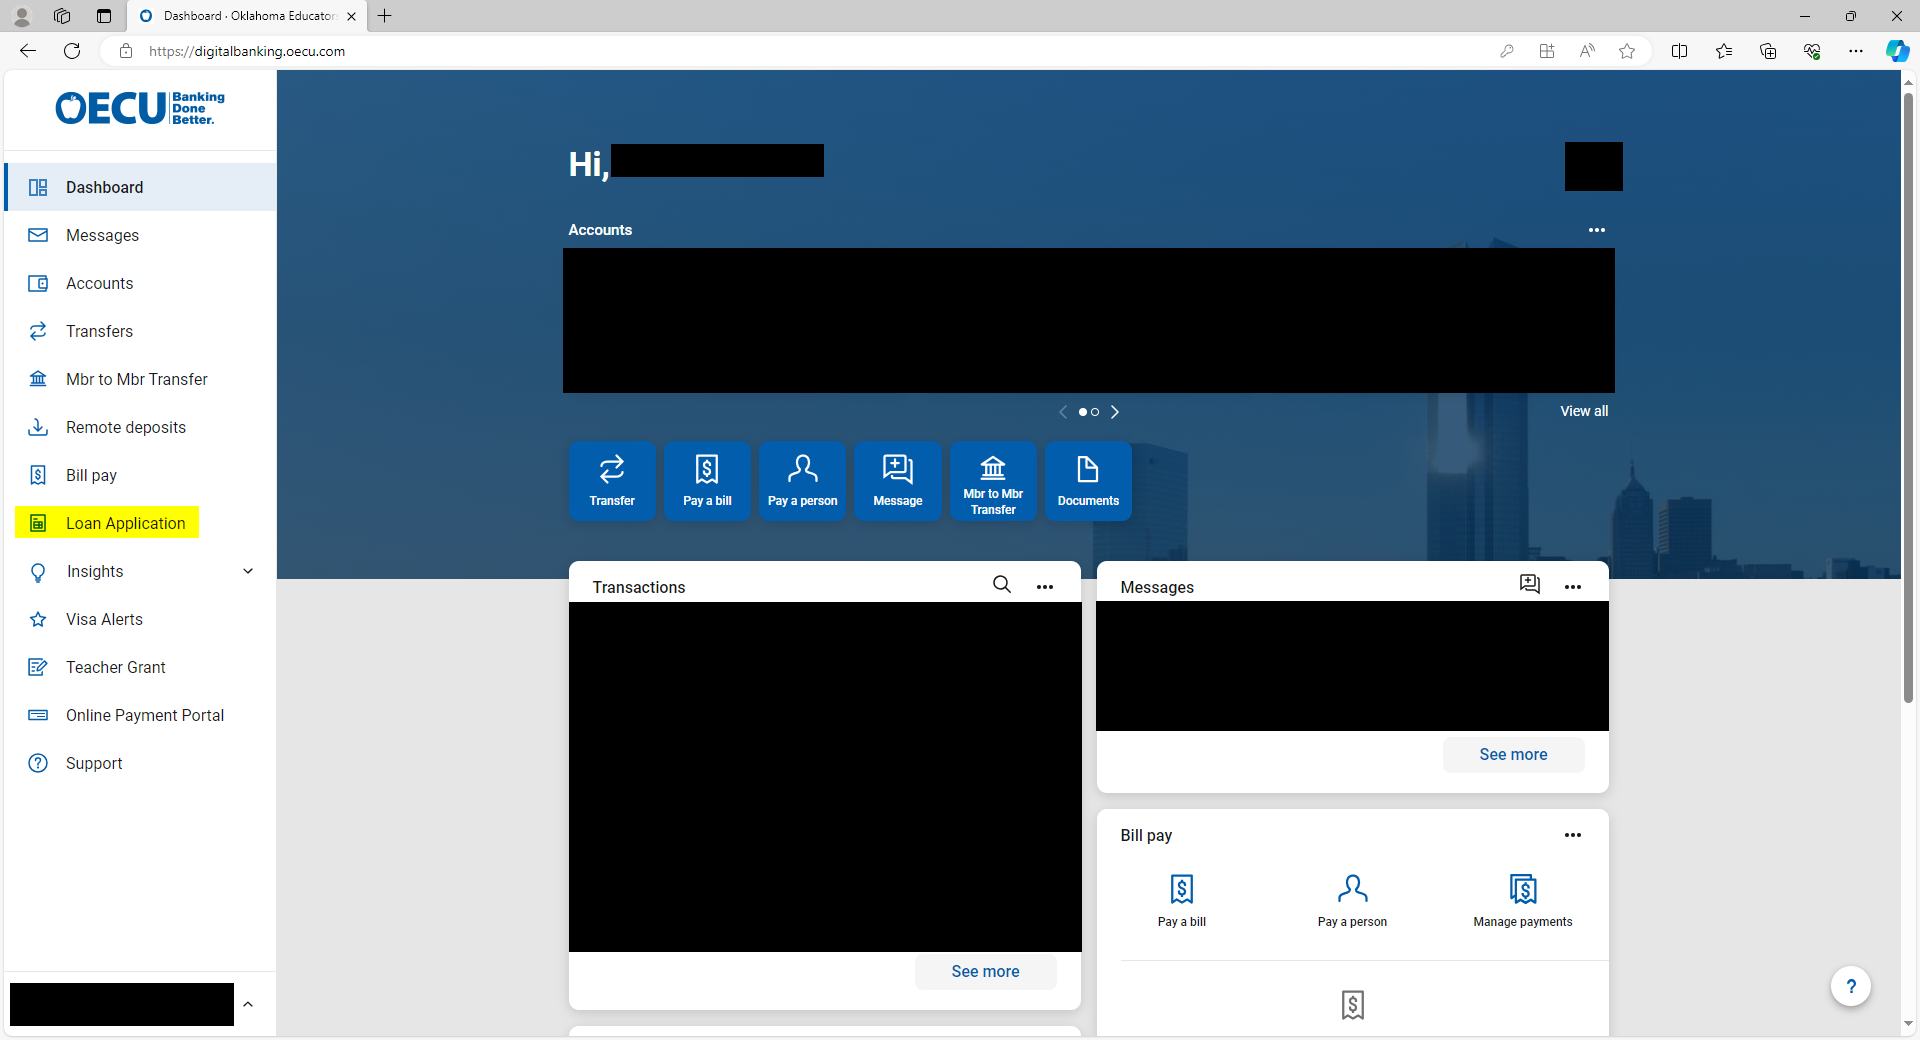
1. From the dashboard, open the “Insights” drop-down and select “Budgets”
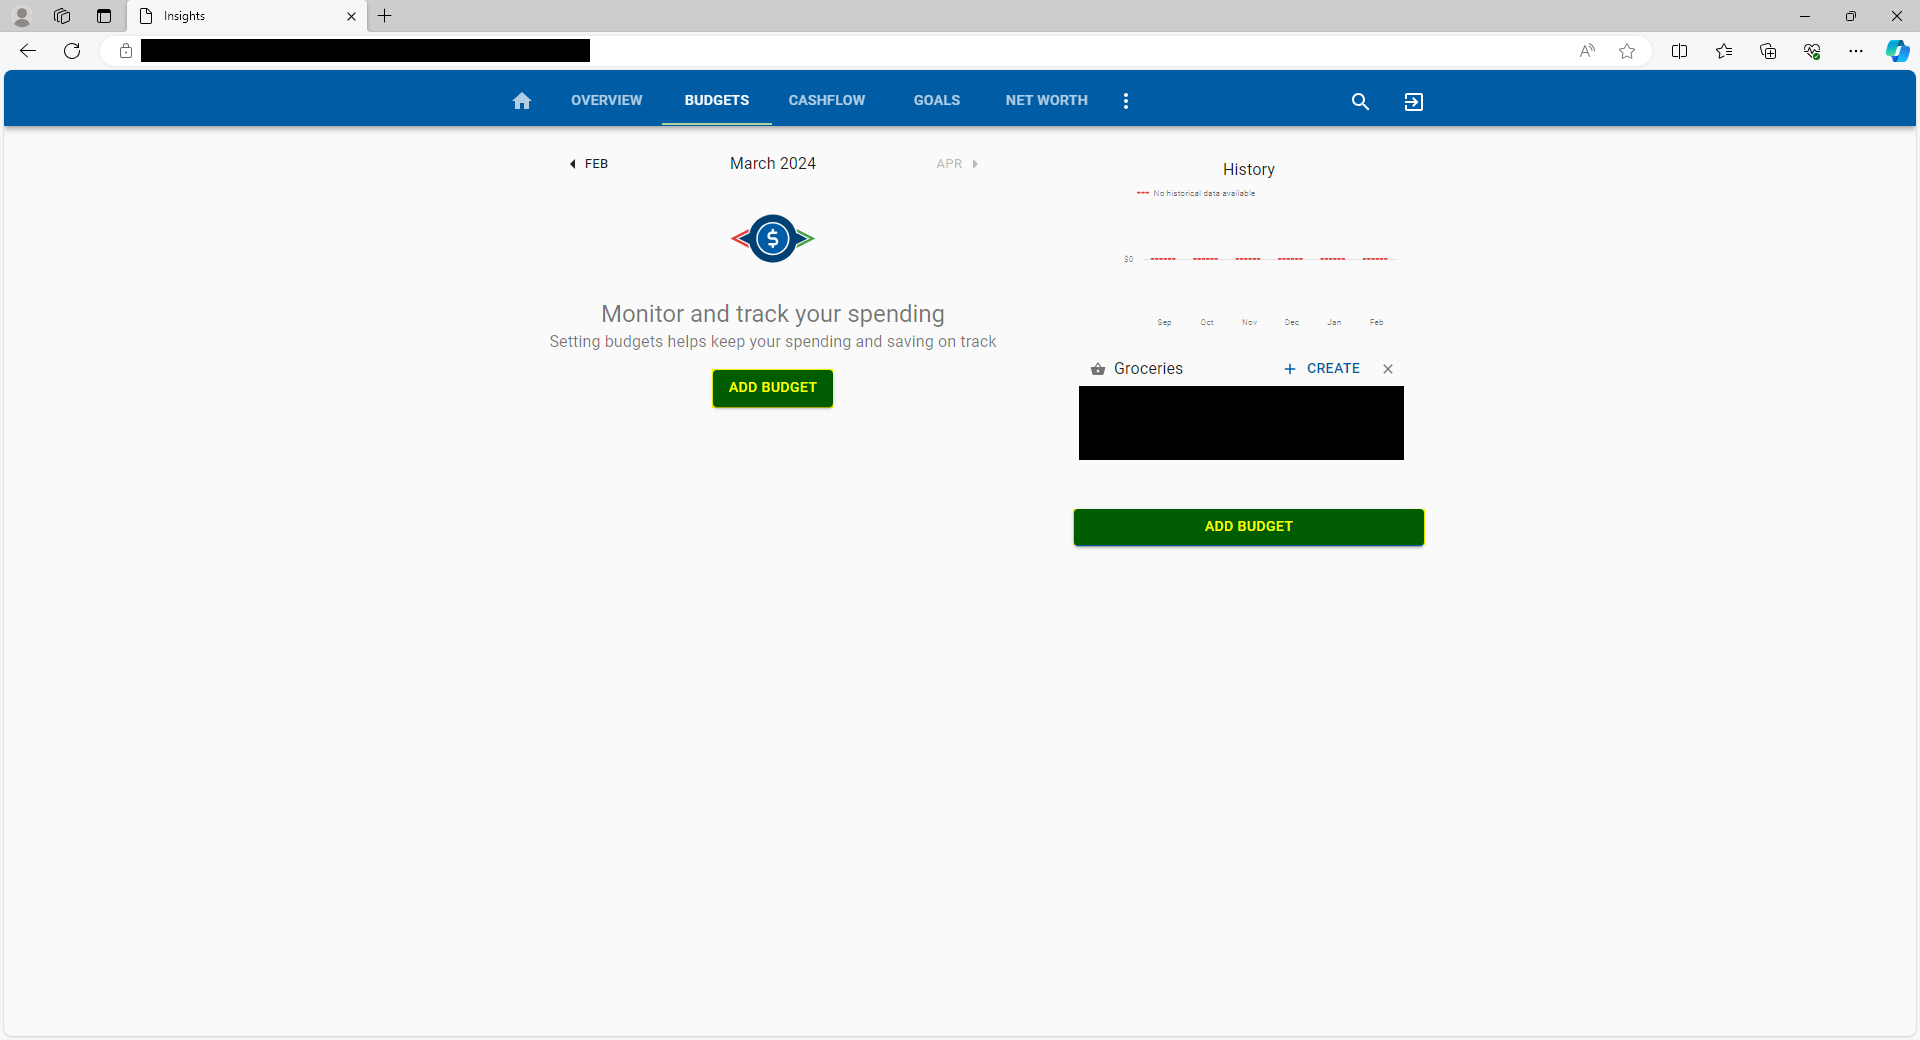
2. From this screen, you should be able to see any budgets you have already created, as well as see suggestions for tags to make a budget with. To create a new budget, click either of the “Add Budget” buttons.
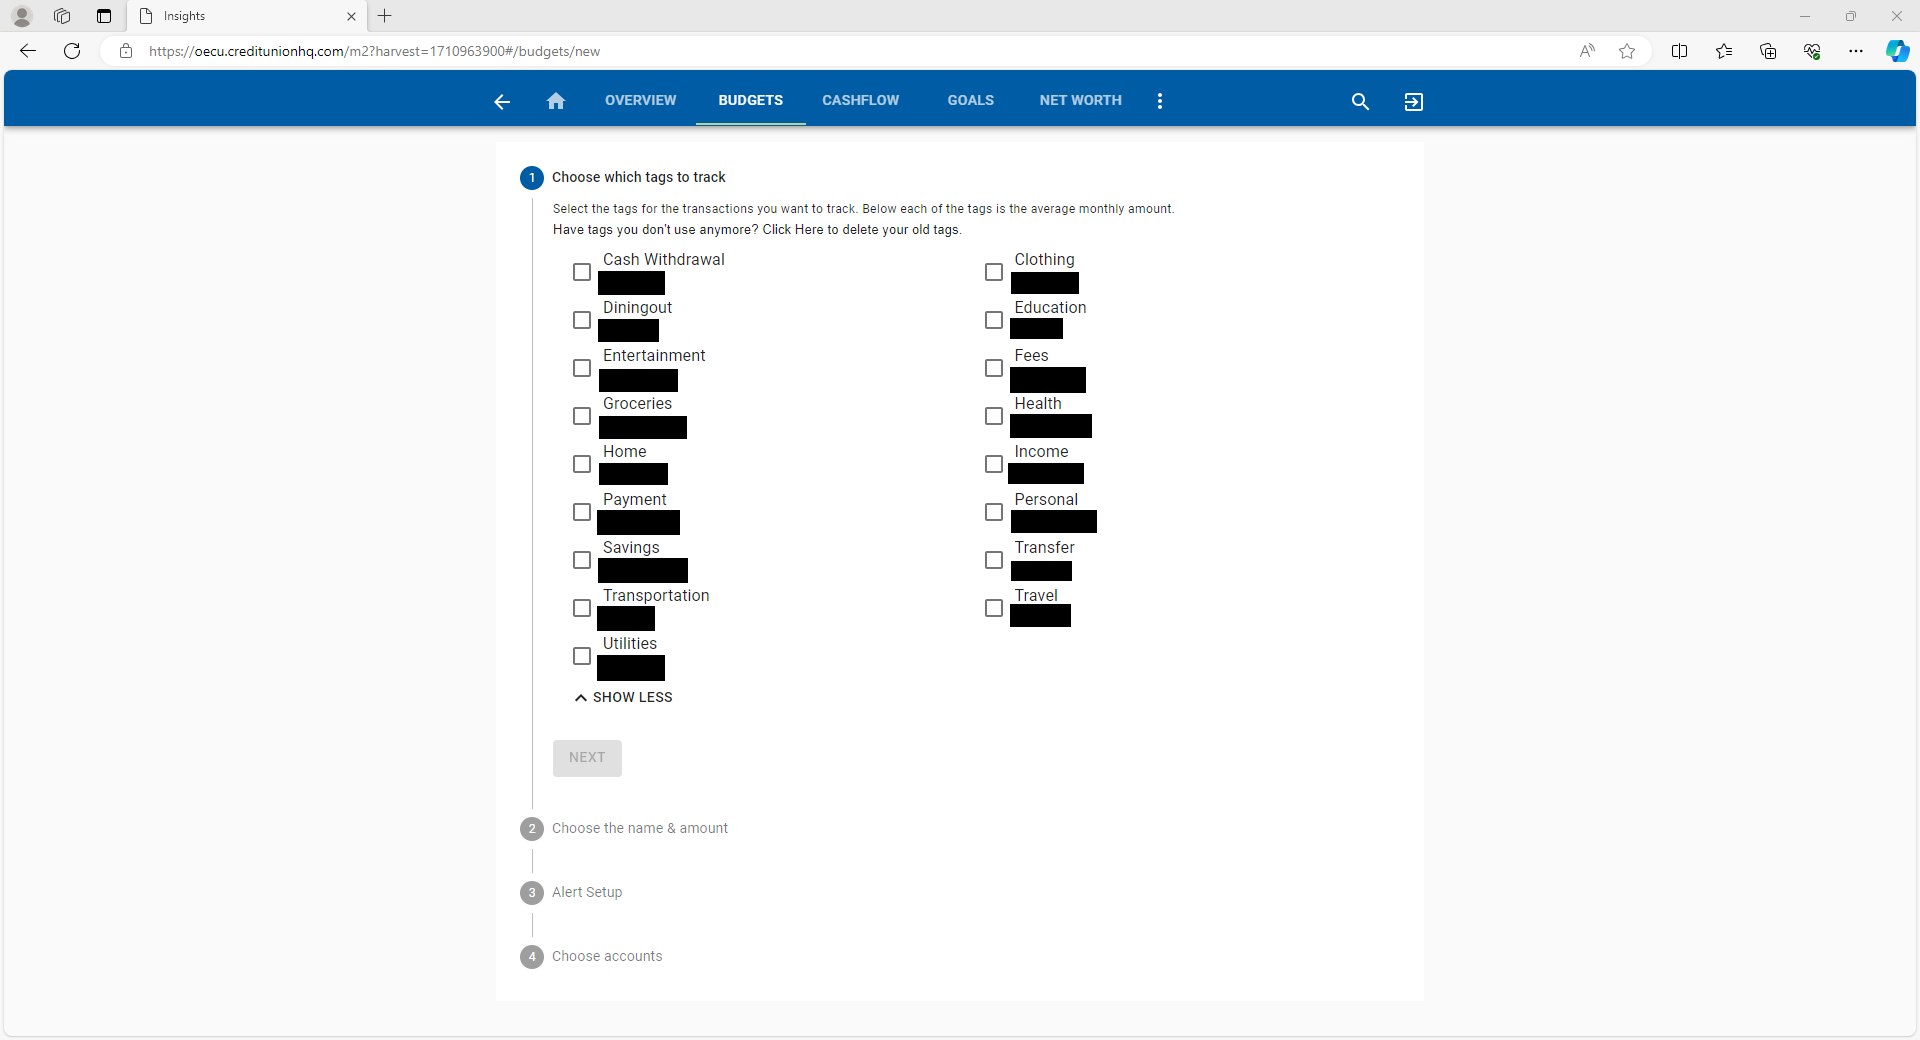
3. Here you can select which tags to track for counting toward the budget by checking the box next to them, then click next.
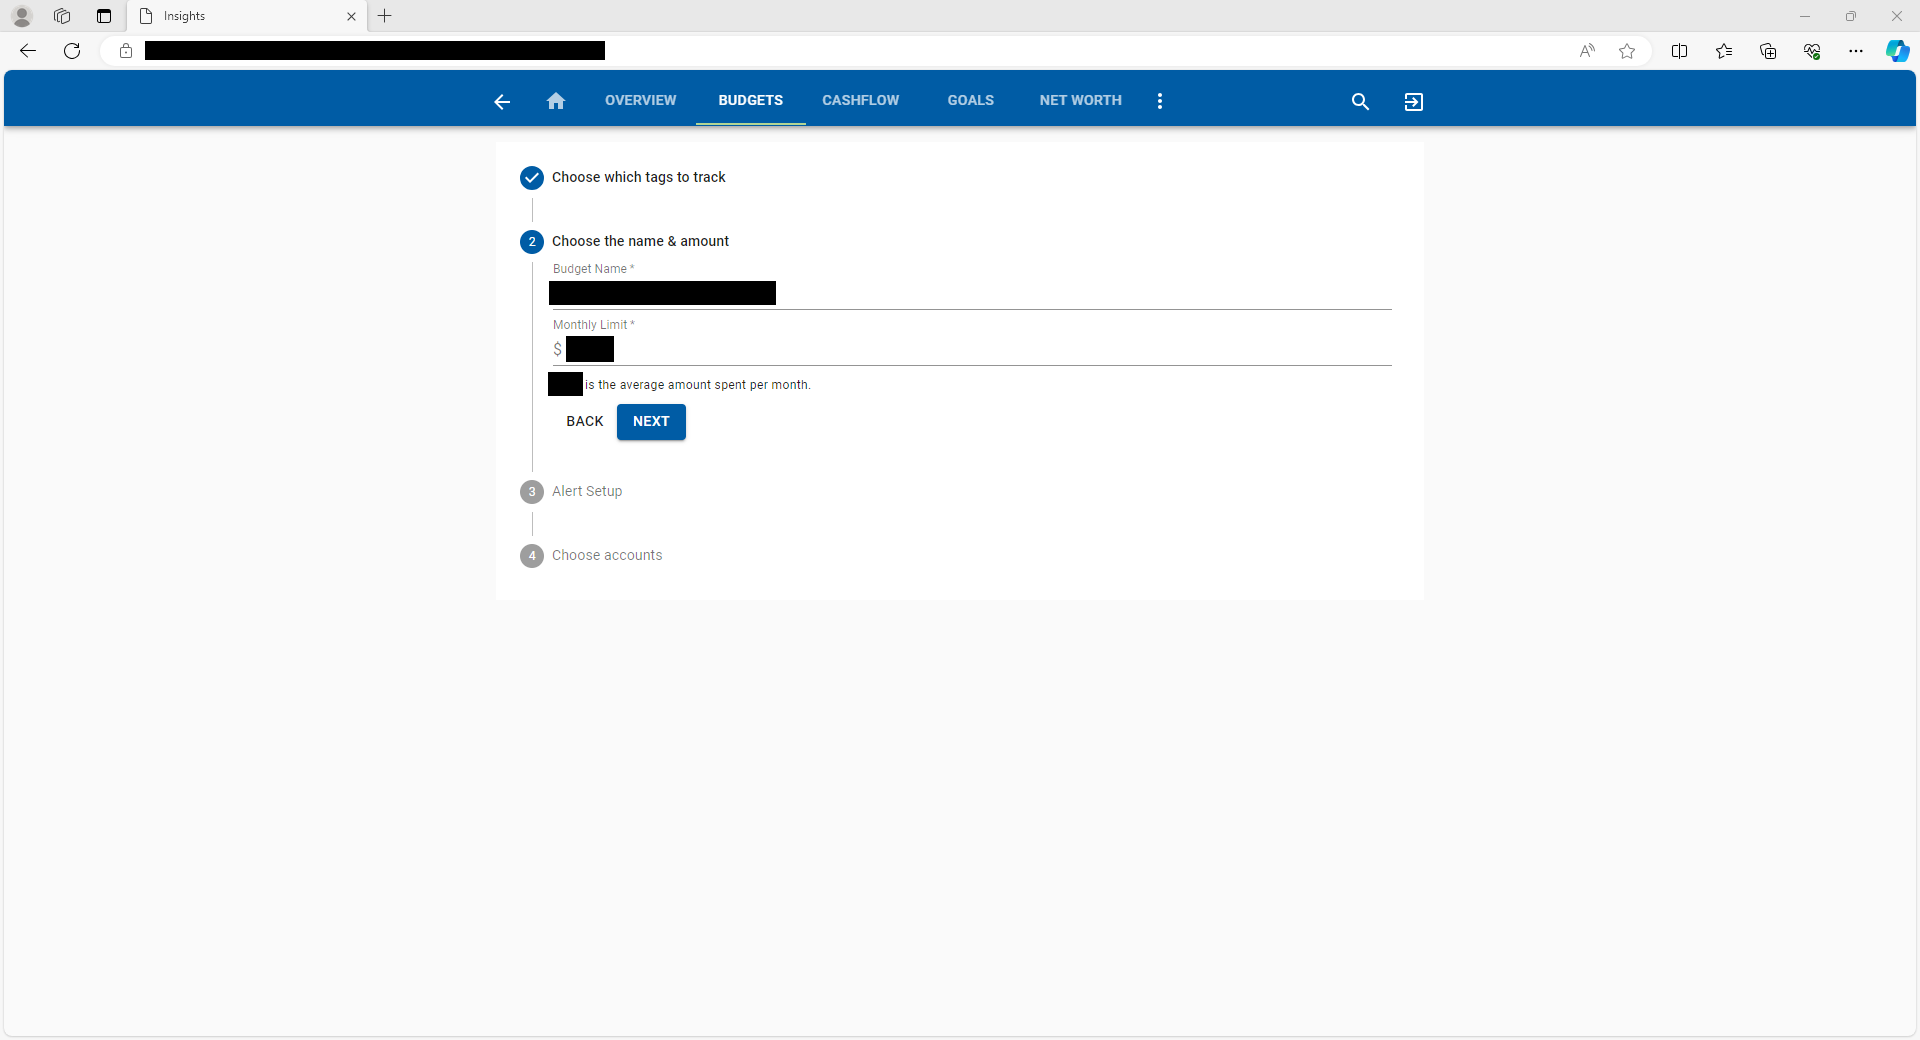
4. Now you can name and set a limit for your budget. After that, click next.
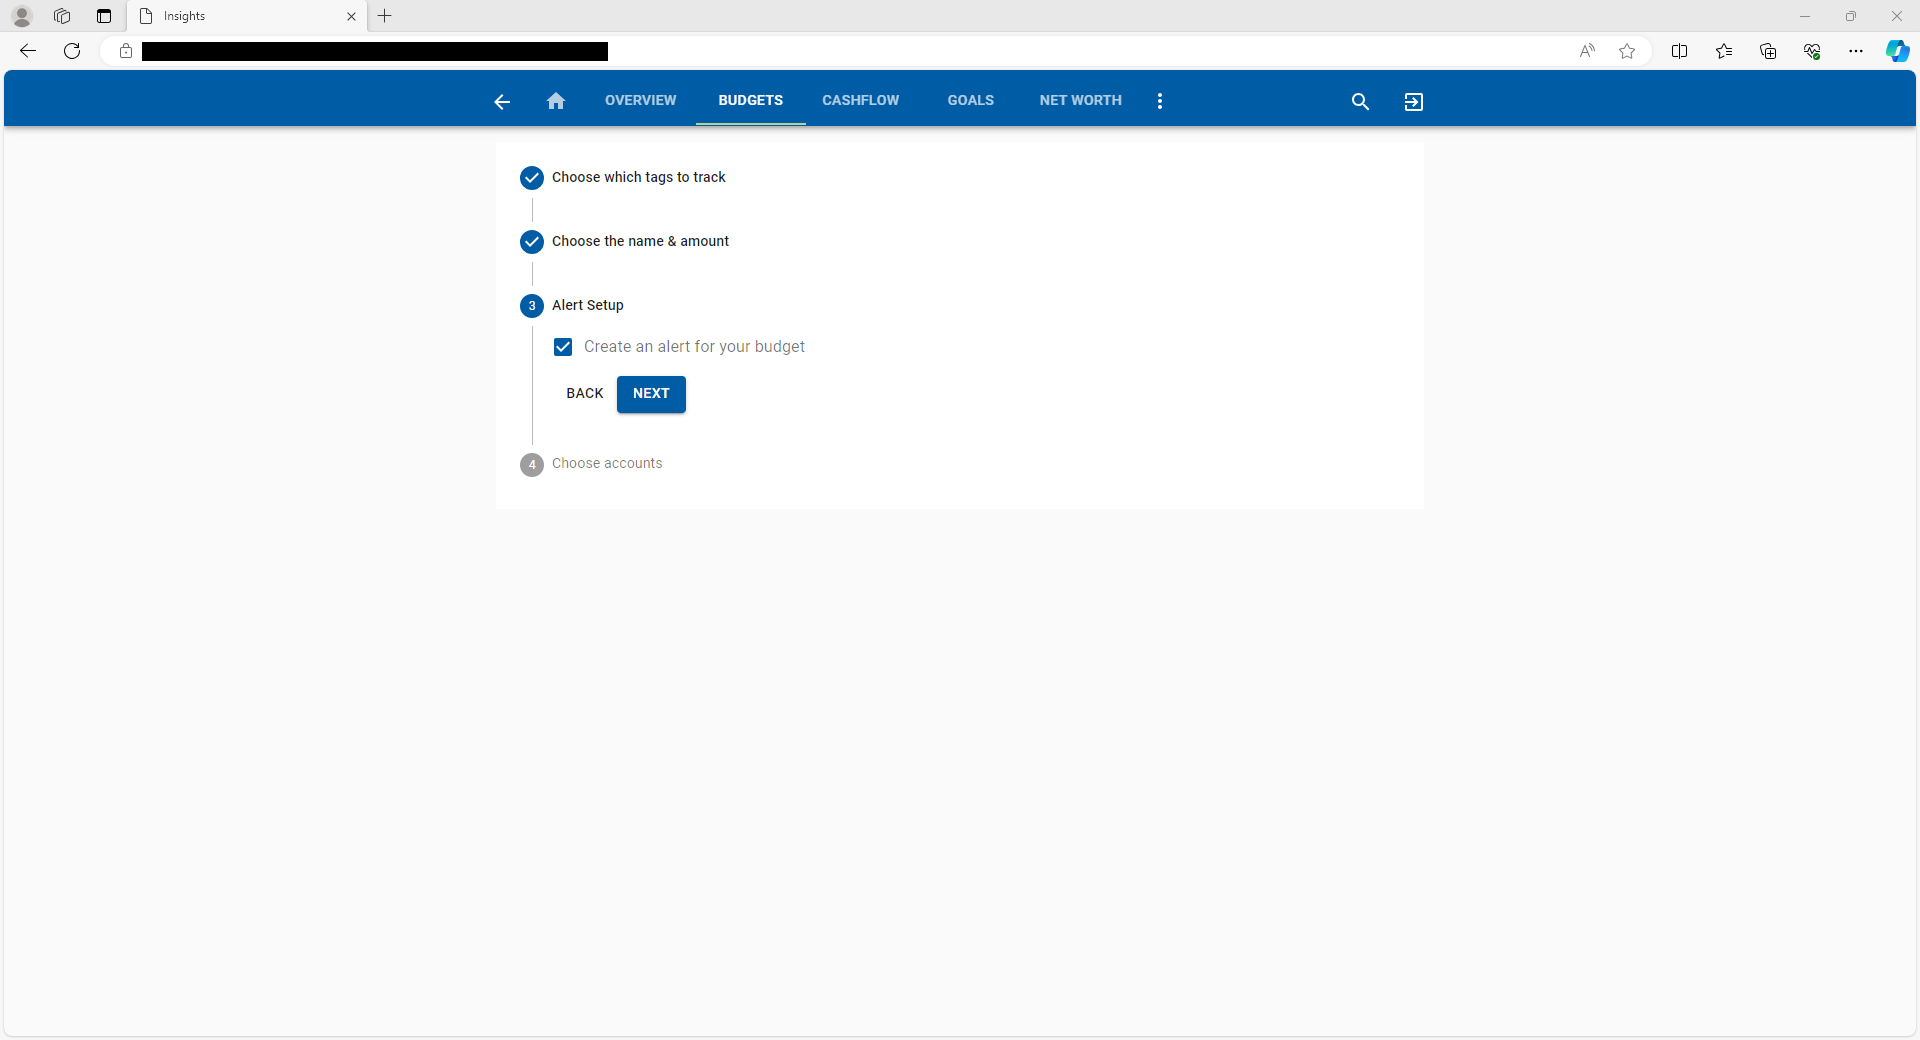
5. Next you will chose whether you would like an alert for your budget or not. Then click “Next”
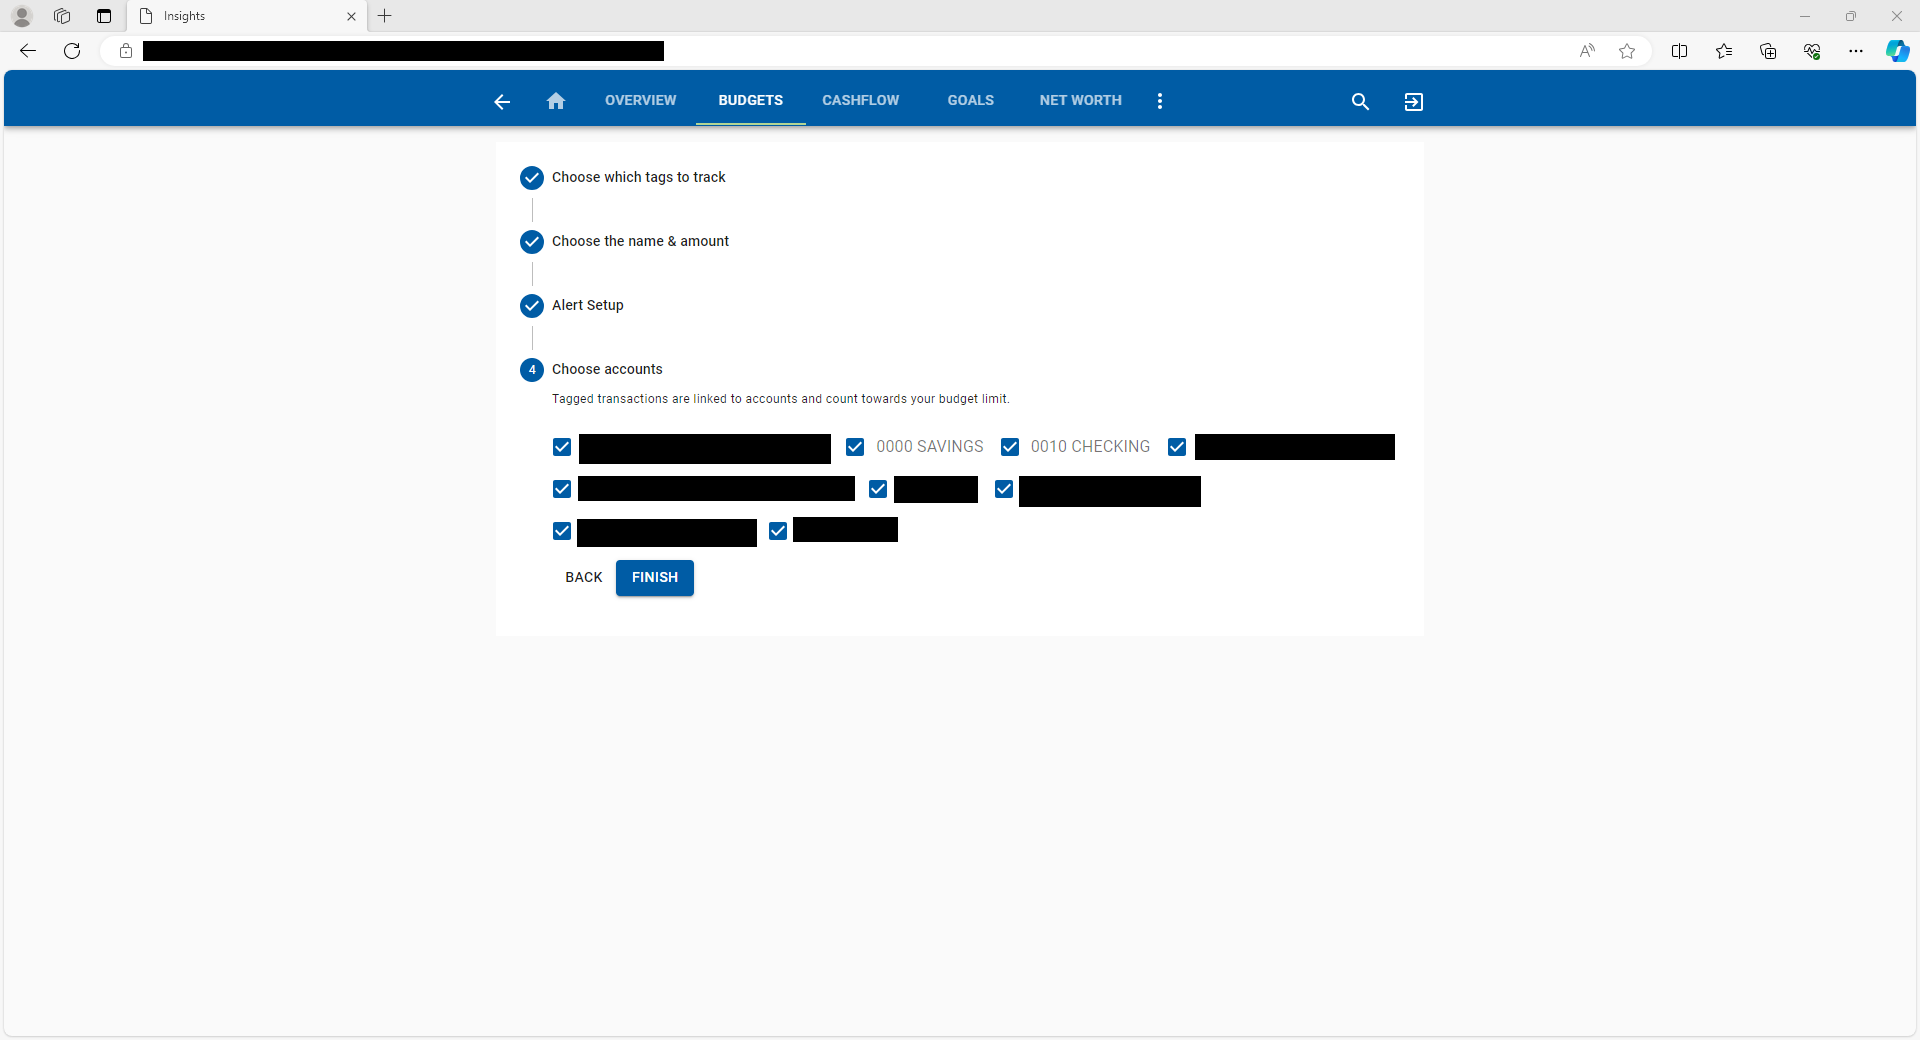
6. Select which accounts you want the budget to count toward, then click “Finish”.
Track Cashflow and Net worth
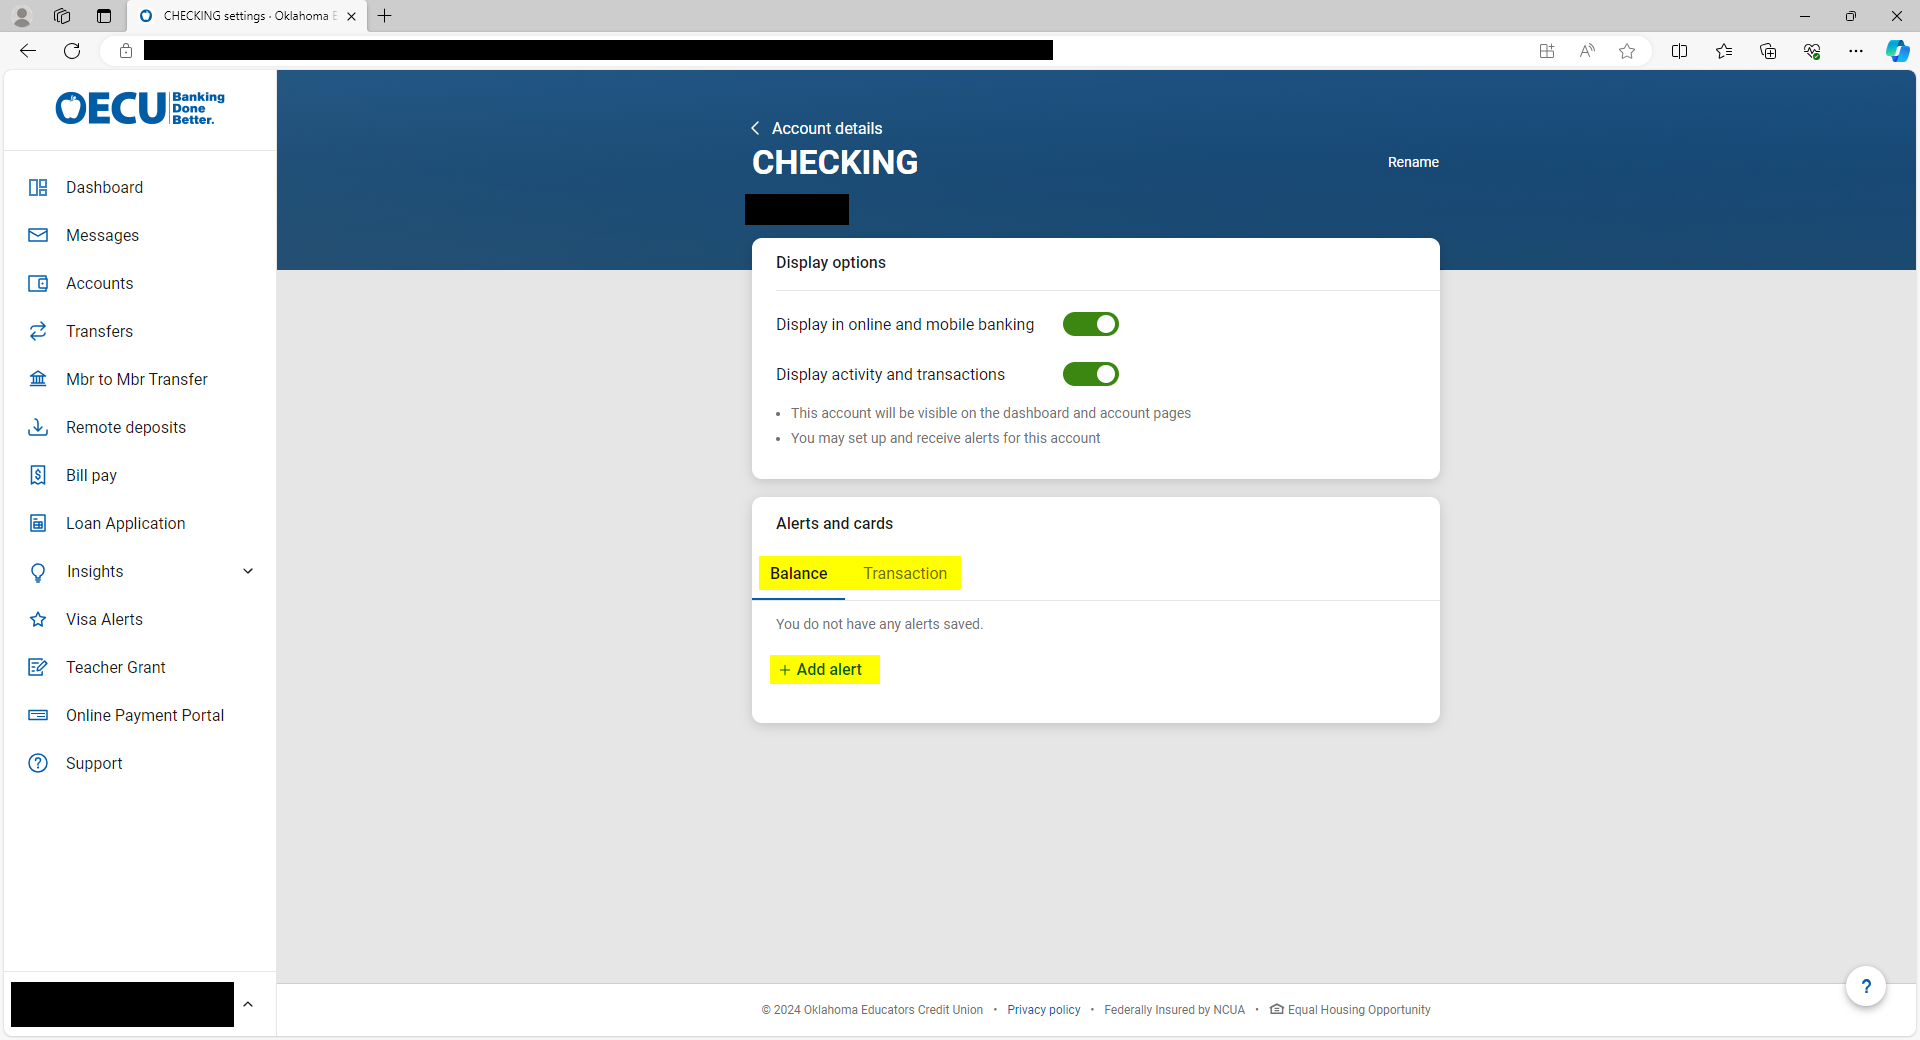
Additional custom alerts including Bill reminders and purchases from specific stores
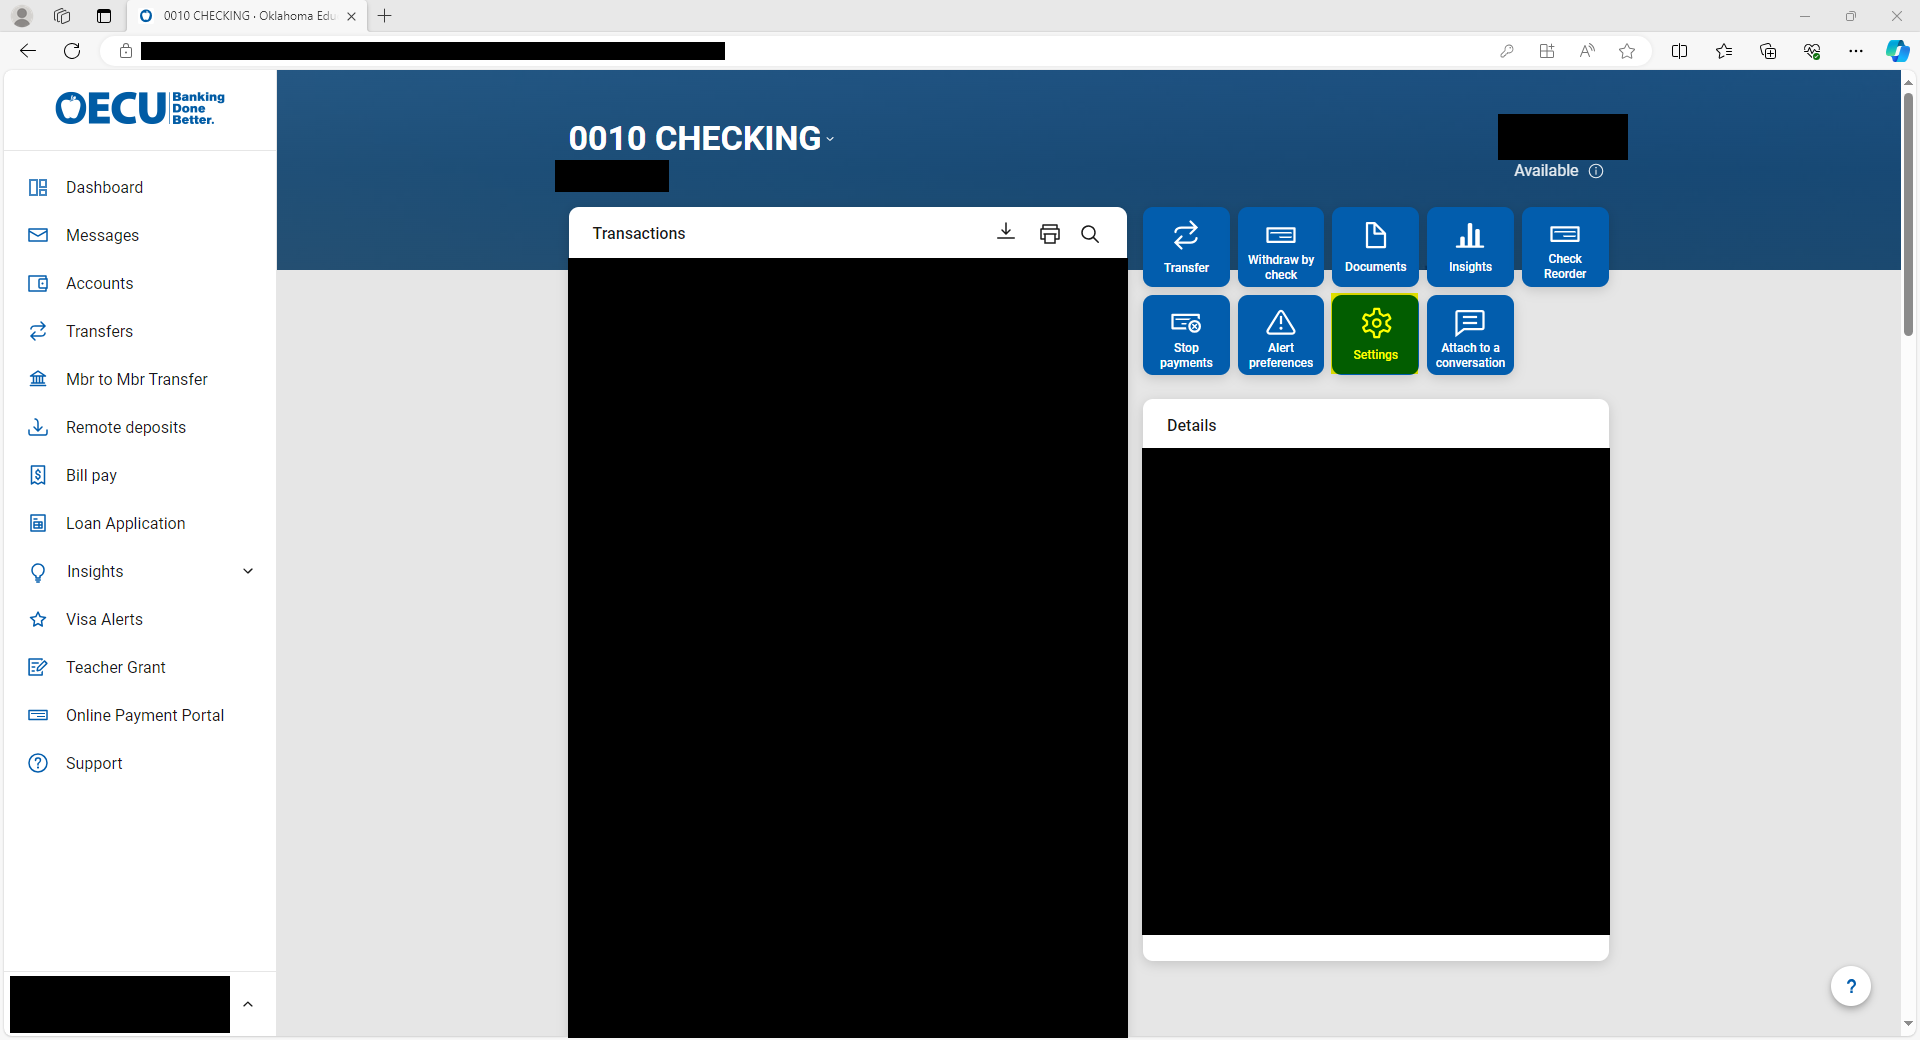
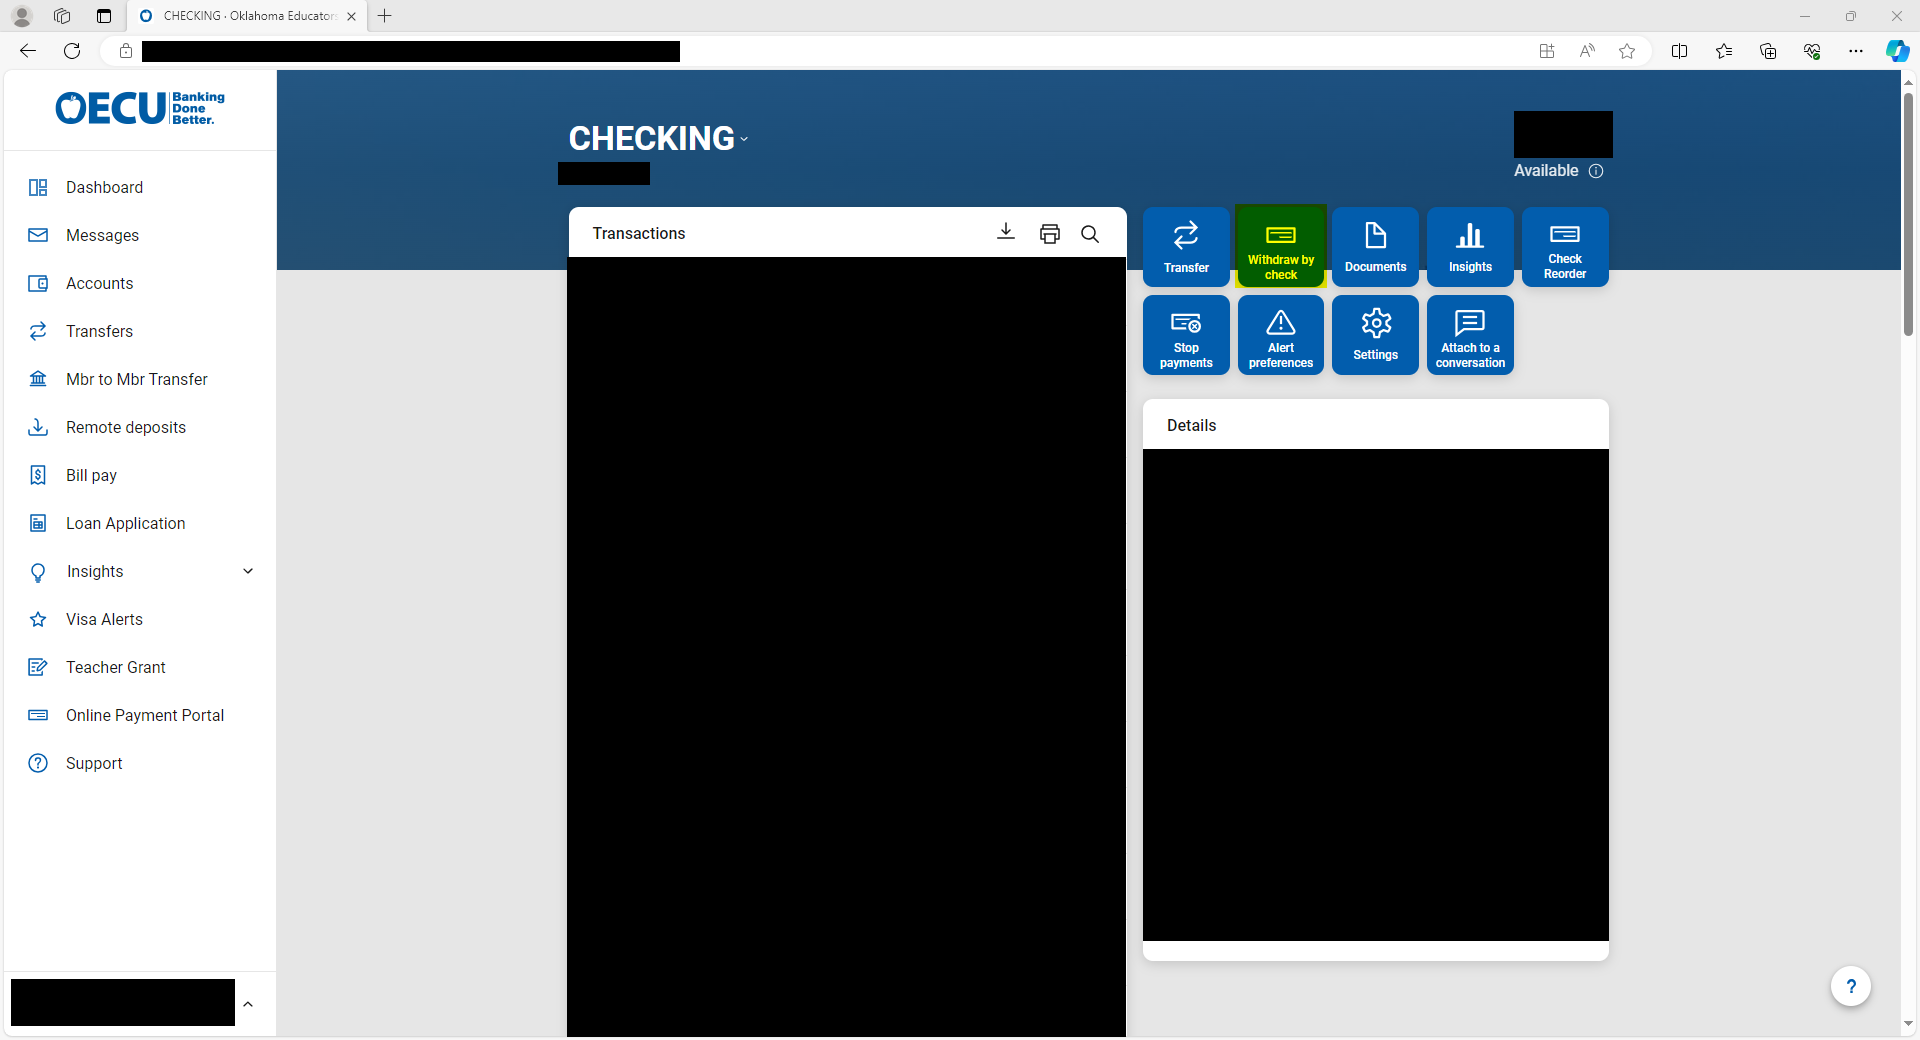
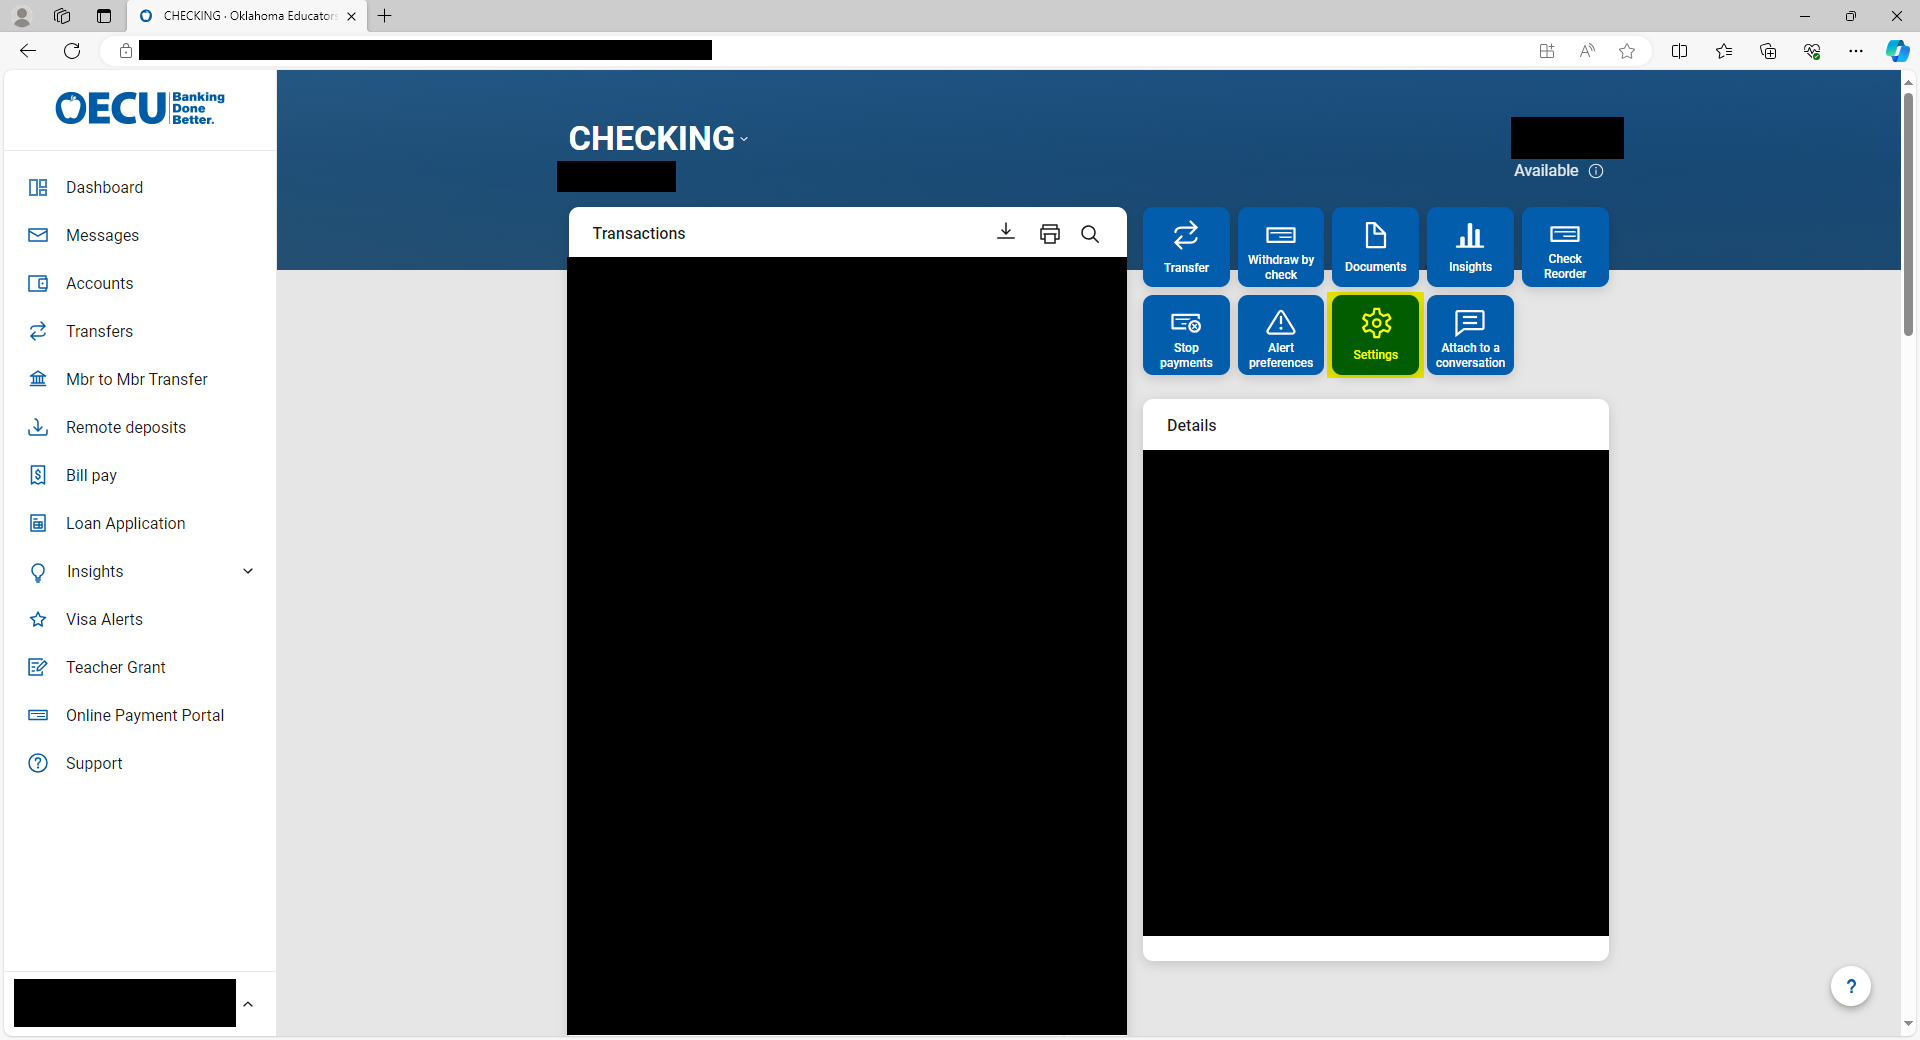
1. On the dashboard, select the account you wish to receive alerts for.
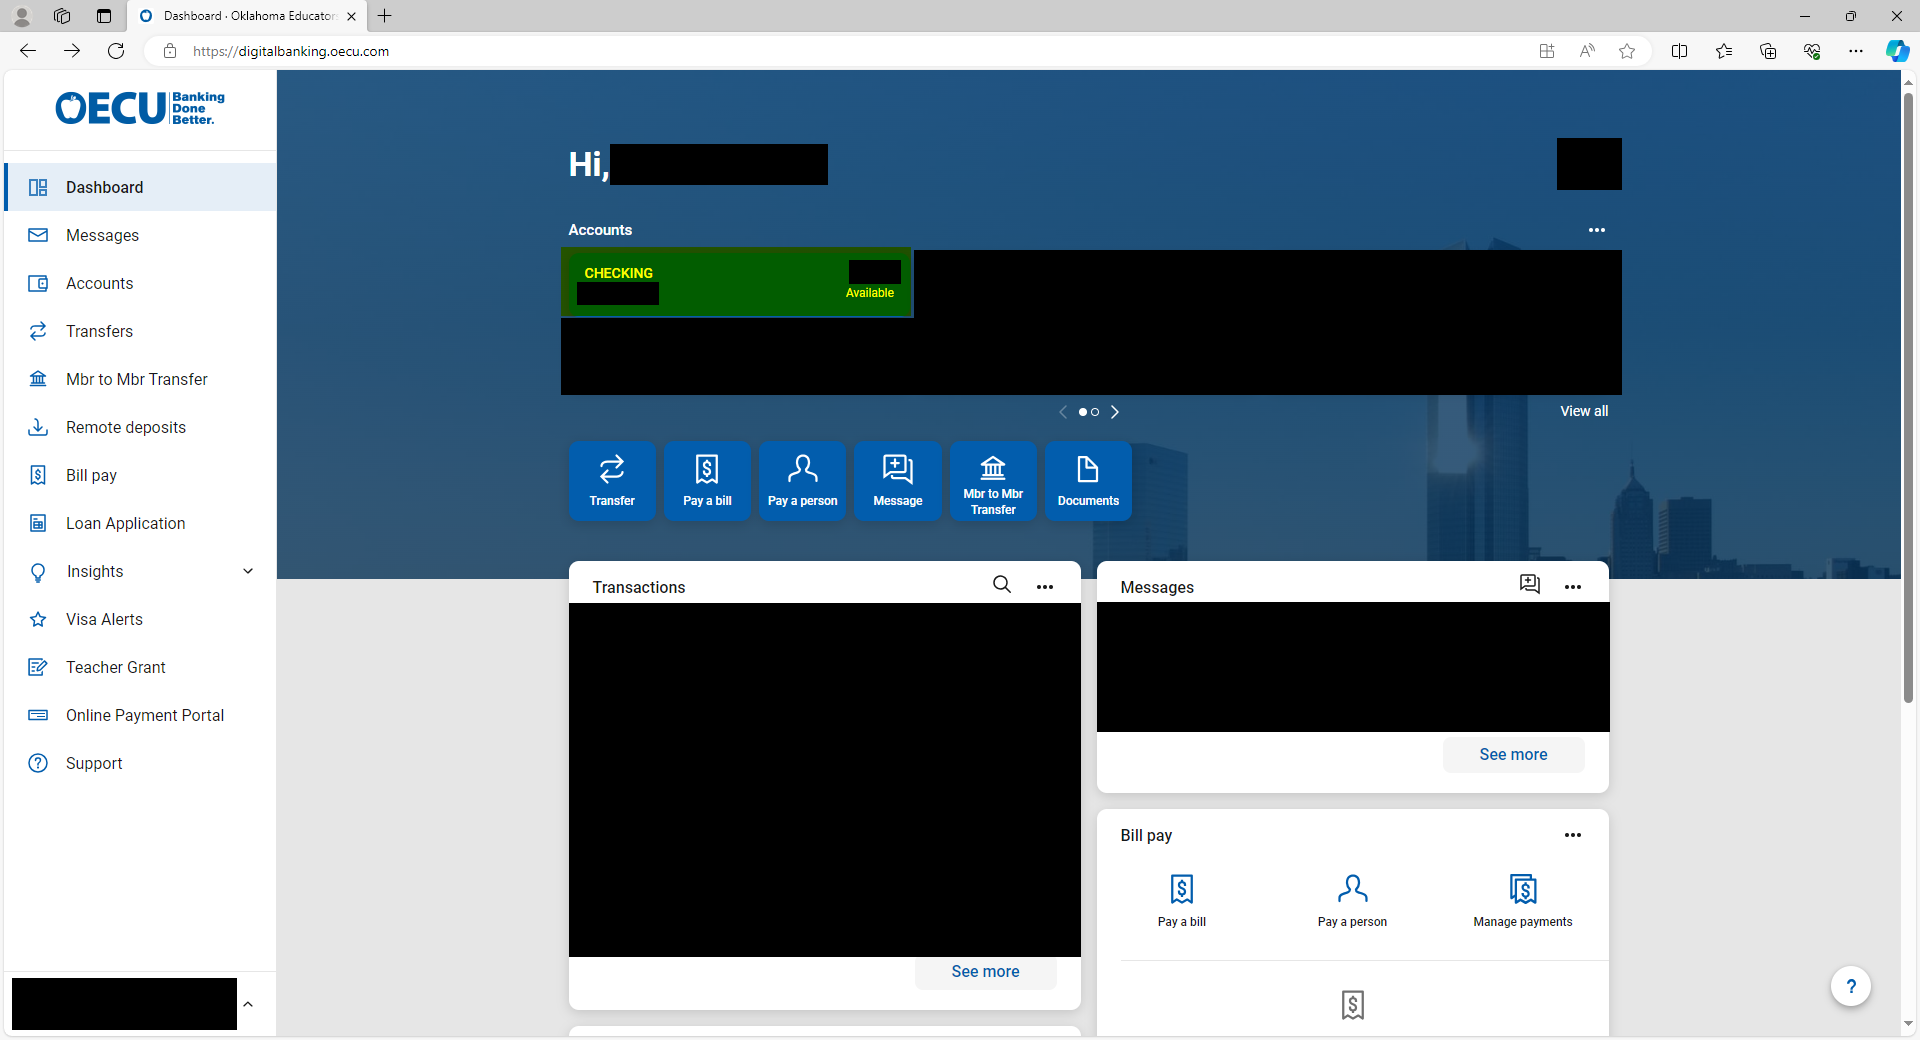
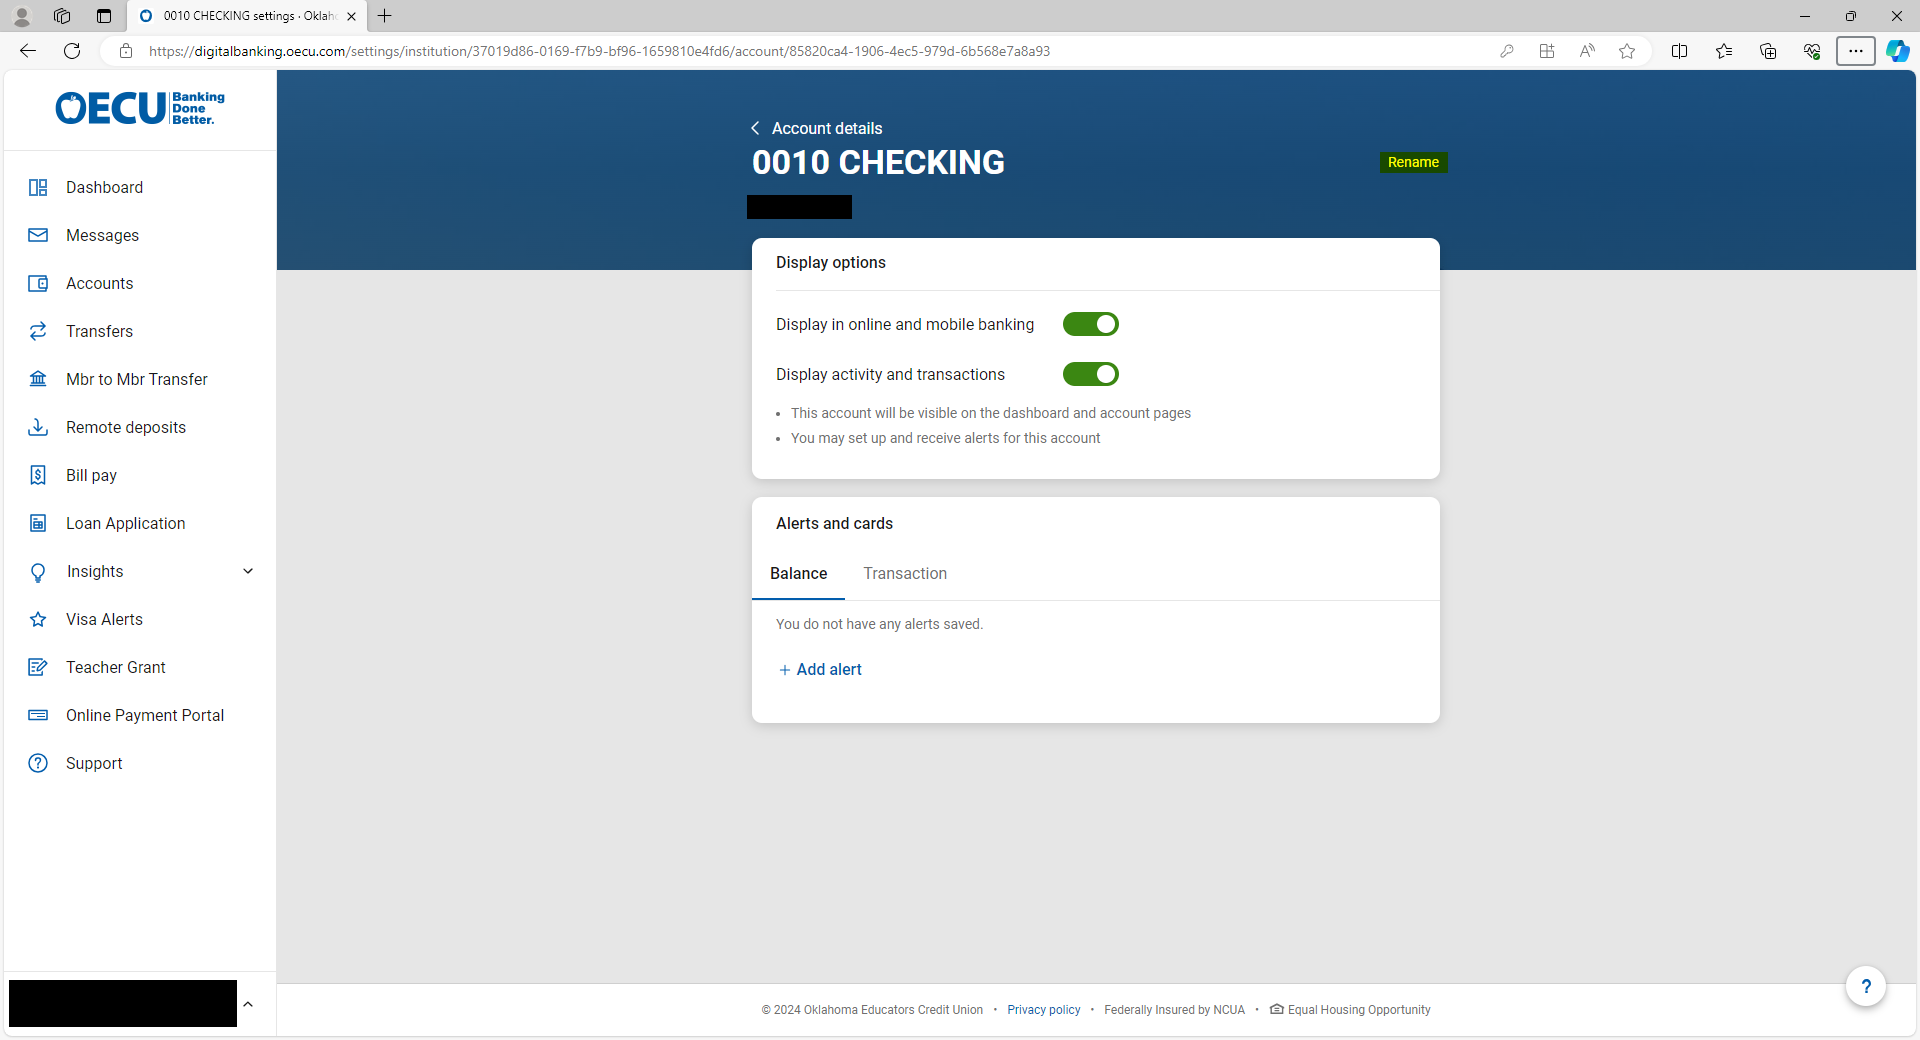
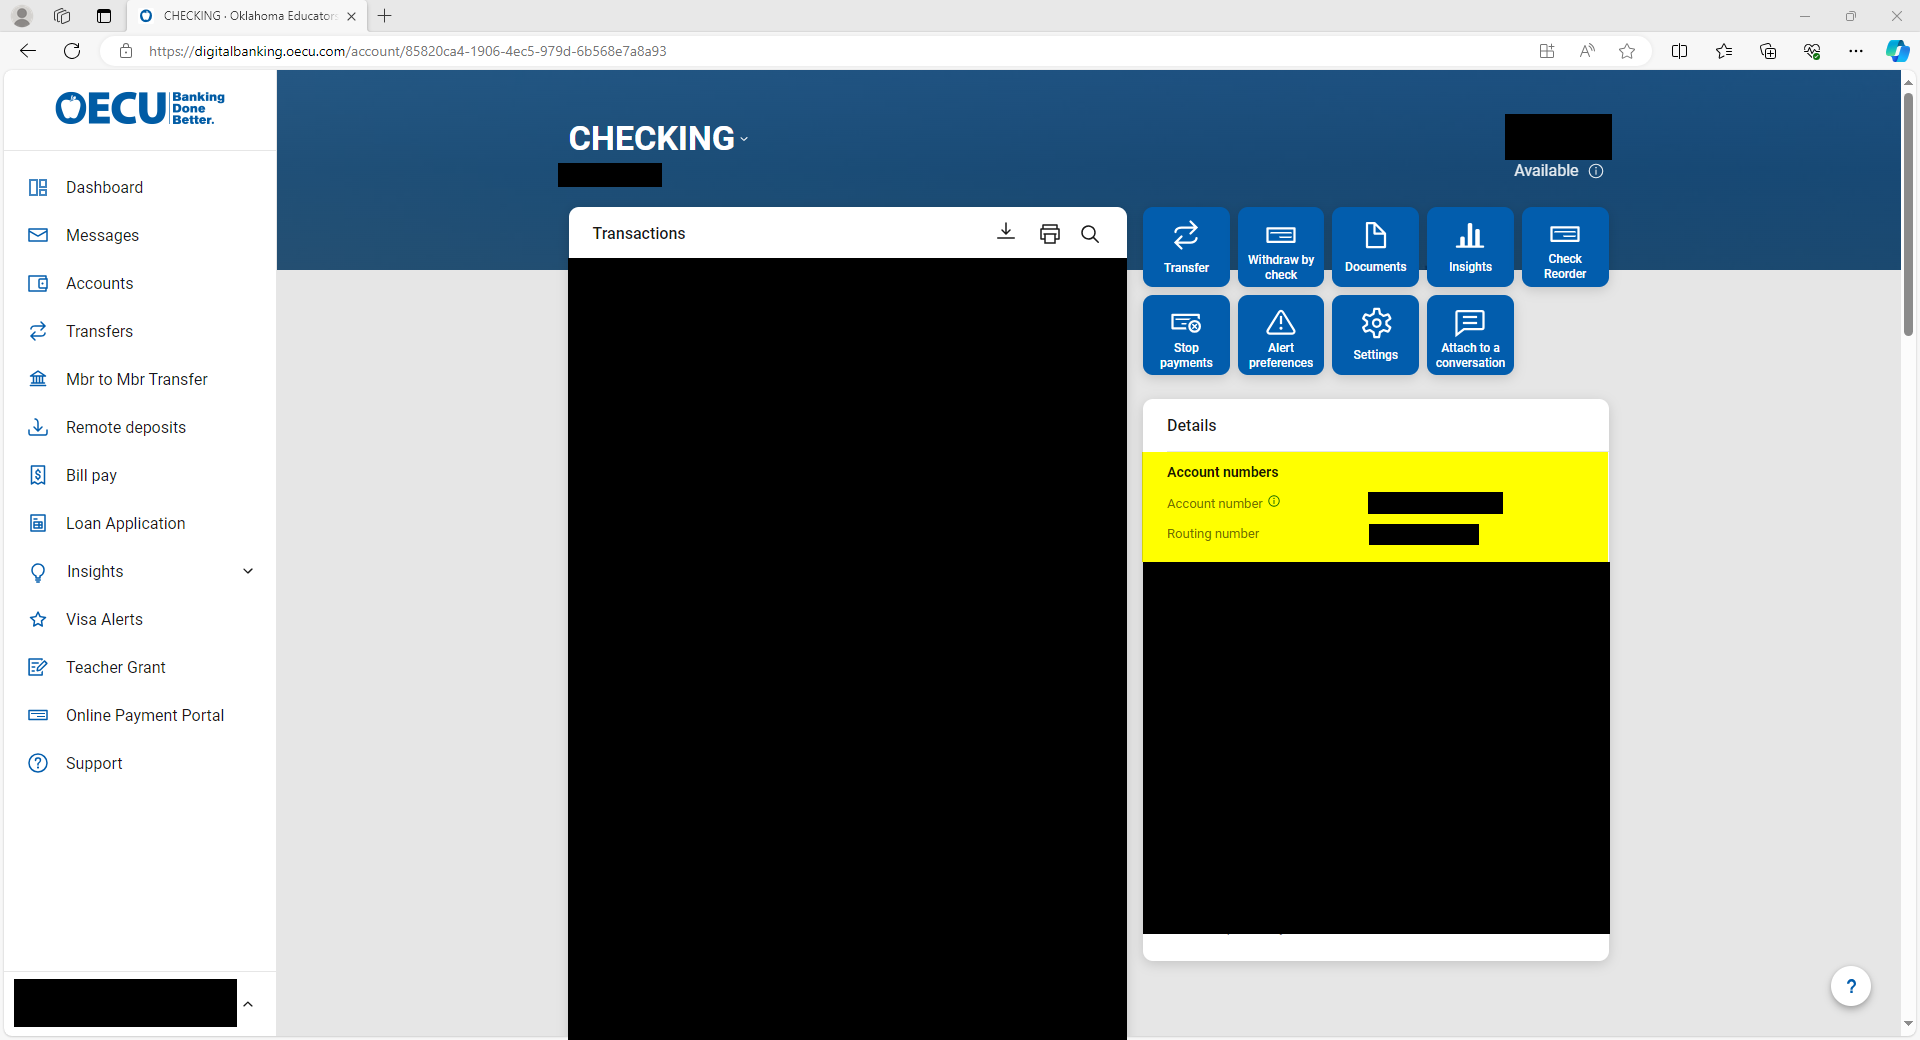
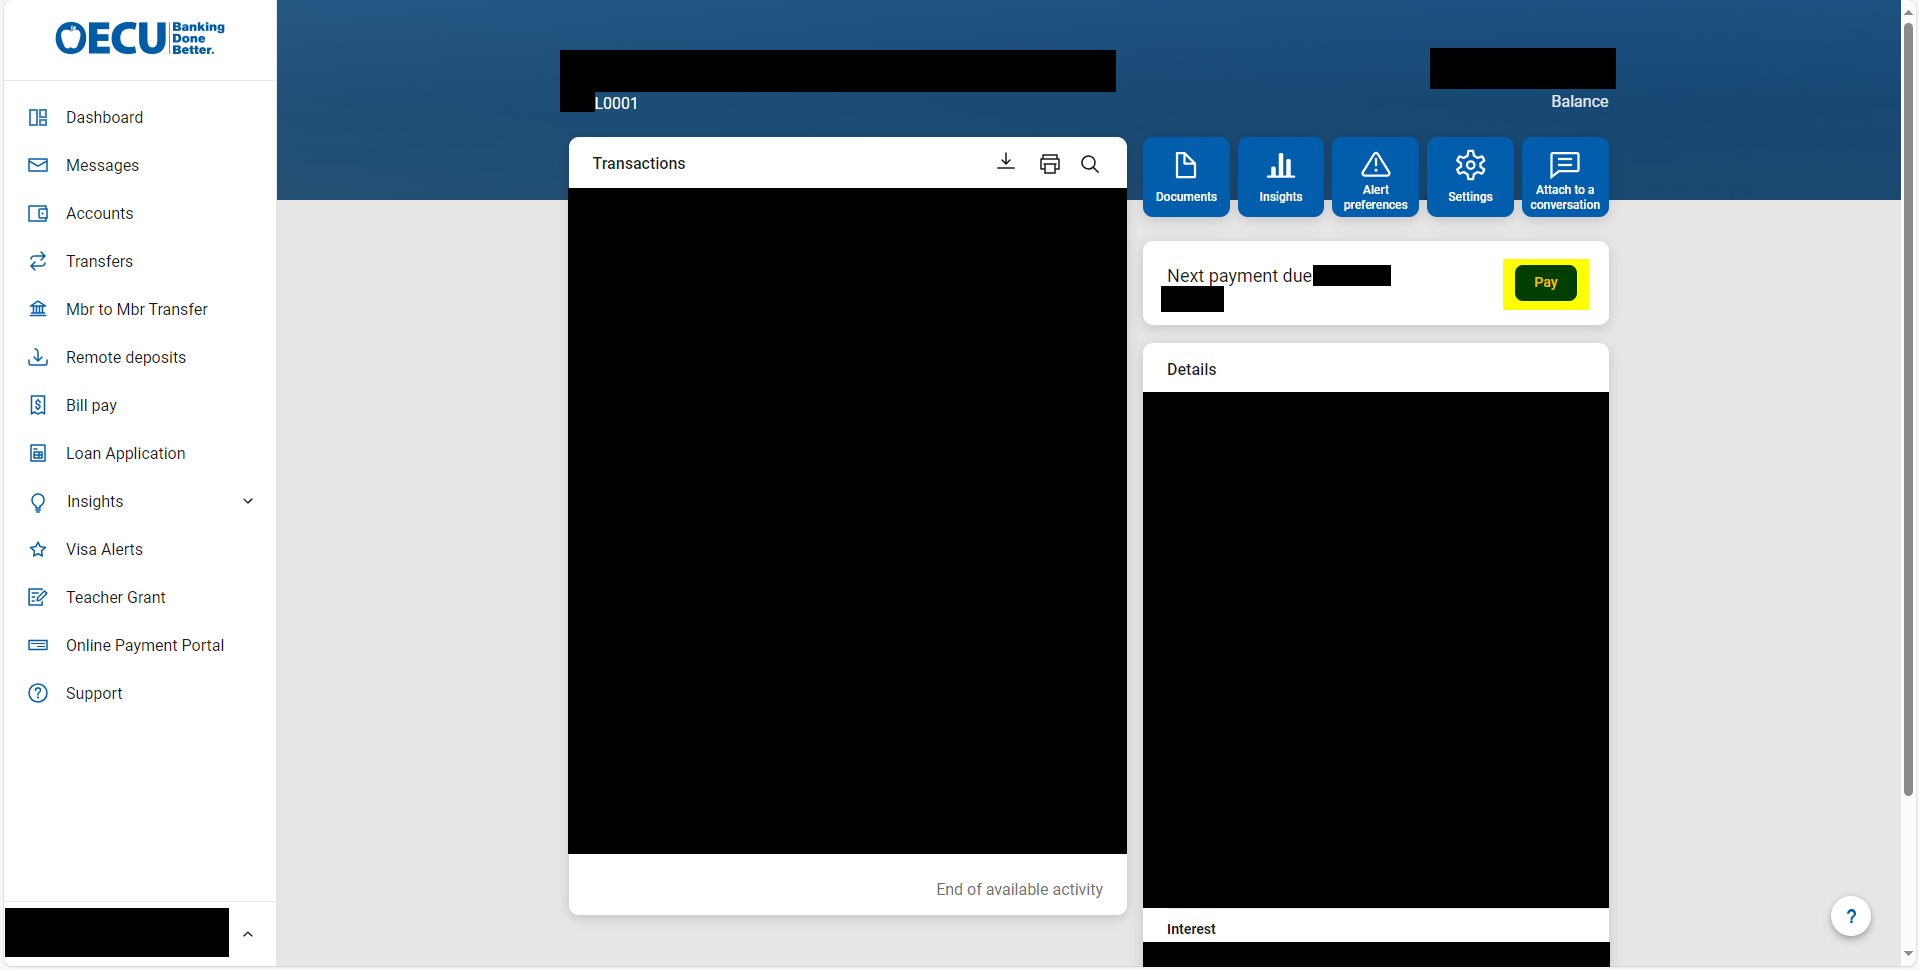
2. On the account page, click the “Settings” button
3. In the settings menu, you can add alerts for either a balance amount, or for transactions. For balance, you can set up to receive an alert if your balance goes under a certain amount or goes over a certain amount. For transactions, you can set up to receive an alert for when a transaction occurs over an amount you set, and you can set that for either credit or debit. Alerts can be received via Text message, Email, or In-App Message.
SUPPORT
OTHER
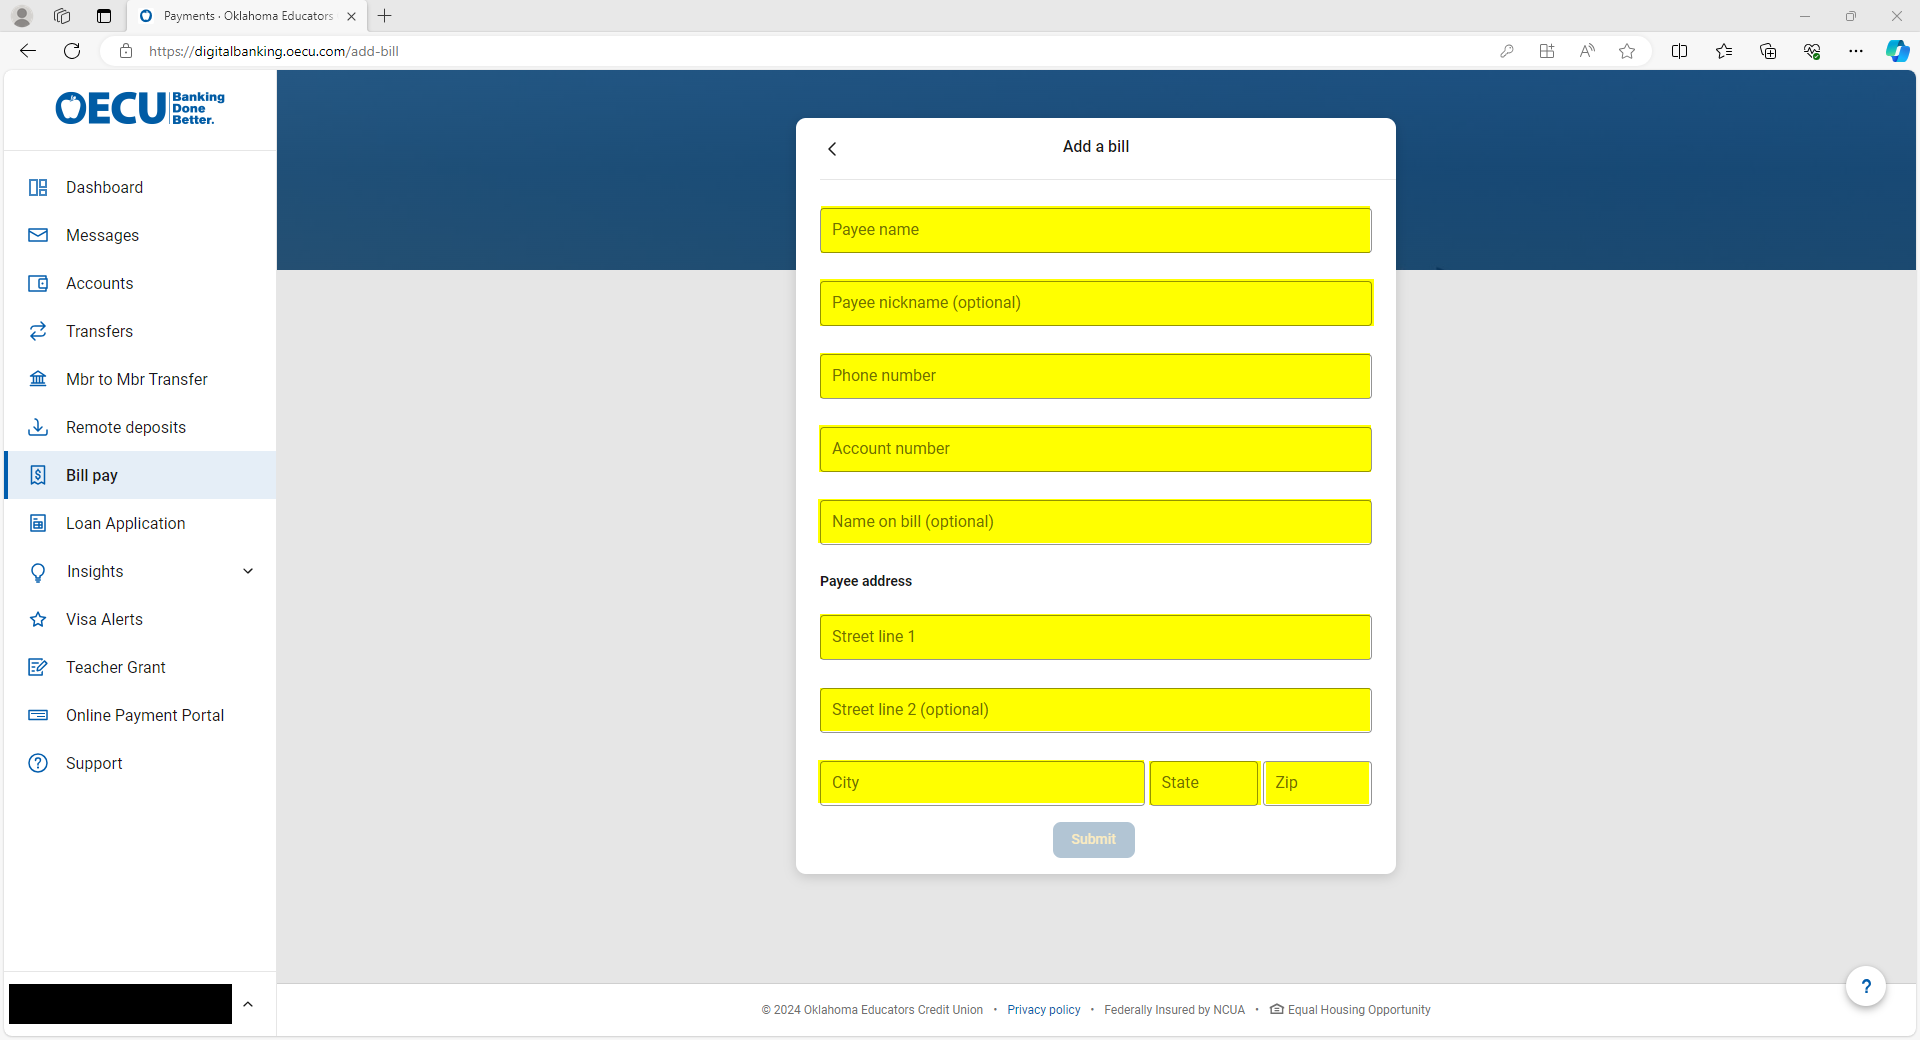
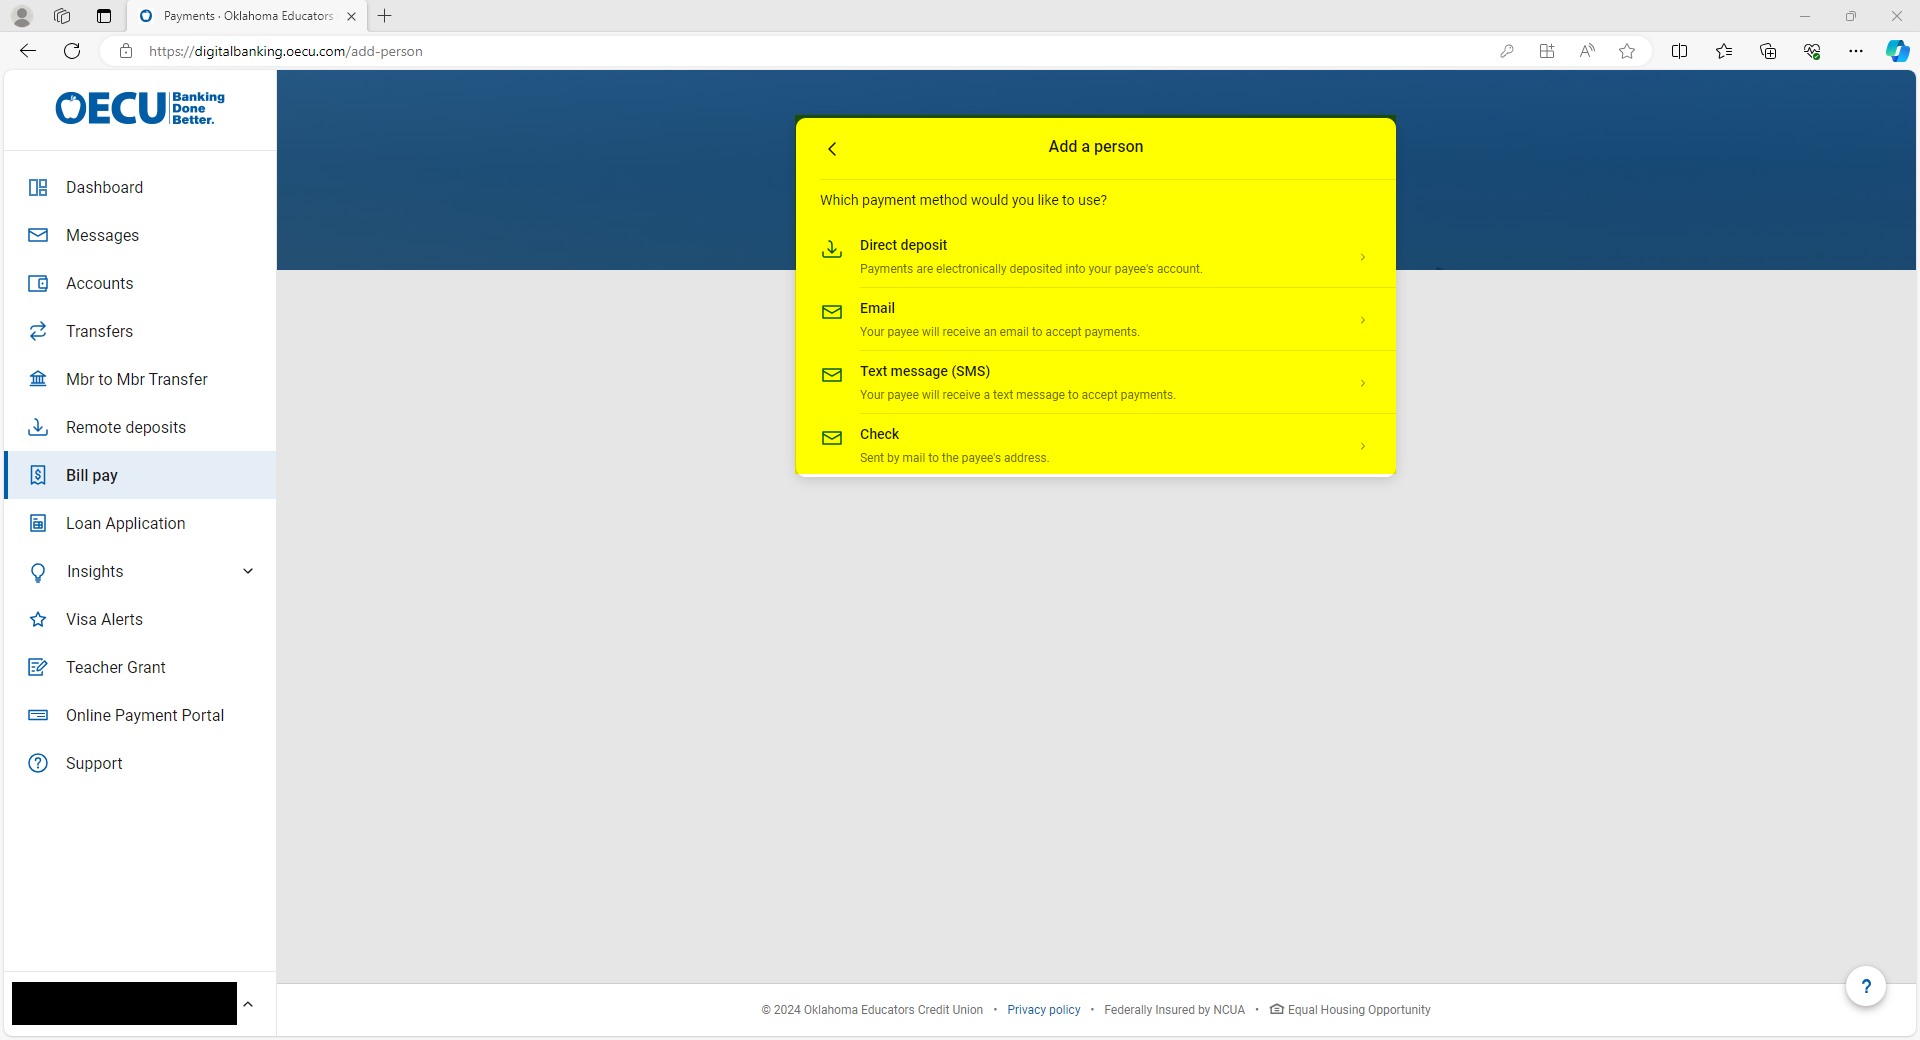
**NOTE: You will need to enroll into the billpay service to use it. If you are not currently enrolled, a prompt will appear to enroll your eligible accounts** Ability to pay a person or bill through OECU Bill Pay
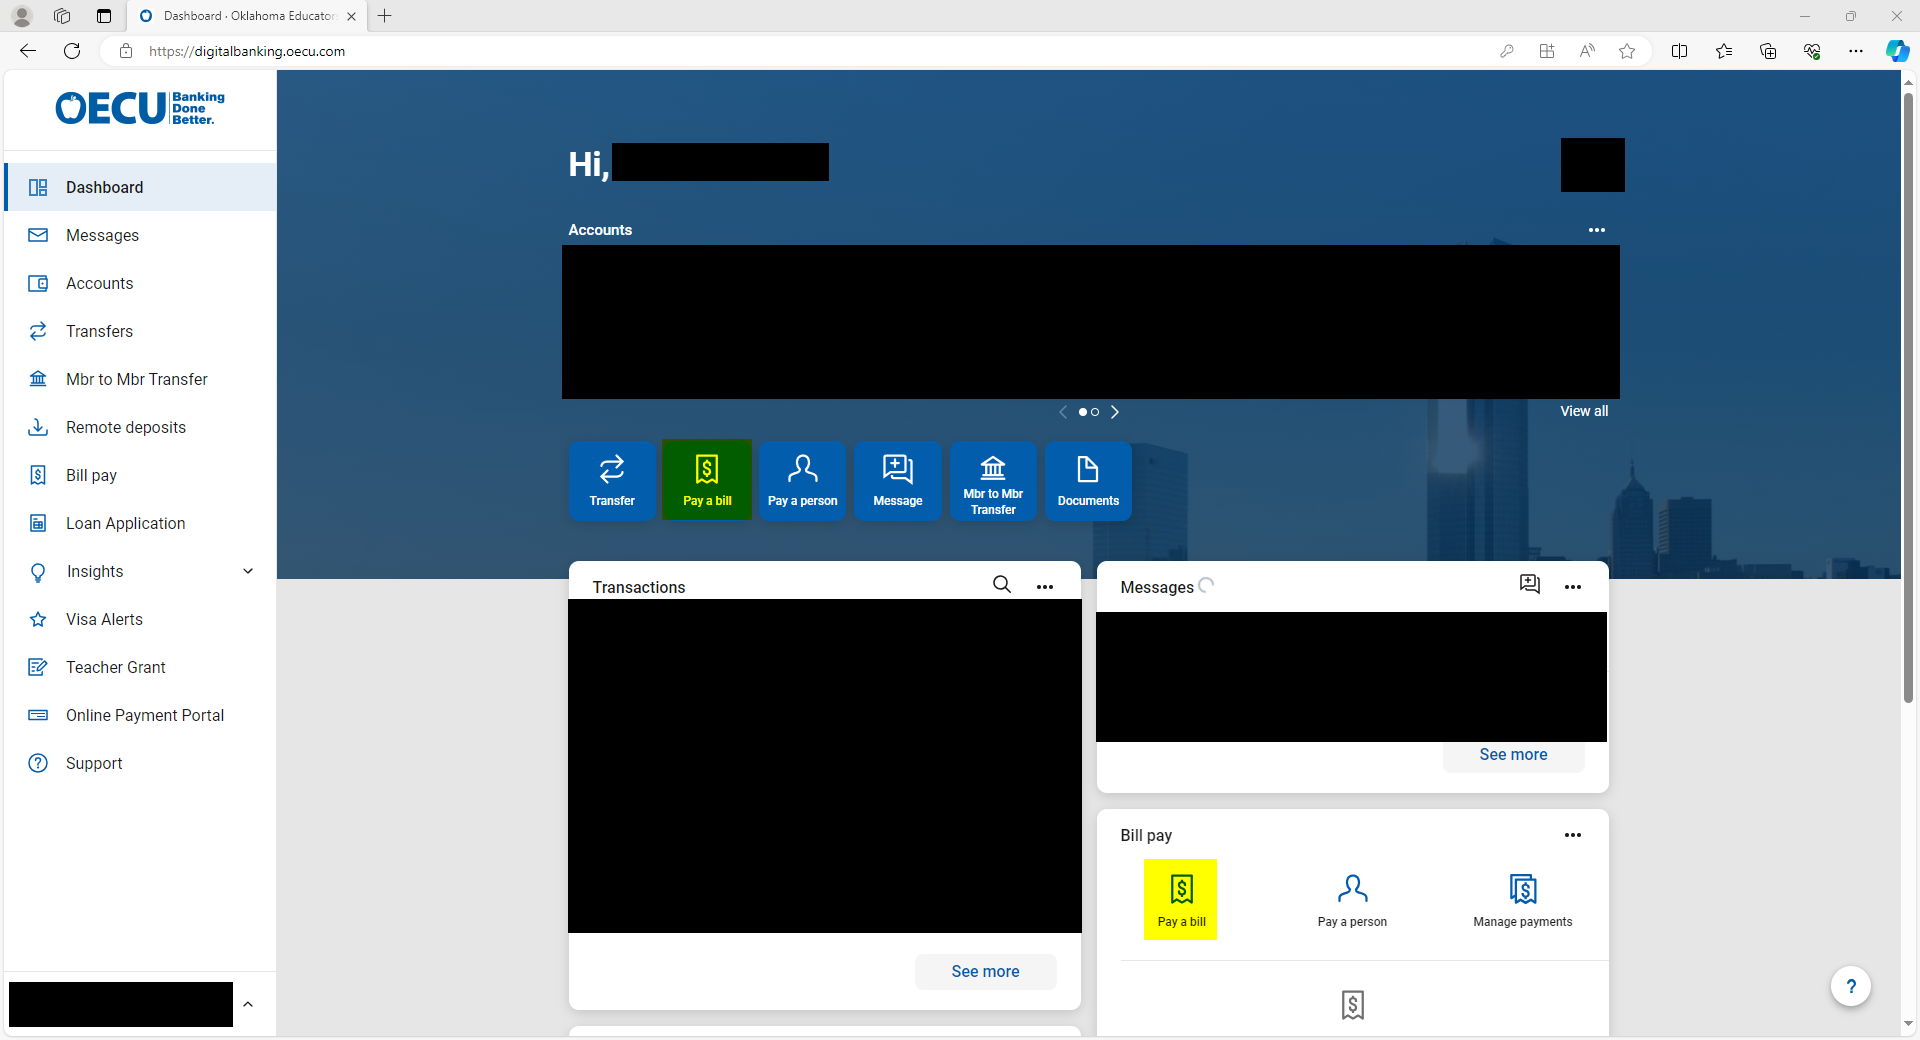
1. To pay a bill using billpay, Click the “Pay a bill” option on the Billpay card, or the “Pay a bill” button below the accounts.
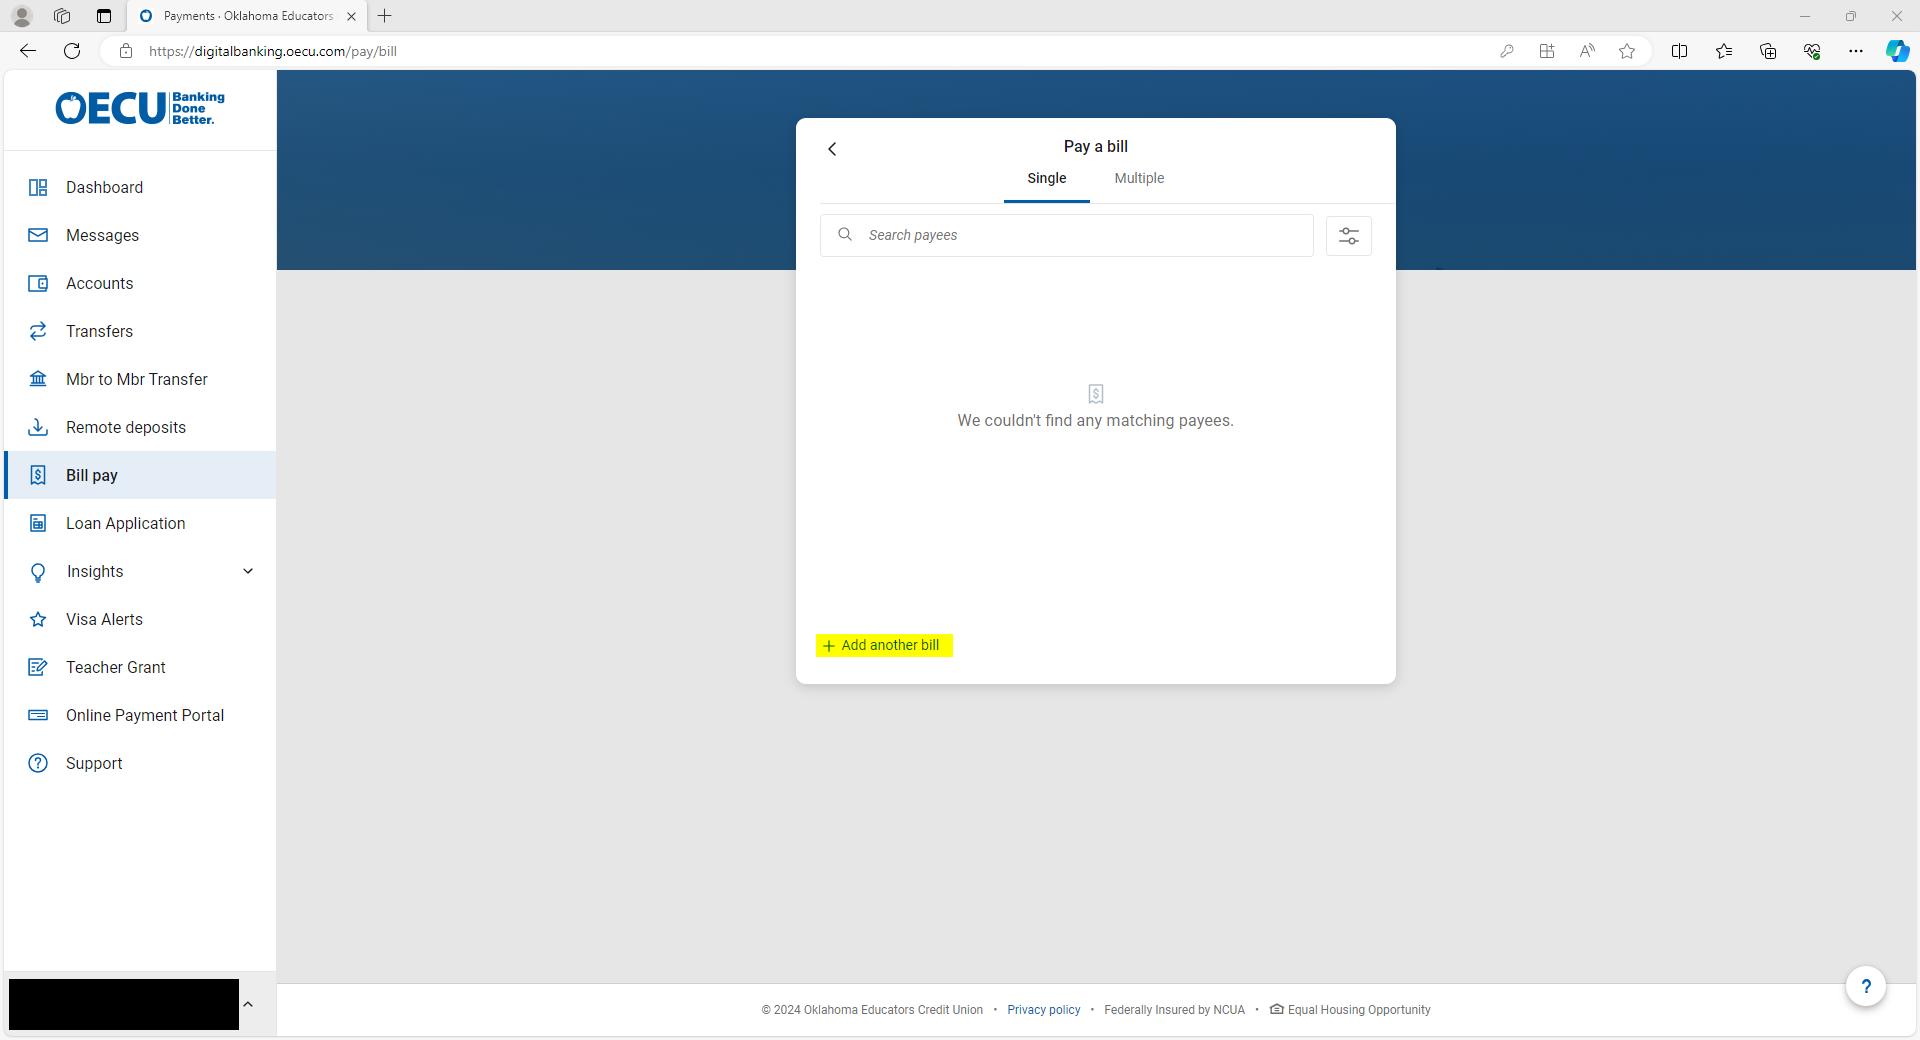
2. This will take you to the billpay menu where you can select to pay a previously entered payee, or to add a new payee by clicking the “+ Add another bill” at the bottom of the card.
3. From here, fill out the information needed to submit the payment.
4. To pay a person using the billpay system, instead of selecting “Pay a bill”, you will select “Pay a person”. You will have some different options on how the funds are sent to the person.
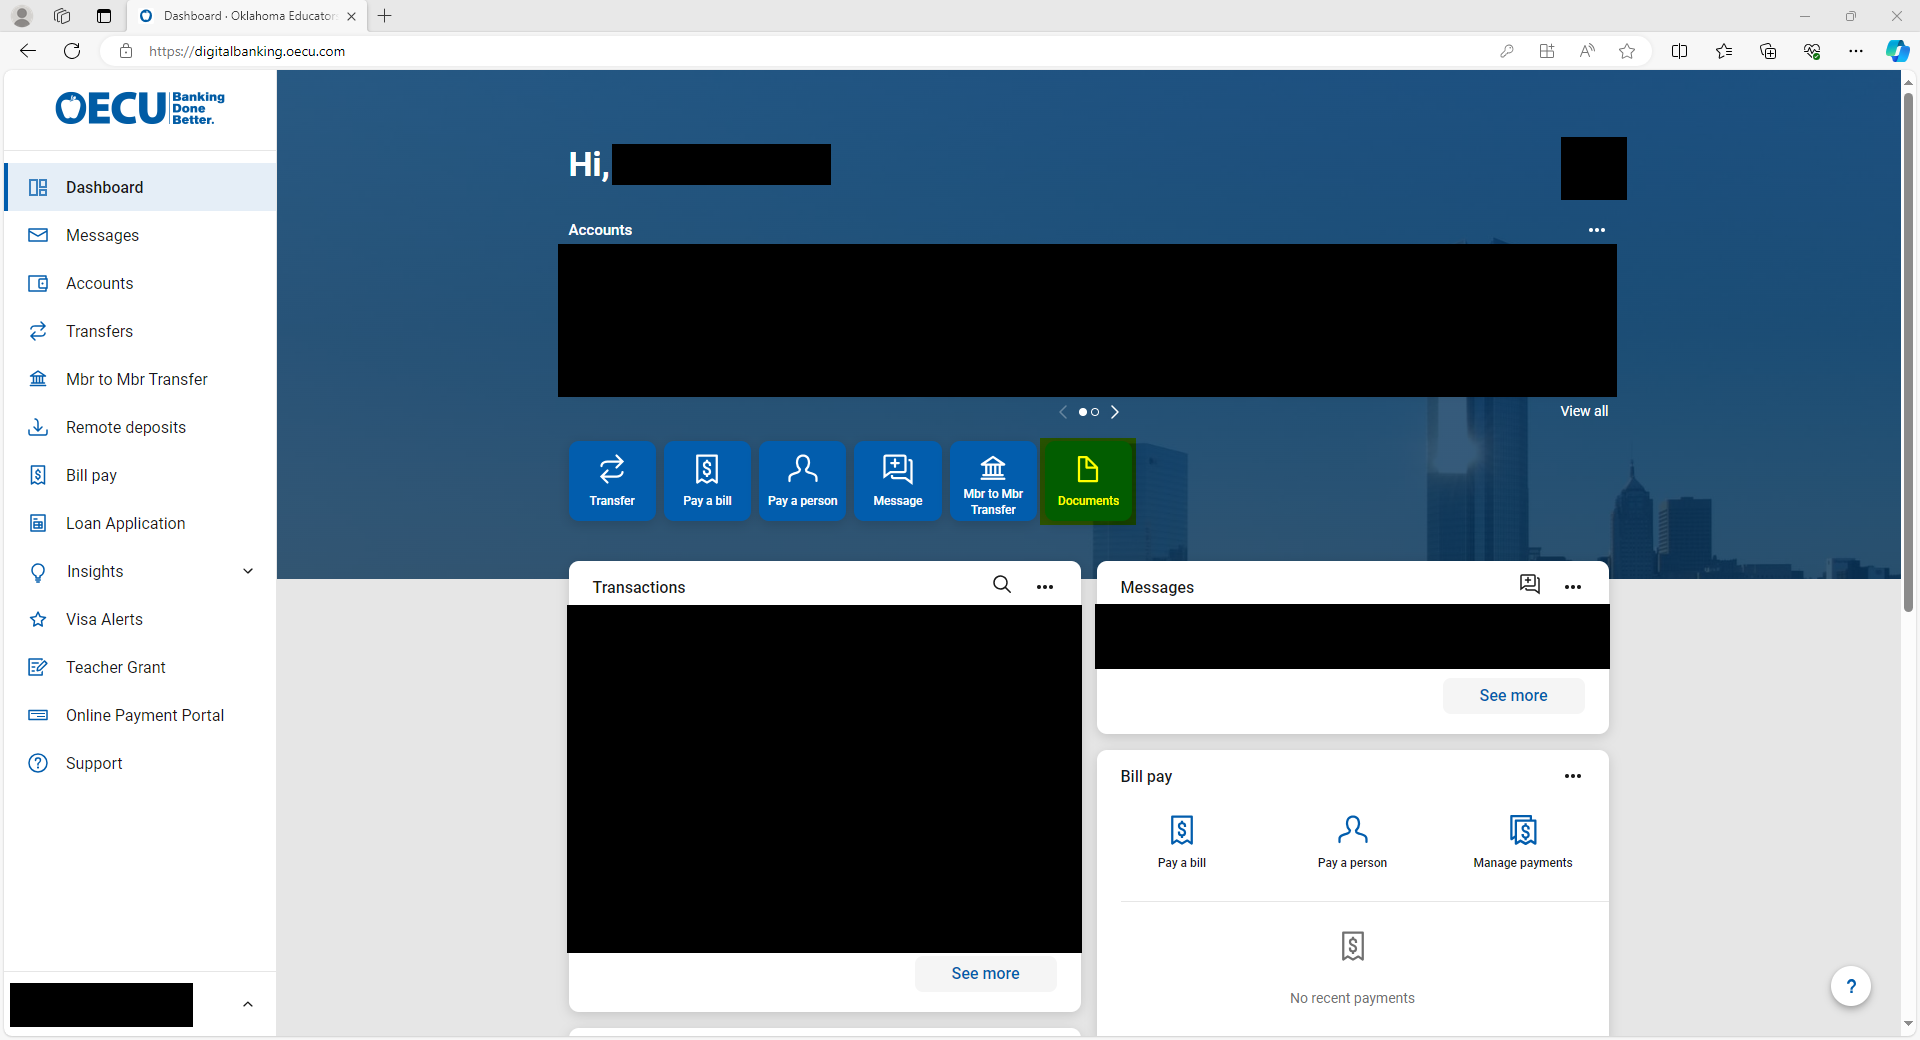
Quick access to all your documents
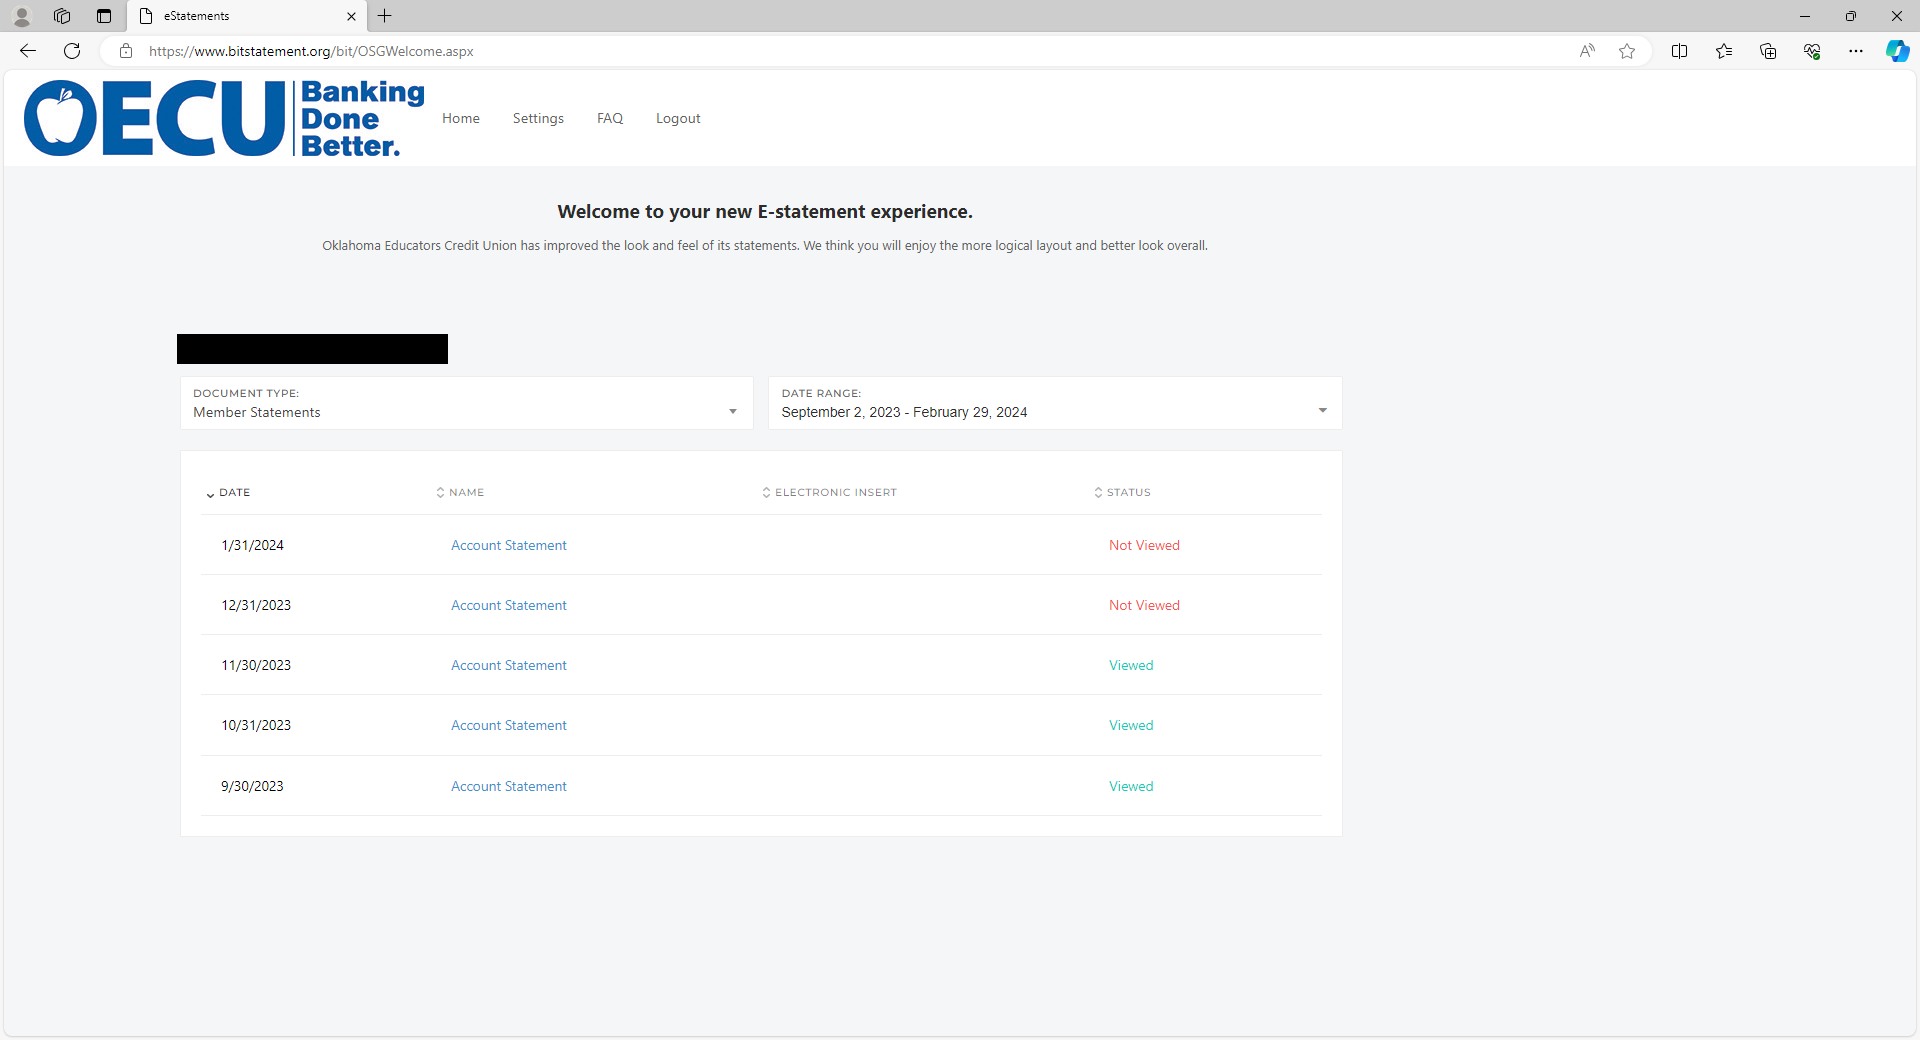
(Statements, Notices, Tax forms, or Mortgage statements. Since this is a direct connection to OSG, it will have all the document history we have published for the members)
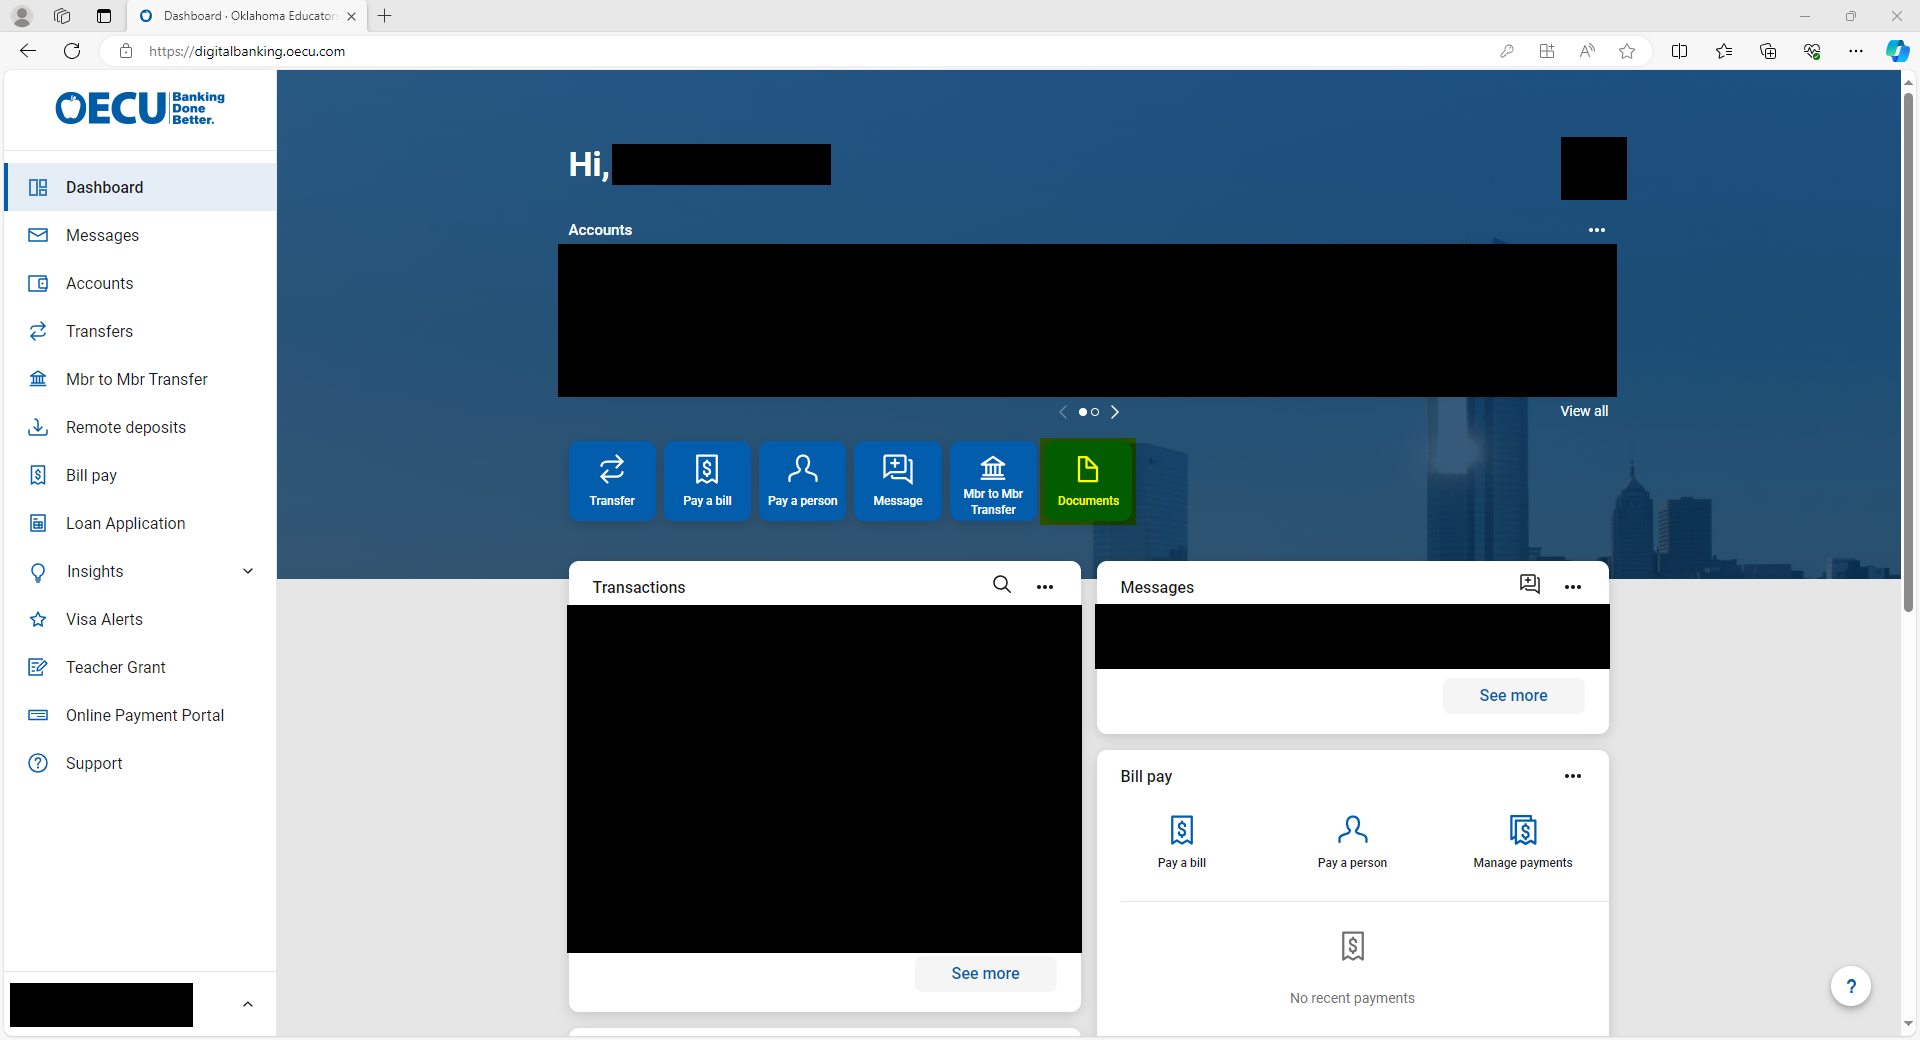
1. Click the “Documents” button on the main accounts page
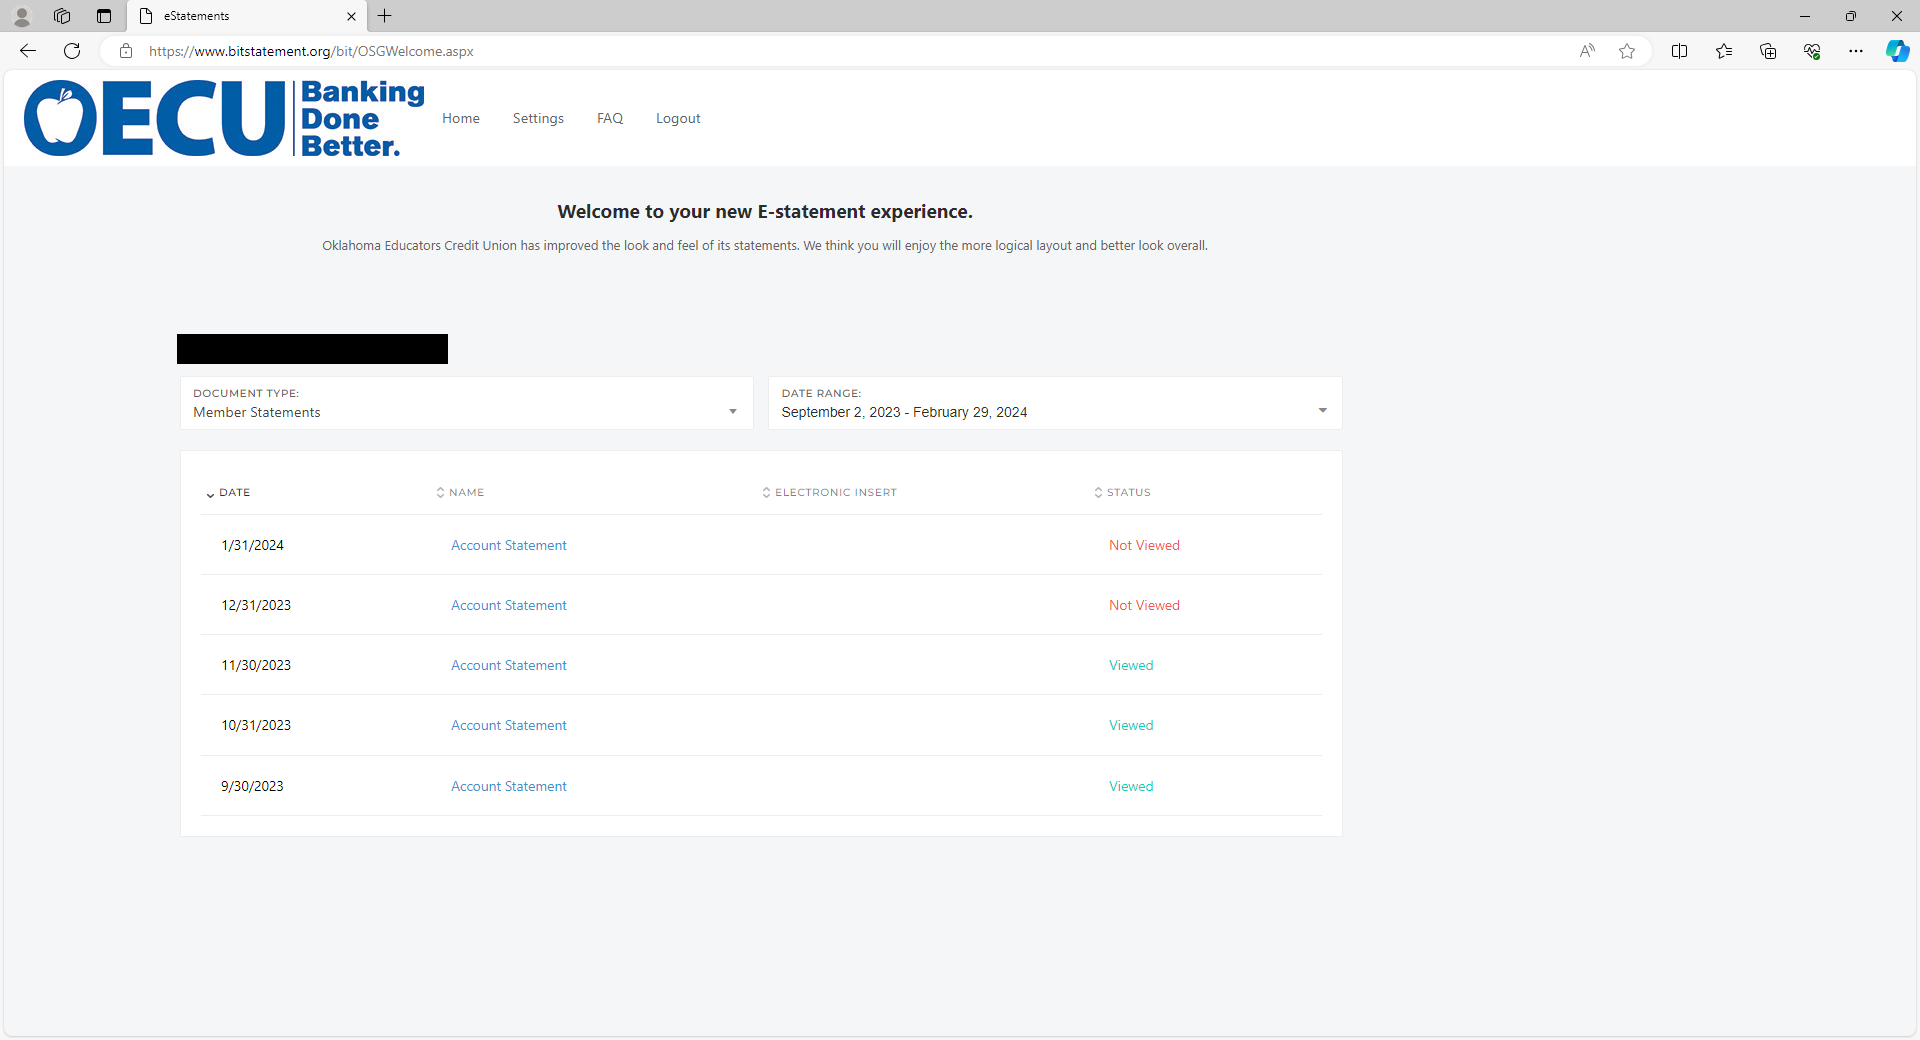
2. From this page, you will be able to view your Estatements, using the date range box to narrow down the options.
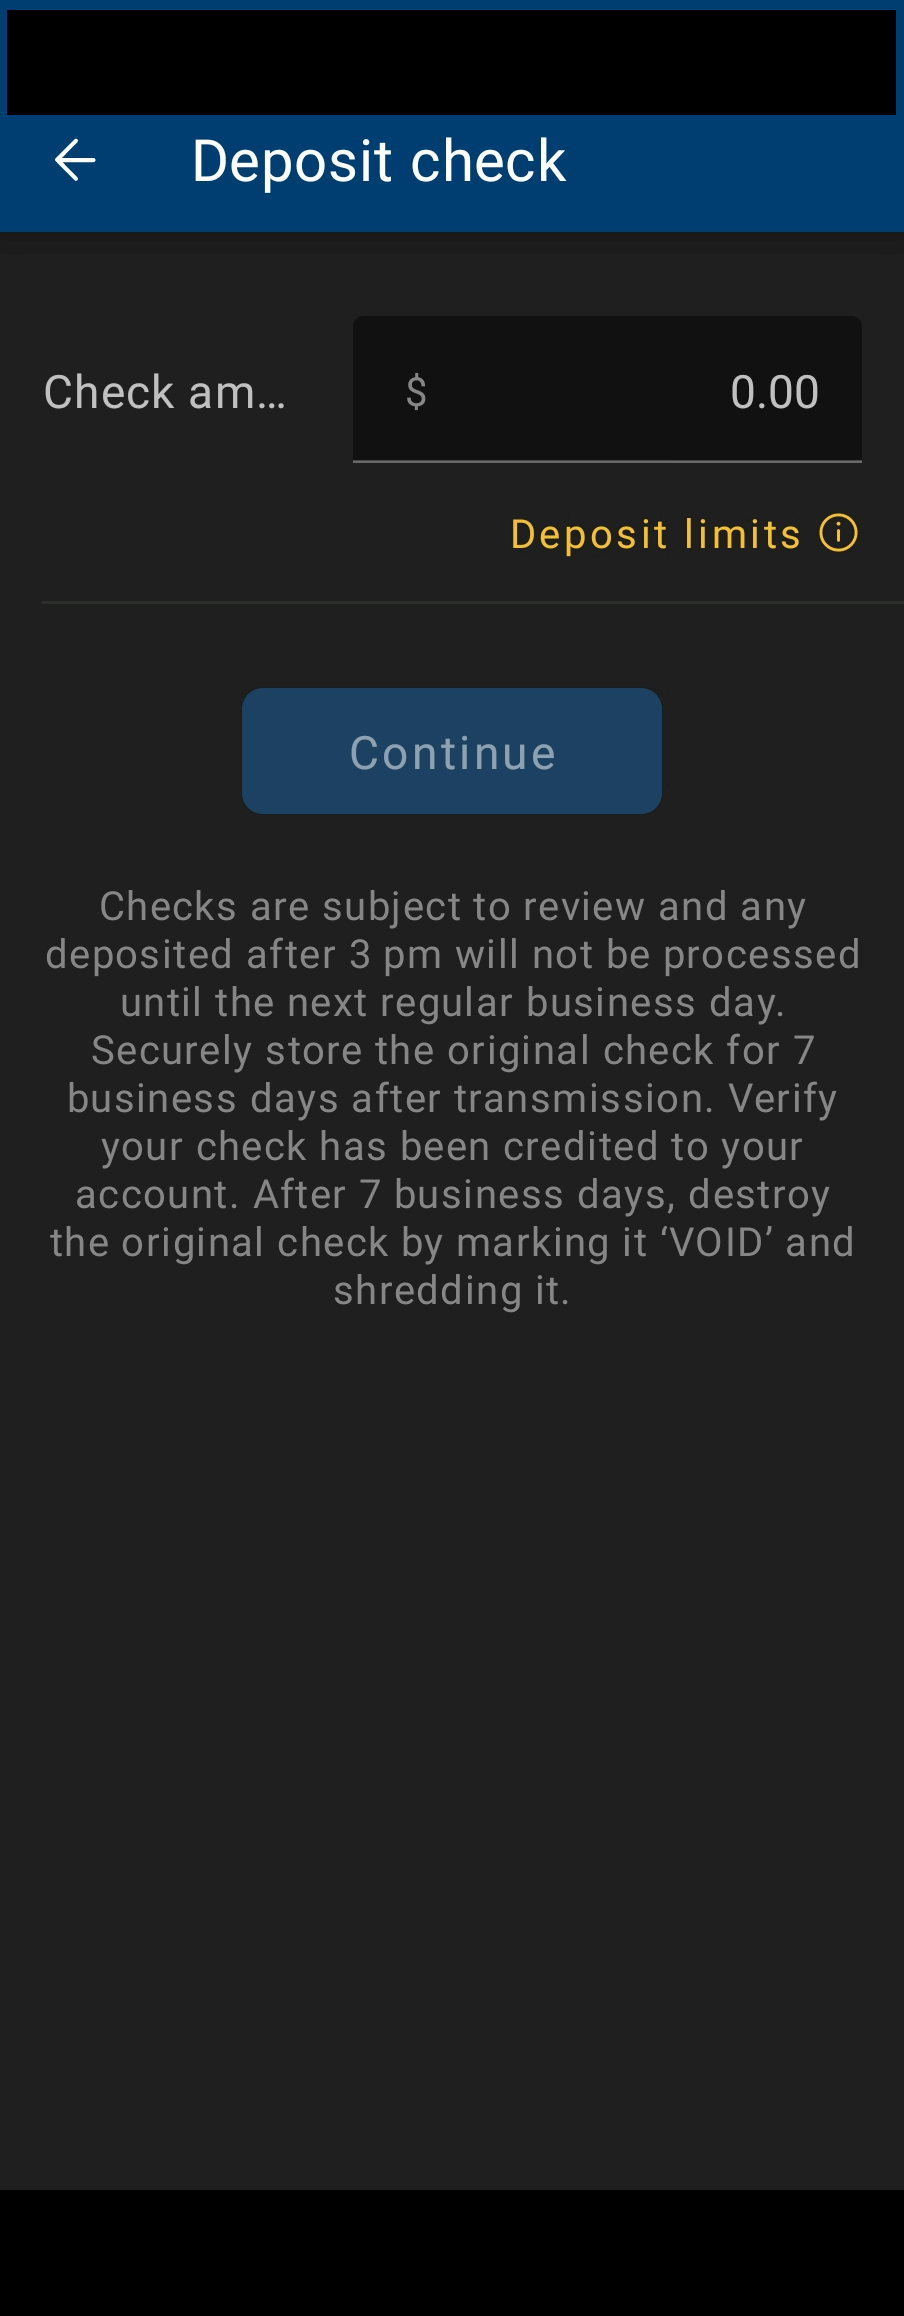
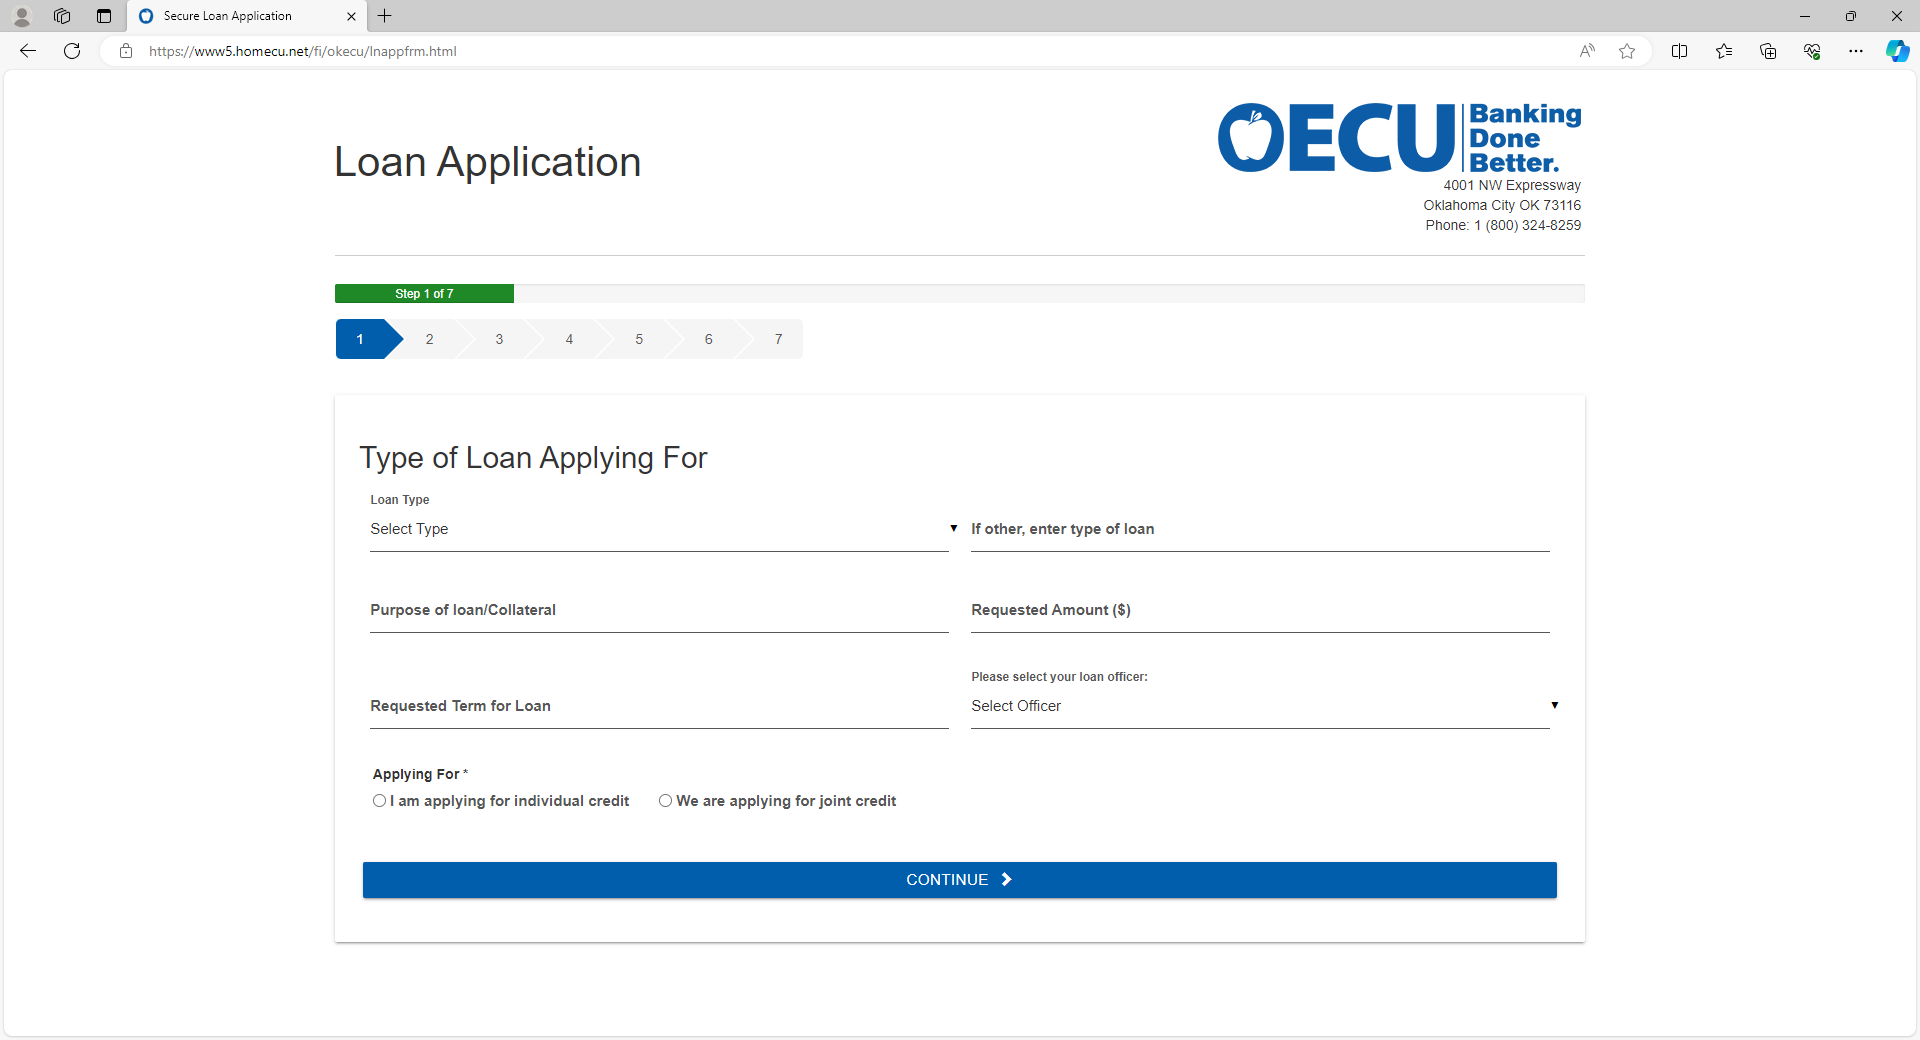
We will make the new system available on the morning of Tuesday, March 19th, 2024. The new mobile app will be available to download at that time. Some services will take a little longer to come up (like billpay and mobile/remote deposit capture). We will email our members once everything has been switched over. Our old online banking product, NetTeller, has reached “End of Life.” This means the company that provides it will no longer offer the product or provide support. However, we’ve been planning for this change for years and we’re excited to be able to offer the updated interface and services this new online banking solution provides. No. If you were signed up for online banking before March 19th,2024, your old online banking User ID and password will carryover to the new system. No. Our billpay provider is staying the same so any companies you had setup to pay before will still show up in your list. Absolutely. The new software incorporates several features that enhance security along with retaining existing safeguards such as high level encryption and 2 factor authentication via one time passcodes, security (FIDO) keys, and biometrics. Go to the Google Play Store or Apple App store after launch day and search for “OECU Digital Banking” and then just click install or get. When you update your address, phone number or email address online, the change is reflected immediately on your account. Certain situations may prevent the address from being updated instantly, in which case a member of the staff will contact you with additional instructions. NOTE: It is the primary name on the account that will be changed. To change account information for a secondary owner, contact the credit union. Online banking does not limit what is displayed to joint owners if they are setup with a separate login. All users are able to see information about all loans and shares on the account. You’ll still be able to setup alerts for certain account events. However, any alerts you had setup on the old platform will not carryover to the new online banking. Some alerts like those for password changes will be sent automatically as long as your email address is able to receive these alerts. Our new online banking has a self-enrollment option for new users. You’ll be asked certain pieces of information like account number, social security number, email address, and phone number. If online banking is not able to match the information you enter with what we have for you on our systems, it will not allow you to enroll. After five unsuccessful attempts to self-enroll, your account will be locked out for 24 hours. Keep in mind if another account owner has already enrolled as the primary owner, you’ll need to contact the credit union to setup a second preference record for the new user. There are many third-party “aggregation” apps our members can use to pull information about their accounts using their online banking credentials. It is hard to say which of these will work right away. You may need to disconnect your account from the aggregation app and reconnect it to get it to work. The default browser on many Apple devices is Safari which has a special way it handles cookies that can interfere with how our online banking works. If you are using Safari to access your online banking you can disable this by going to the Safari menu, clicking “Preferences”, navigate to the “Privacy” tab and make sure the “Prevent cross-site tracking” and “Block all cookies” options are unchecked. Another option would be to use a different browser like Chrome to access online banking. Look for the icon that reads “Documents” which is on the dashboard and on each share and loan. If you’ve already enrolled for e-statements, you’ll see the list of statements right away. If you haven’t enrolled before, you’ll be able to from there.
When is the change happening?
Why is OECU changing online banking providers?
Will my online banking credentials change?
What about billpay? Will I have to setup my payee information again?
Is it safe?
How do I get the app?
If I change address information in online banking, does it just change it for online or does it change it on my account, too?
If I’m a joint owner, what can I see of the account?
Will I still receive alerts?
So what if I’m a new user. How do I enroll?
I use another program that connects to my online banking. Will this still work?
How do I get my online banking to display on my Apple device?
Where can I find my e-statements?


